I'm lazy. I try to automate routine, repetitive tasks. One task I performed repeatedly for photo blogging was exporting images to upload to WordPress. My workflow used to export sized images to disk, upload each image to WordPress, optimise the image with a WordPress plugin, and then edit the image caption for use later in a post. It was tedious.
I simplified my workflow a few years ago using Jeffrey Friedl's Metadata Wrangler Export Filter plug-in and Automattic's WordPress plug-in for Adobe Lightroom. This post is a combination of two posts, Export directly from Adobe Lightroom to WordPress and Set WordPress Image Caption with Jeffrey Friedl's Metadata Wrangler Export Filter with the addition of information about the use of JPEG mini Pro. You can also consider this an update of the Export directly from Adobe Lightroom to WordPress post that includes all the information from Set WordPress Image Caption with Jeffrey Friedl's Metadata Wrangler Export Filter that provides information about how I use JPEG mini Pro to optimise images.
Requirements
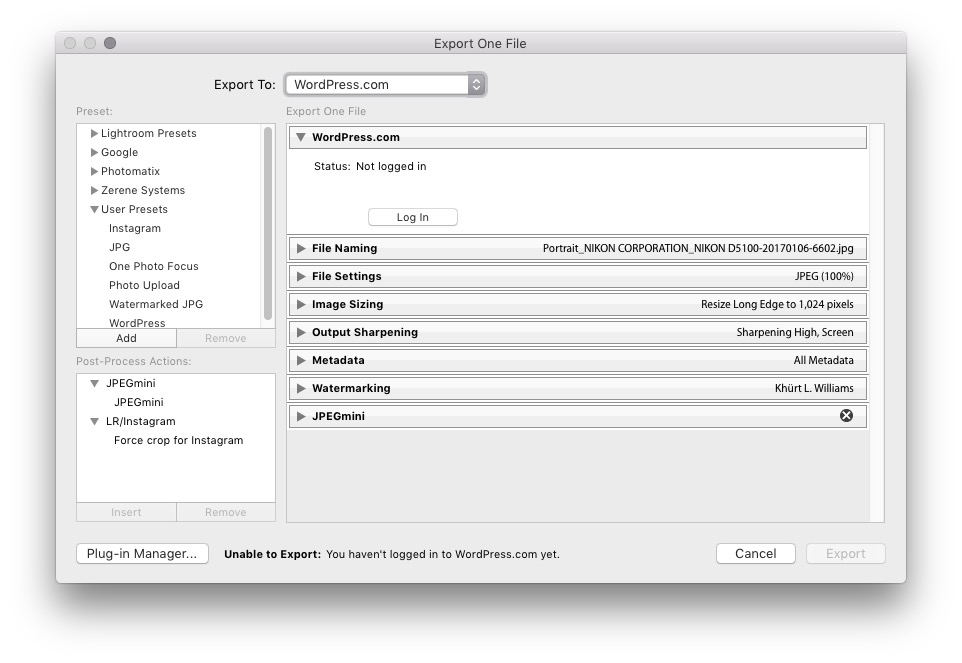
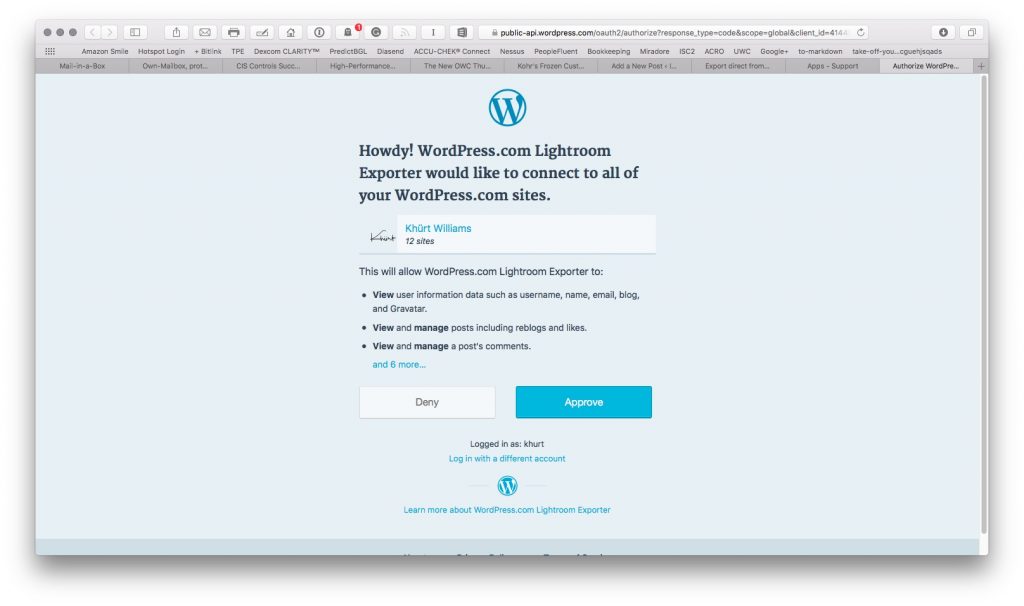
To make this work, you'll need Adobe Lightroom Classic CC, Automattic' WordPress plugin, Jeffrey Friedl's "Metadata Wrangler" Export Filter, and JPEGmini Pro Suite. The requirements assume you're running macOS Mojave. I don't use Windows. For me, Linux is a server OS. I also think all the required software is installed already, including Jeffrey Friedl's filters and presets, JPEGmini Pro Suite, and Adobe Lightroom. Jeffrey Friedl has excellent instructions on installing and using his "Metadata Wrangler" Export Filter on his website. You'll need WordPress.com or self-hosted WordPress with Jetpack installed.
Configuration
The setup for the JPEGmini Pro plugin is complete once it's installed. There are no settings. Automattic's WordPress plugin configuration can be found in my earlier post. JetPack is a requirement for this to work. I don't think it's necessary to repeat all the steps here. Setup and configuration for the "Metadata Wrangler" Export Filter are the same as in my earlier post on the topic.
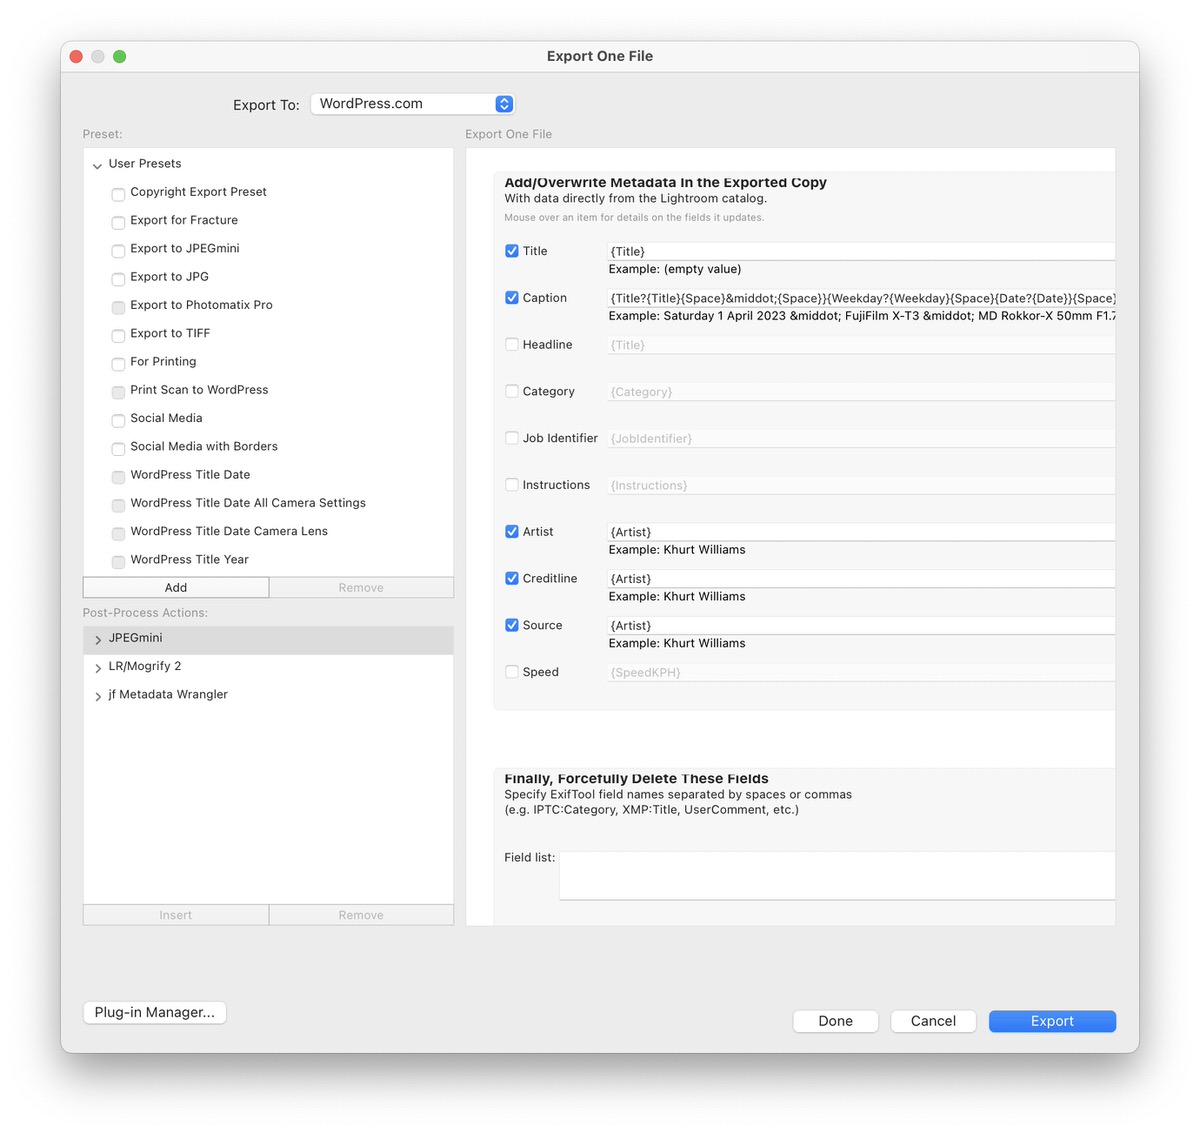
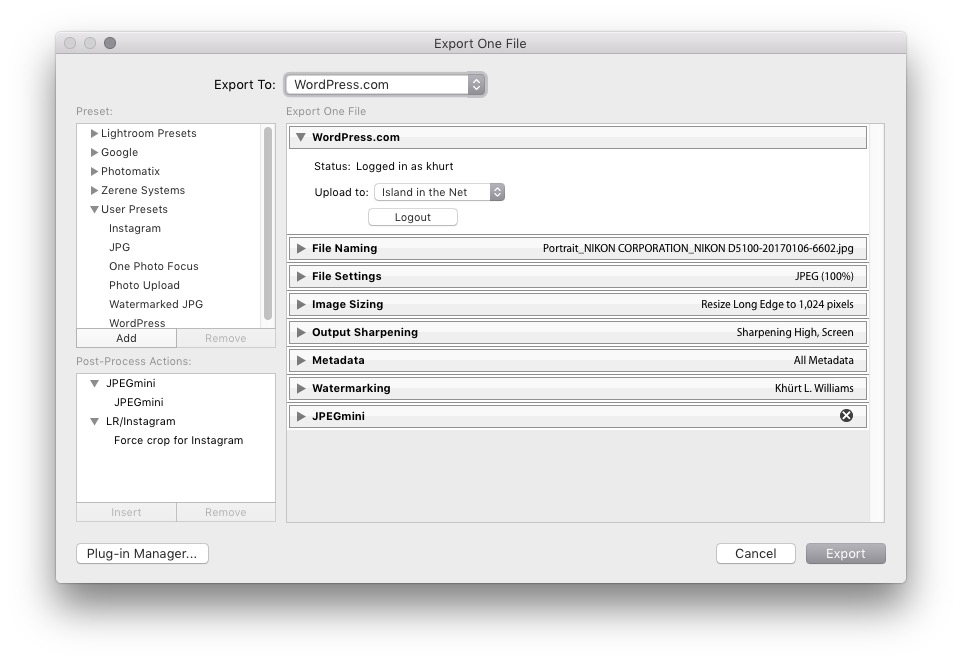
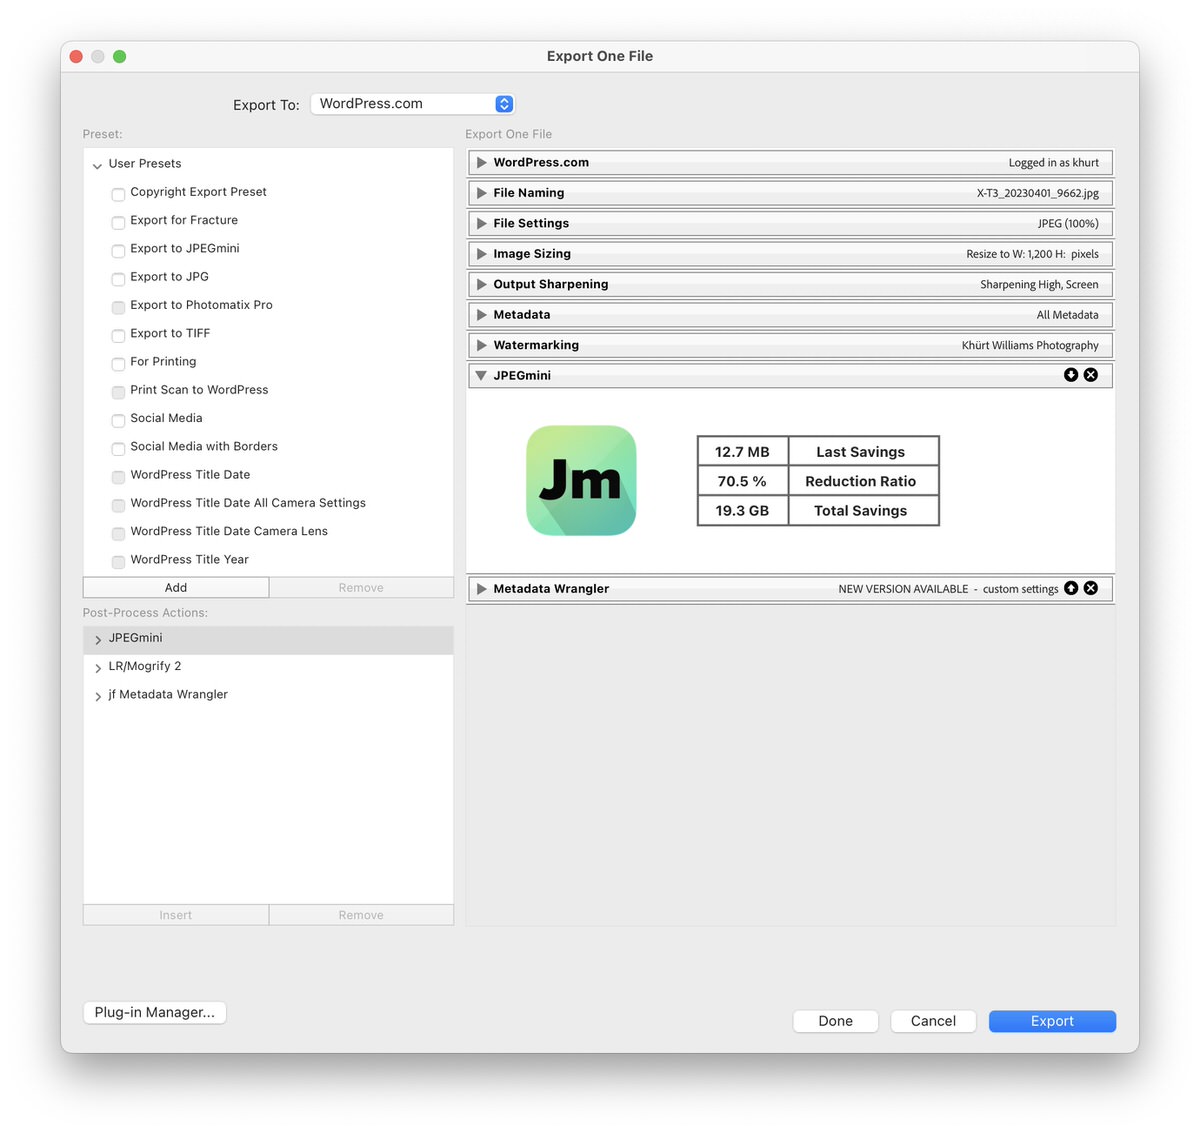
From the "export preset" window, add the JPEGmini and Meta Wrangler post-process actions to the export preset.
The export template that I am currently using is as follows:
{Title?{Title} —} {CameraName?{CameraName }} {CameraMake?+ {CameraMake}} {Lens?{Lens}} — ({FocalLengthMM? {FocalLengthMM}}, {Aperture?{Aperture}}, {ISO?ISO{ISO}})
I set the image's title in Adobe Lightroom before I exported the image. The template sets the image caption upon export by appending the title and image-specific information.
Example.
Upper Buttermilk Falls along the Gorge Trail, Ithaca, New York — FujiFilm X-T2 + Fujifilm XF16-55mmF2.8 R LM WR — (16 mm, f/16, ISO200)
Other notes
While I use the specific setup for WordPress, if I used Jekyll or Hugo or some other static site generator, my image file export to disk workflow could work for that purpose. It's similar to the preset mentioned above, except the images are exported to the disk where Jekyll resides. I would still need to edit the content file and insert links to the pictures manually. Exporting images from my Adobe Lightroom catalogue to disk, WordPress, Instagram, email, etc., is done with variations of this export preset. The only thing that changes is the export destination.
Summary
Using this Lightroom export preset, I name, size, caption, optimise, and export my image files directly to WordPress. It's one step - right-click, then select the export preset.
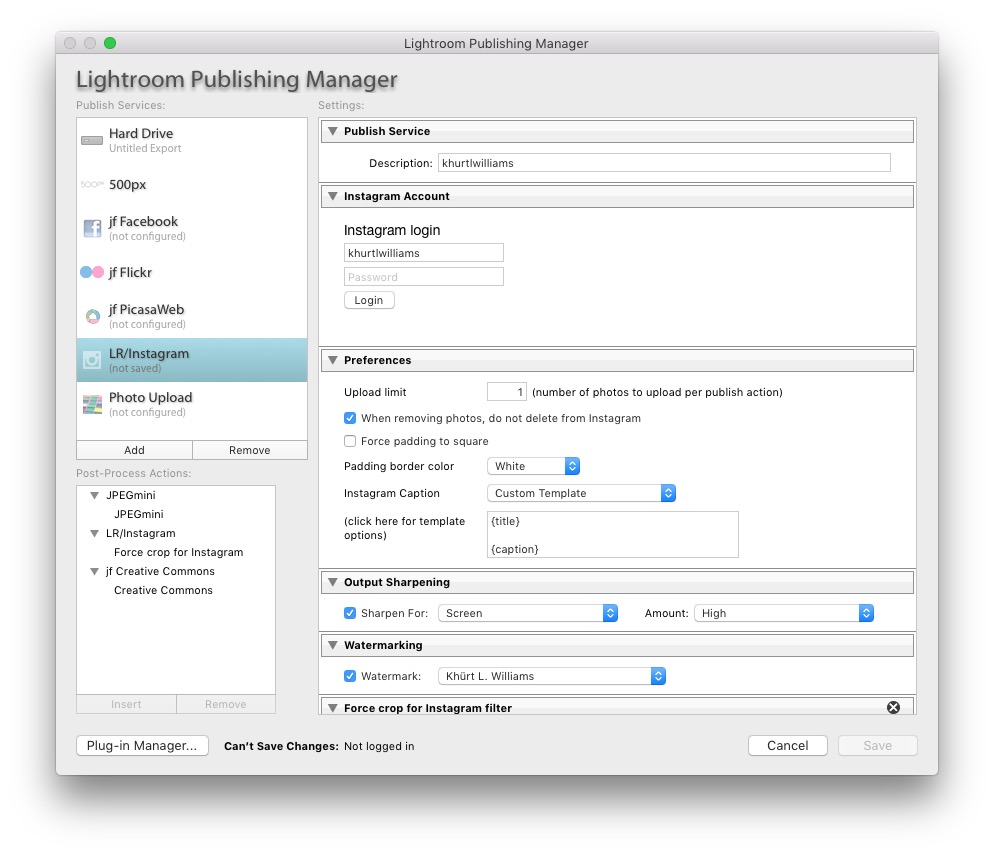
As of the beginning of 2020, LR/Instagram is no longer a viable way to post directly to Instagram. The developer's note on their website says, "Service Note: Instagram has updated their protocol, and currently plugin does not work. We are investigating the issue, and the plugin will be updated when a fix is available."
 First, you need to install the plugin. If you are already familiar with plug-in installation follow the normal process for installing LR/Instagram. If you have never installed a Lightroom plug-in, plug-in author Jeffrey Friedl has written an excellent