I'm lazy. I try to automate routine, repetitive tasks. One task I performed repeatedly for photo blogging was exporting images to upload to WordPress. My workflow used to export sized images to disk, upload each image to WordPress, optimise the image with a WordPress plugin, and then edit the image caption for use later in a post. It was tedious.
To make this work, you'll need Adobe Lightroom Classic CC, Automattic' WordPress plugin, Jeffrey Friedl's "Metadata Wrangler" Export Filter, and JPEGmini Pro Suite. The requirements assume you're running macOS Mojave. I don't use Windows. For me, Linux is a server OS. I also think all the required software is installed already, including Jeffrey Friedl's filters and presets, JPEGmini Pro Suite, and Adobe Lightroom. Jeffrey Friedl has excellent instructions on installing and using his "Metadata Wrangler" Export Filter on his website. You'll need WordPress.com or self-hosted WordPress with Jetpack installed.
Configuration
The setup for the JPEGmini Pro plugin is complete once it's installed. There are no settings. Automattic's WordPress plugin configuration can be found in my earlier post. JetPack is a requirement for this to work. I don't think it's necessary to repeat all the steps here. Setup and configuration for the "Metadata Wrangler" Export Filter are the same as in my earlier post on the topic.
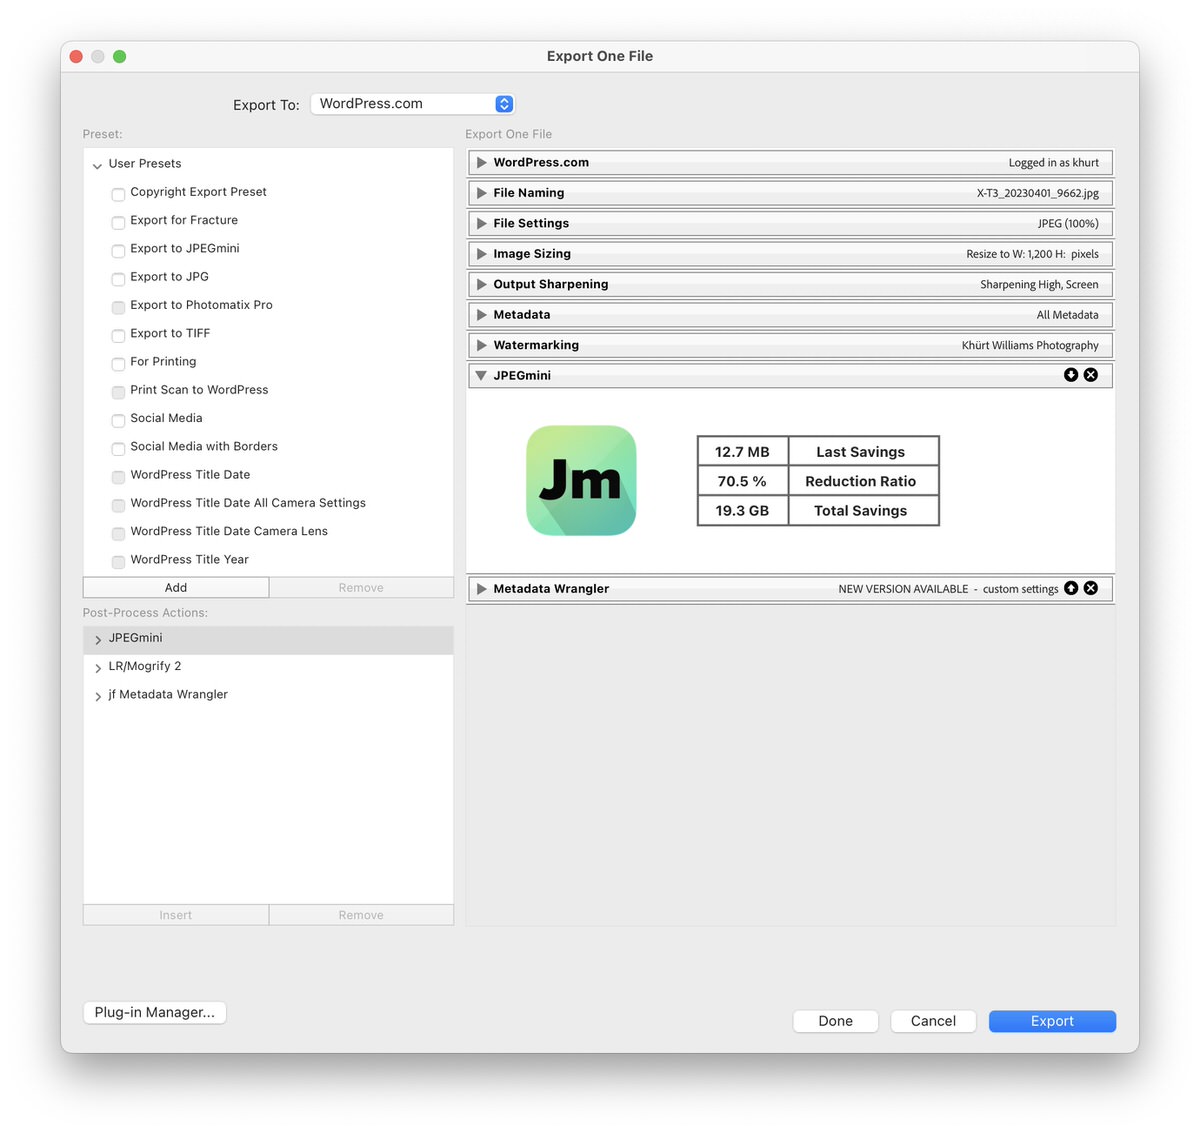
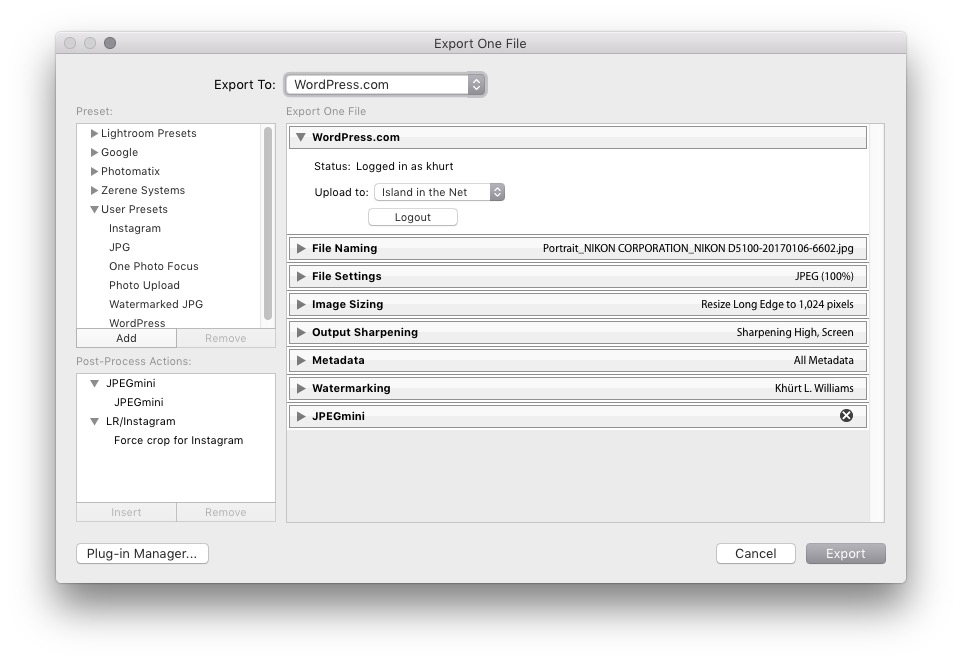
Screenshot of Adobe Lightroom CC export with Metadata Wrangler
From the "export preset" window, add the JPEGmini and Meta Wrangler post-process actions to the export preset.
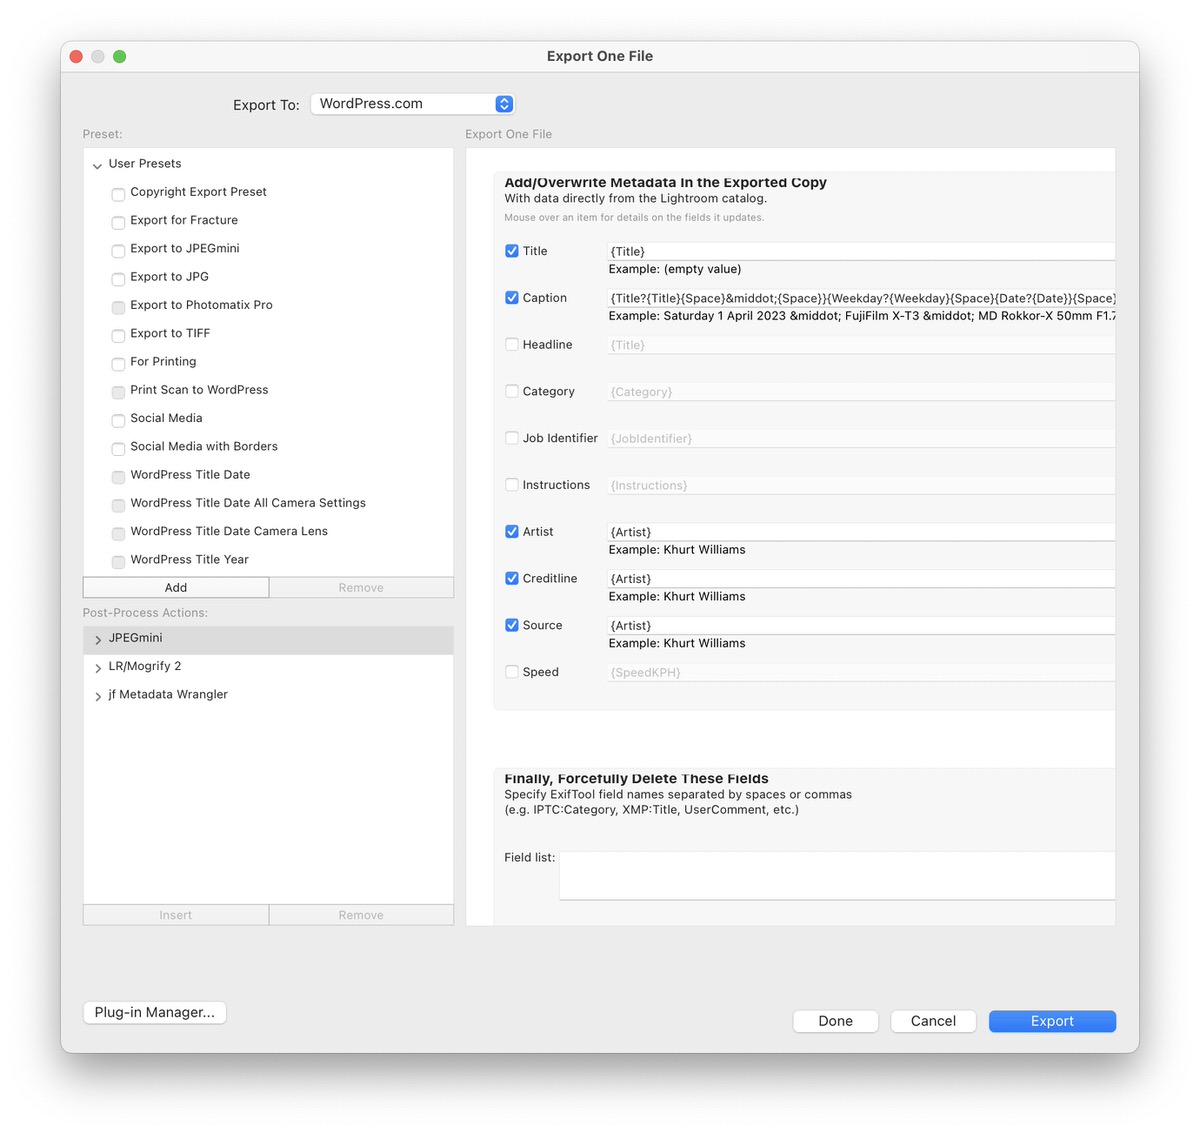
The export template that I am currently using is as follows:
I set the image's title in Adobe Lightroom before I exported the image. The template sets the image caption upon export by appending the title and image-specific information.
Example.
Upper Buttermilk Falls along the Gorge Trail, Ithaca, New York — FujiFilm X-T2 + Fujifilm XF16-55mmF2.8 R LM WR — (16 mm, f/16, ISO200)
Other notes
While I use the specific setup for WordPress, if I used Jekyll or Hugo or some other static site generator, my image file export to disk workflow could work for that purpose. It's similar to the preset mentioned above, except the images are exported to the disk where Jekyll resides. I would still need to edit the content file and insert links to the pictures manually. Exporting images from my Adobe Lightroom catalogue to disk, WordPress, Instagram, email, etc., is done with variations of this export preset. The only thing that changes is the export destination.
Summary
Using this Lightroom export preset, I name, size, caption, optimise, and export my image files directly to WordPress. It's one step - right-click, then select the export preset.
As of the beginning of 2020, LR/Instagram is no longer a viable way to post directly to Instagram. The developer's note on their website says, "Service Note: Instagram has updated their protocol, and currently plugin does not work. We are investigating the issue, and the plugin will be updated when a fix is available."
While my Nikon D5100 camera only a 16MP sensor, the size of the images it produces can be quite large. While file size varies most files are between 3.5 MB to 5 MB. Uploading a full resolution image to my website would use considerable bandwidth and space on my server. Loading a full-size image also impact the performance of the website. Large images take a long time to load. This will be frustrating to my websites viewers. For this reason, I always downsize my images to between 960 pixels to 1024 pixels on the long side. While this reduces the file size considerably, it may not be enough. I could reduce the file size further by uploading smaller images -- e.g. 640 pixels on the long side. However, I feel that small images sizes just don't work well for many of my images. I think it's hard to see detail when the images are too small. Ideally, I would be able to display my images at a decent size while also reduce the size of the images. That's where image compression comes in.
JPEGmini is a photo optimization technology that reduces the file size of JPEG photos while preserving the resolution and quality of the original photos. The software is available in two consumer versions, JPEGmini ($20) and JPEGmini Pro ($99). Both are available as Trial downloads. JPEGmini is available for Windows and macOS with support for Adobe Lightroom 5 and later Photoshop: CC 2015.1 and later.
I have used JPEGmini Pro for a few years as part of my workflow for posting images to my WordPress website. The software reduces the file size of my photos significantly, saving me space on a server and speeding up my website. JPEGmini Pro includes a plug-in for Adobe® Lightroom® and a Photoshop® extension! I have used it successfully with the Creative Cloud version of Lightroom and Photoshop. When I export my photos directly from Lightroom or Photoshop, they are automatically optimized by JPEGmini to the lowest file size possible without ever sacrificing quality. The plug-in can be integrated with any of Adobe® Lightroom’s export presets.
While JPEGmini Pro has worked well for me I have never done a comparison test with other software. A recently article in MacWorld promote me to take a look at alternatives. The article was a cursory review and comparison of Realmac’s Squash ($20) to JPEGmini Pro. I am not sure why the author chose to compare Squash to the JPEGmini Pro when JPEGmini is available for $20. To me the comparison was unfair and I took issue with this on MacWorld’s Facebook page. One other person agreed with me and indicated that he got good results with the FREE ImageOptim app for macOS. Other commenters suggest that using the image quality slider in Adobe Lightroom would be just as effective. I wanted to do my own test.
For this test, I compressed images with each of the following: JPEGmini, Squash, and ImageOptim. I will compare each software with JPEG quality set to 100% and then 70%.
I used two images. The first image was my bird landing photo from a few weeks ago. From Lightroom I exported a full resolution 3692px x 3264px JPEG at 100% quality. I then compressed copies of that image with Squash, JPEGmini, and ImageOptim with the quality sliders set at 100%.
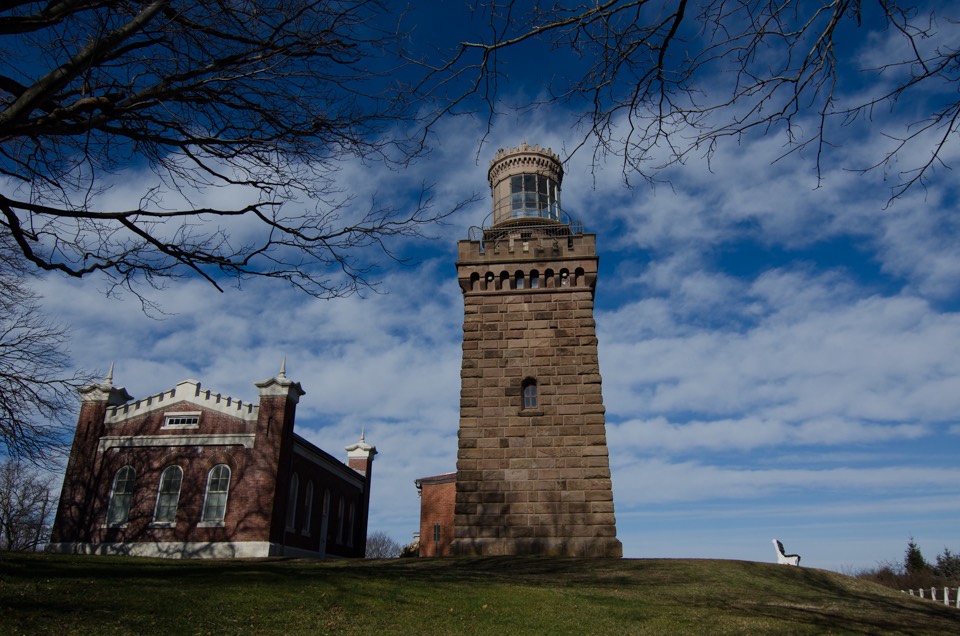
The second test image is one I captured last month at the Twin Lights Lighthouse in the Highlands, New Jersey. I exported that image from Lightroom as a 960px x 636px JPEG image at 100% and 70%. I compressed the 100% version with Squash, JPEGmini, and ImageOptim with the quality sliders set at 70%.
I also exported all 180 of my January 2017 images from Lightroom to a folder. That took a VERY long time. I then exported the same set of images from Lightroom as 960px x 636px JPEG images with the quality slider set to 70%. The 100% JPEG export folder was compressed with Squash, JPEGmini, and ImageOptim with the slider set to 70%.
Here are the results.
[table id=2 /]
JPEGmini is the clear winner here. ImageOptim minimally reduced the file size. Squash made the image file larger.
Now for the folder containing the 180 JPEG images exported at 100% quality.
[table id=3 /]
The results are similar to above. Truthfully, the test above is not fair. While all the other software has a quality slider which I set to 100%, JPEGmini does not. I suspect that JPEGmini has a quality algorithm that is always on. I don’t know what that value is. It could be anywhere from 70-90%. It could be less. It could be dynamically adjusted based on data gathered by the app from the image file. In any case, I needed a test that is fairer to the other apps.
The second test image is one I captured last month at the Twin Lights Lighthouse in the Highlands, New Jersey. I exported that image from Lightroom as a 960px x 636px JPEG image at 100% and 70%. I compressed the 100% version with Squash, JPEGmini, and ImageOptim with the quality sliders set at 70%.
[table id=4 /]
When the quality slide is set to 70%, the image file size is reduced considerably. Squash and ImageOptim performed best with ImageOptim reducing the image by about 80%. JPEGmini did not fare much better than just setting the image slider in Adobe Lightroom to 70% at export.
Now for the folder containing the 180 JPEG images exported from Adobe Lightroom at 100% quality and compressed by Squash and ImageOptim with the slider set at 70%. For comparison, I also exported the same images from Lightroom with the quality slider set to 70%.
[table id=6 /]
When the quality slide is set to 70%, the entire folder of images is reduced in size considerably. ImageOptim performed best, reducing the image by about 88%. JPEGmini and Squash did worse than just setting the image slider in Adobe Lightroom to 70% at export.
In my test, ImageOptim performs best at reducing the file size of JPEG images with the quality slider set to 70%. When the quality slider is set to 100% Squash increases the size of the image file. That's exactly the opposite of what I want to accomplish. ImageOptim performs only slightly better when the slider is at 100% quality.
From my perspective, there is no clear winner here. Squish, with the slider set to 70%, does a slightly better job than JPEGMini. However, ImageOptim beats both of those by a significant margin. Given that ImageOptim is free, I think that would be the best option if you don't need integration with Lightroom.
If you need to export and compress directly from Lightroom to a folder or, in my case, a WordPress website, then JPEGmini Pro will offer convenience. I use the plug-in with all my blogs posts. I think it is more efficient to export from Lightroom directly to the WordPress media library, than to export to a folder, compress the contents with an image optimization tool, then open a browser, log-in to the website, then upload to the media library.
I didn't test for the quality of the images. I think that is subjective and could vary with each image. You can judge for yourself from the images below. It seems to me that ImageOptim achieved a small image file size by compromising quality. The image has a lot of compression artefacts. I could not visually discern a difference between the images compressed by Squash, JPEGmini, and Adobe Lightroom’s 70% slider.
Original image exported to 960 × 636 pixel JPEG at 100% quality[exif id="24781"]
Original image exported to 960 × 636 JPEG image at 70% quality[exif id="24780"]
Original image exported to 960 × 636 JPEG image at 100% quality and then compressed with Squash at 70% quality[exif id="24782"]
Original image exported to 960 × 636 JPEG image at 100% quality and then compressed with JPEGmini.[exif id="24779"]
Original image exported to 960 × 636 JPEG image at 100% quality and then compressed with ImageOptim at 70% quality[exif id="24778"]
Automattic recently released a plugin for Adobe Lightroom that instantly simplified my photography publishing workflow. The plugin allows the user to export images direct from Lightroom to WordPress.com or a self-hosted WordPress website.
Installing, configuring and using the plugin was straightforward and easy. I’ll explain how it’s done.
Installation
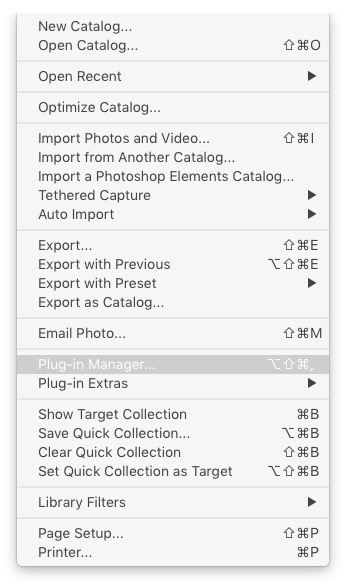
Download the plug from WordPress.com and unzip the plugin file. The plugin has the following file name: wordpress.com.lrplugin. Launch Adobe Lightroom and navigate to the Plug-in Manager. On the Mac, you can find the entry under the File menu. Alternatively, use a Mac keyboard shortcut ...
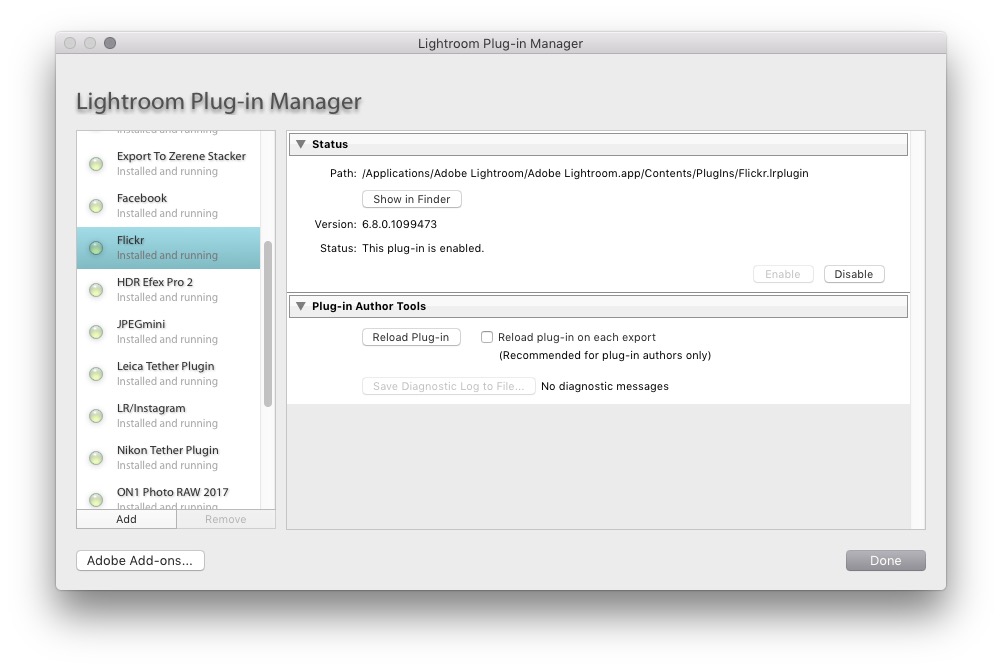
From the Plug-in Manager winder click add in the bottom left corner of the plugin manager, navigate to the location of the wordpress.com.lrplugin file and select the plugin.
I suggest copying the wordpress.com.lrplugin file to the folder where Lightroom keeps the rest of its plugins. You can find this easily.
Select one of the pre-installed plug-ins in the left pane of the Plug-in Manager. Then click the Show in Finder button in the Status section. On MacOS, this will open a Finder window to this location.
Copy — drag, and drop — the wordpress.com.lrplugin to the Adobe Lightroom plugin folder, then restart Adobe Lightroom. The plug-in is now installed.
Setup
Setup for a WordPress.com or self-hosted WordPress.org website is done the same way. However, to upload to your self-hosted WordPress (.org) website, you need to install the Jetpack plugin, which you can do by following the instructions on WordPress.com.
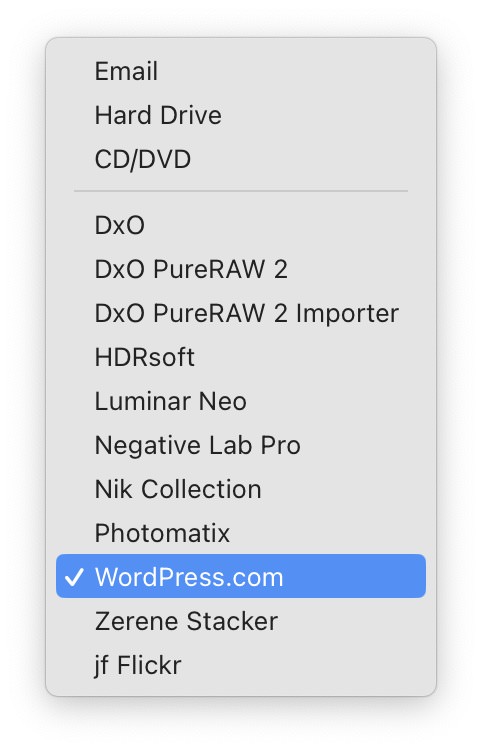
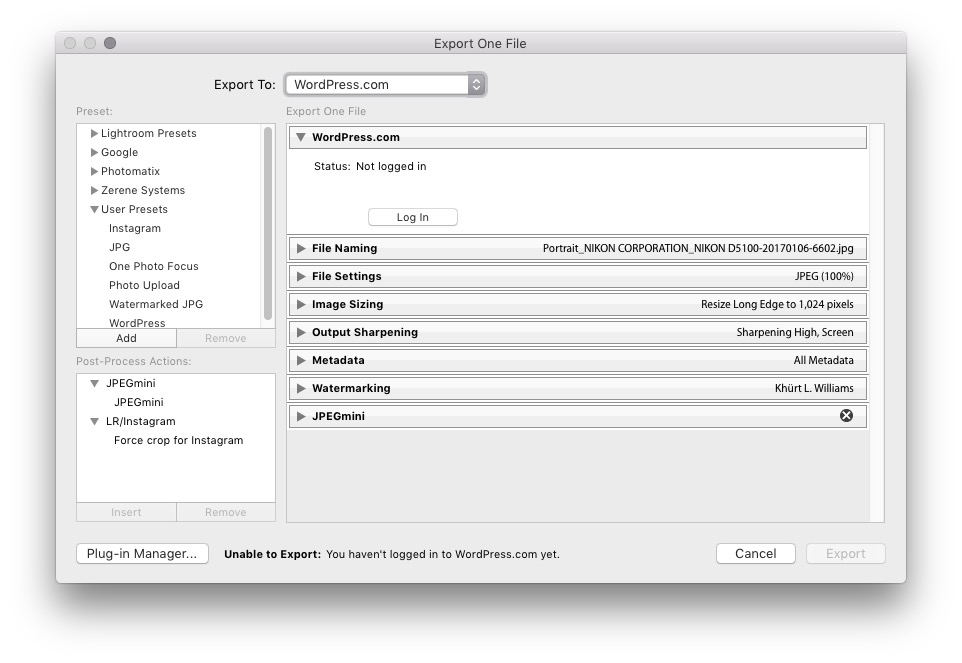
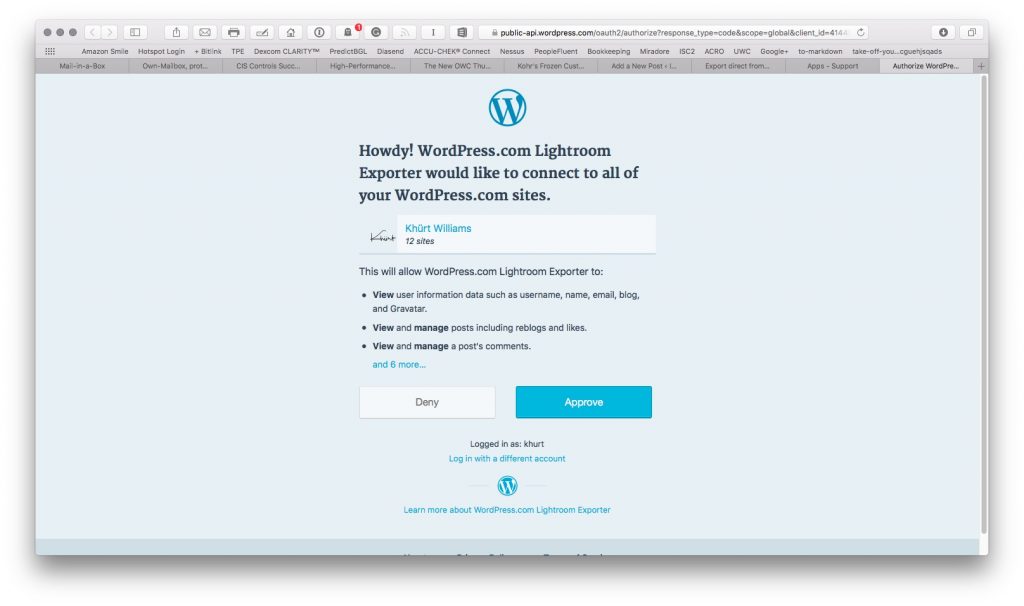
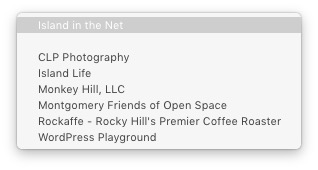
Click the Log In button. This will launch your browser. You will have to log in and authorized the plugin to use your WordPress.com. You will be taken back to Adobe Lightroom once the connection is approved. Once that is done, make sure your site is selected from the drop-down list.
That’s it. In the past, I had used another plugin called Photo Upload to export from Lightroom to WordPress. However, that plugin was more challenging to set up and use and is not free. The free WordPress plugin is as easy as to use as selecting one or more images in Lightroom, clicking the Lightroom export button and picking my blog.
We use cookies on our website to give you the most relevant experience by remembering your preferences and repeat visits. By clicking “Accept”, you consent to using ALL the cookies. However, this website has no interest in selling your information. It does not explicitly use social media cookies from Facebook, Google, Twitter, Threads, Instagram etc. Read More
This website uses cookies to improve your experience while you navigate through the website. Out of these, the cookies categorized as necessary are stored on your browser as they are essential for the working of basic functionalities of the website. We also use third-party cookies that help us analyze and understand how you use this website. These cookies will be stored in your browser only with your consent. You also have the option to opt out of these cookies. But opting out of some of these cookies may affect your browsing experience.
Necessary cookies are absolutely essential for the website to function properly. These cookies ensure basic functionalities and security features of the website, anonymously.
Cookie
Duration
Description
cookielawinfo-checkbox-analytics
11 months
This cookie is set by GDPR Cookie Consent plugin. The cookie is used to store the user consent for the cookies in the category "Analytics".
cookielawinfo-checkbox-functional
11 months
The cookie is set by GDPR cookie consent to record the user consent for the cookies in the category "Functional".
cookielawinfo-checkbox-necessary
11 months
This cookie is set by GDPR Cookie Consent plugin. The cookies is used to store the user consent for the cookies in the category "Necessary".
cookielawinfo-checkbox-others
11 months
This cookie is set by GDPR Cookie Consent plugin. The cookie is used to store the user consent for the cookies in the category "Other.
cookielawinfo-checkbox-performance
11 months
This cookie is set by GDPR Cookie Consent plugin. The cookie is used to store the user consent for the cookies in the category "Performance".
viewed_cookie_policy
11 months
The cookie is set by the GDPR Cookie Consent plugin and is used to store whether or not user has consented to the use of cookies. It does not store any personal data.
Functional cookies help to perform certain functionalities like sharing the content of the website on social media platforms, collect feedbacks, and other third-party features.
Performance cookies are used to understand and analyze the key performance indexes of the website which helps in delivering a better user experience for the visitors.
Analytical cookies are used to understand how visitors interact with the website. These cookies help provide information on metrics the number of visitors, bounce rate, traffic source, etc.
Advertisement cookies are used to provide visitors with relevant ads and marketing campaigns. These cookies track visitors across websites and collect information to provide customized ads.