Removing IndieWeb Plugins (Again)

While IndieWeb tools aim to improve data portability, the varying standards and protocols can sometimes result in interoperability issues, making seamless data exchange between different systems challenging.

Despite the promise of increased interactivity and web integration, the IndieWeb plugins have limited adoption, compatibility issues with WordPress themes, and social platform sharing. After removing all the IndieWeb plugins in 2020, over the last few years I found myself reinstating several and exploring new ones to enhance my WordPress website's IndieWeb capabilities. I re-installed almost all the IndieWeb plugins: IndieAuth, Webmention, Post Kinds, and Syndication Links. Although, it’s not a great-looking theme because I want full compatibility with the IndieWeb plugins I am using a Microformats 2-compliant child theme for Twenty Sixteen.

I hope my statements don't suggest a dislike for the IndieWeb community's efforts. I’ll borrow words from Daniel Goldsmith who wrote:

To begin, and before I get into anything else, I need to state this loudly and clearly: I like the Indieweb movement. I like the aspirational statements which underpin the movement. I like the people involved, I've interacted with more than a few of them and have found them to be, almost without exception, among the most earnest, polite and encouraging people I've ever met online.

I removed all the plugins except Webmention and Syndication Links. There are several reasons.

IndieAuth works by allowing me to use my website URL as the identity for authentication and authorization on websites that support it. Here's a simplified overview of how it operates:

  1. User Identification: When I want to log in to a website, I enter my website URL, `https://islandinthenet.com/`.
  2. Discovery of Authorization Endpoint: The website connects to my WordPress websites and looks for an authorization endpoint. This endpoint is configured in the HTML or HTTP headers of my WordPress website.
  3. Authentication Request: The website redirects me to their discovered authorisation endpoint with a request to authenticate.
  4. User Authorization: At the authorization endpoint, I prove ownership of my URL, usually by logging in to the service that hosts the endpoint.
  5. Redirection and Token Verification: After successful authentication, the authorization endpoint redirects me back to the original website with an authentication token.
  6. Confirmation: The original website verifies the token with the authorization endpoint to confirm my identity and then grants access.

But I rarely come across websites that use IndieAuth. The only website that I know supports IndieAuth is the IndieWeb Wiki.

Post Kinds is a concept within the IndieWeb community that categorises various types of content a person might want to publish on their website. These types, or "kinds," include articles, notes (similar to toots), photos, videos, replies, likes, reposts, and more. The Post Kinds WordPress Plugin adds support to the Classic Editor to implement this concept by enabling me to classify my website content into these different kinds.

But except for "replies" the Post Kinds plug-in isn’t useful to me and I rarely. Even when I’ve used the reply post kind feature I found that very few websites supported Webmention which is required to make use of many of the post kinds.

I don’t do microblogging on my website so I’ve never had use for the Simple Location plug-in.

Screenshot of JetPack Social

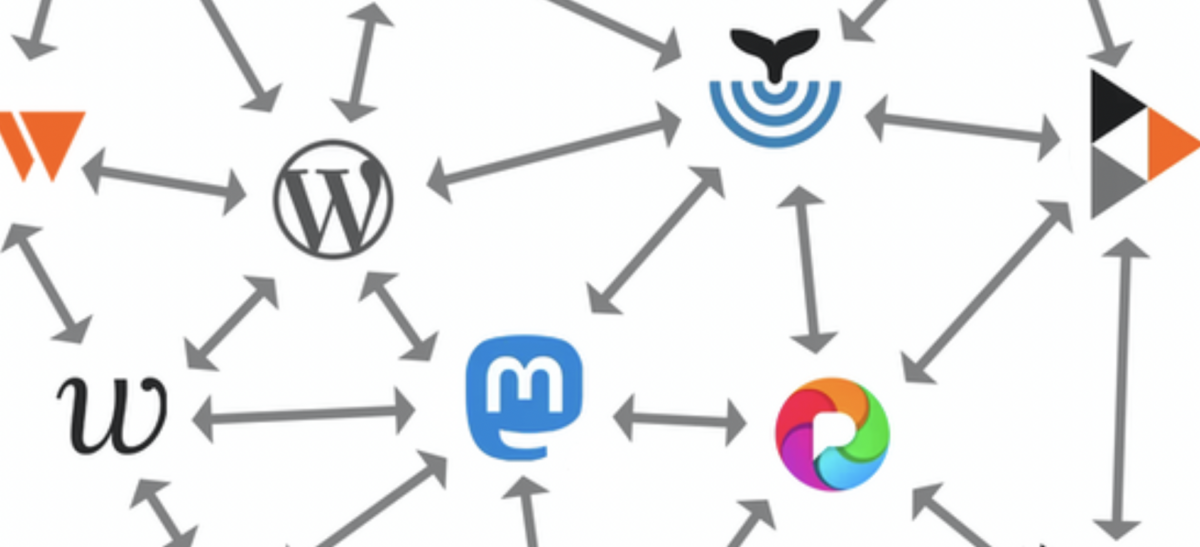
Webmention and Syndication Links offer the most potential for engagement. Webmention is a simple, standardized protocol for my website to notify another when it links to it. For example, some post something on their website. I write a response on my website and include a link to their post. My website sends a Webmention to their site, informing their website of the link. Their site verifies the Webmention by checking my post to confirm it indeed links to their post. Once verified, their site can display my response as a comment, like, share, etc., depending on the context.

Syndication Links are a way to indicate that a piece of content published on my site is also available via a link on another site. For example, if I write a blog post on my website and also share it on Twitter, I can use a syndication link on my blog post to point to Twitter.

Webmention and Syndication Links work together to create a more interconnected and rich web of content. Let’s say someone publishes a post on their website and shares it on Twitter, adding a syndication link on their original post pointing to the tweet. I see the tweet, write a response on my website, and my website sends a webmention to the original post. The originating website receives the webmention, verifies it, and then shows my response as a comment. The syndication link to the tweet is also displayed.

I think it’s very cool. Yet, its effectiveness is limited. Most social platforms I use, barring micro.blog, don't support "rel=me" linking and most blogs do not support webmention.

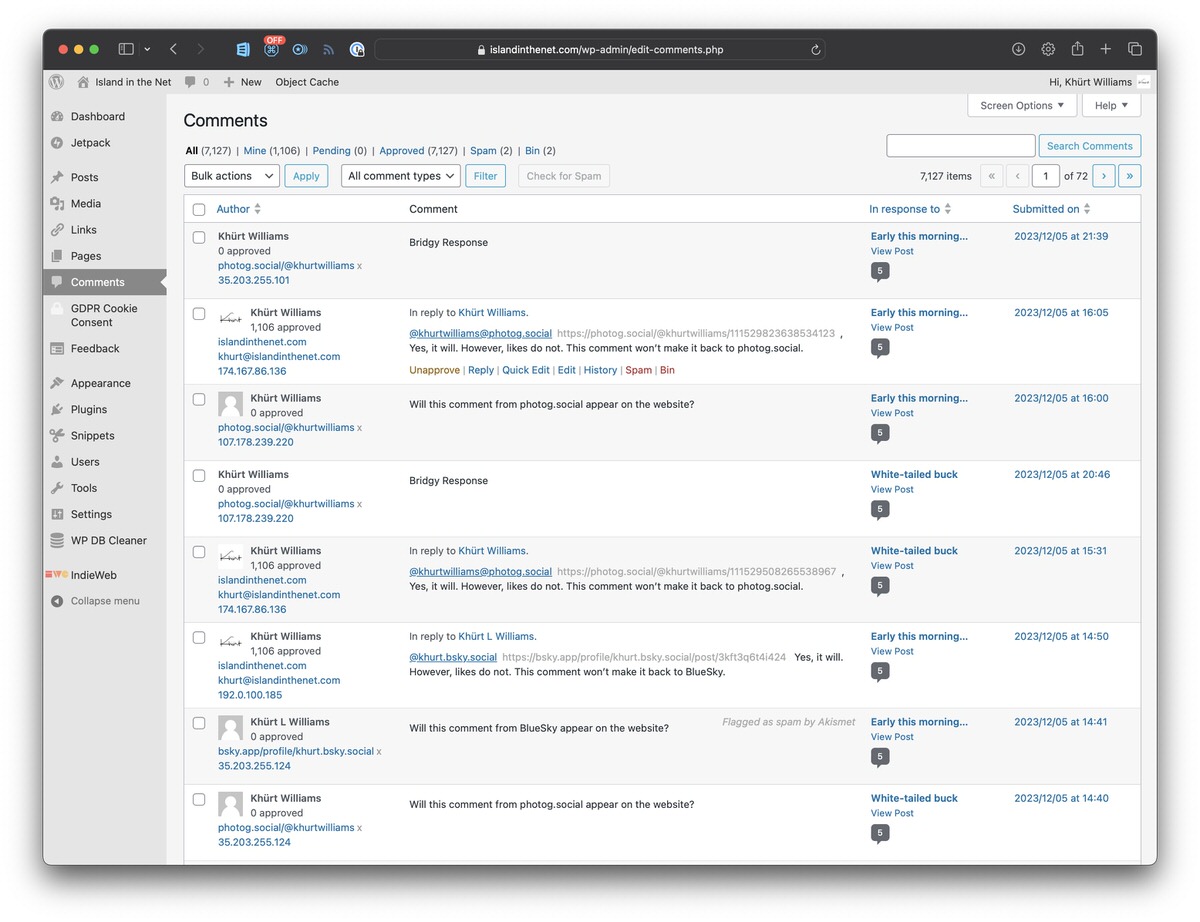
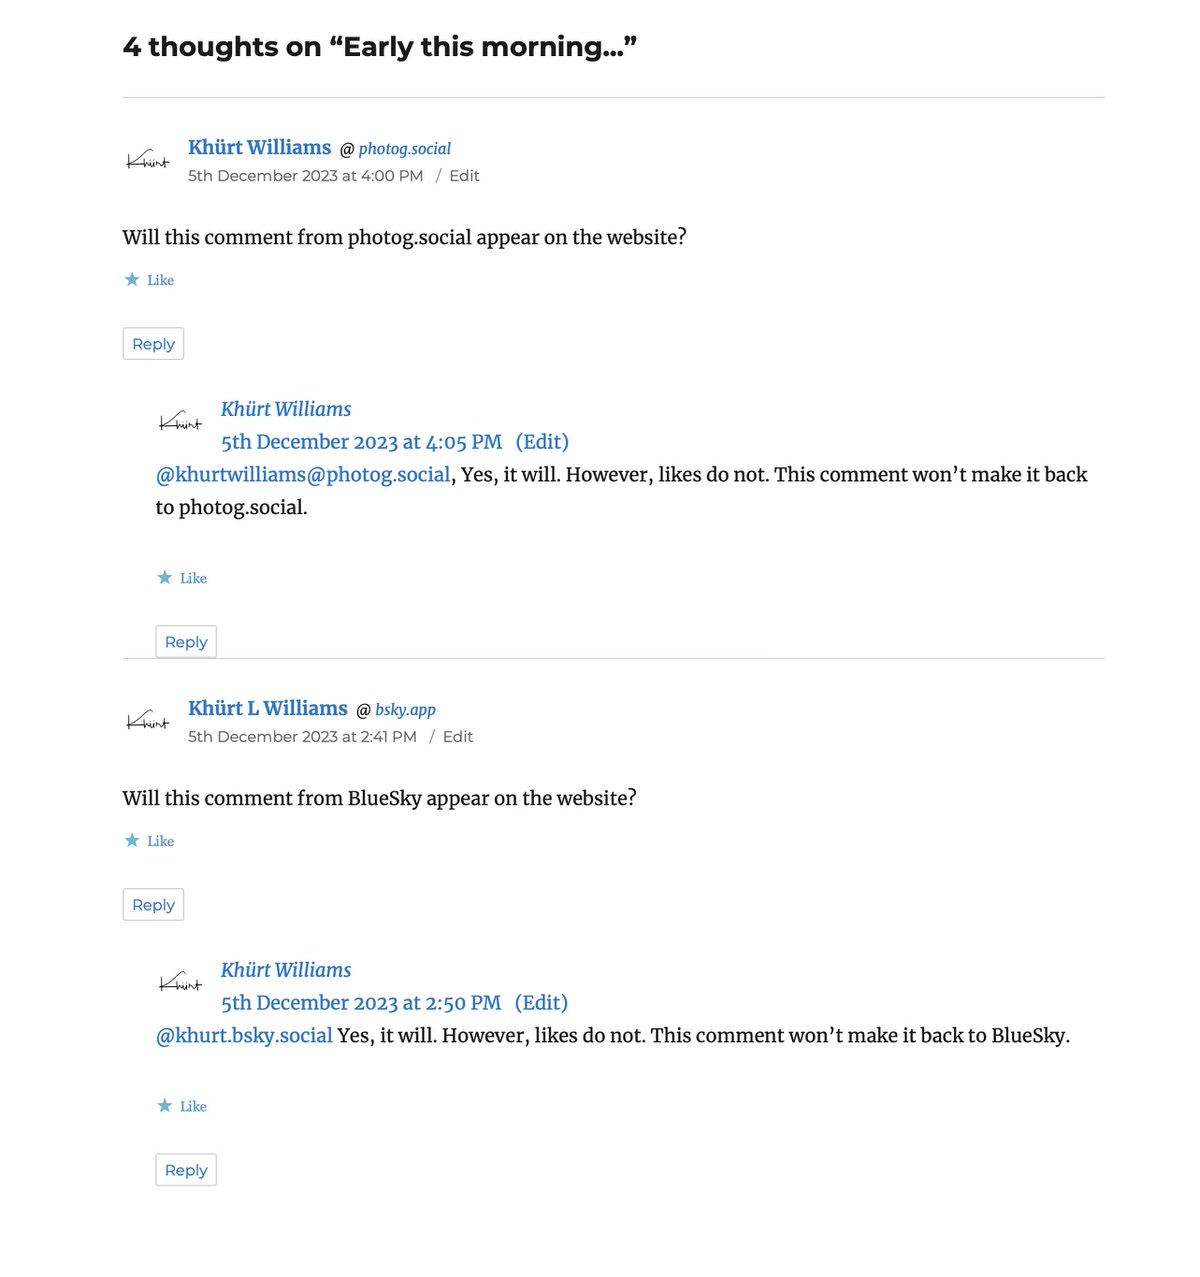
My posts are syndicated (POSSE) across various social platforms and managed through Automattic's JetPack Social and ActivityPub plugins. Comments on these platforms, however, only merge back into my blog with additional tools like Brid.gy, which only partially solves the problem.

The engagement on my blog primarily comes through native comments, WordPress Reader, micro.blog, and the photog.social Mastodon instance. Interaction from platforms like BlueSky is minimal, with limitations in displaying 'likes' and backfeeding comments.

Preparing a blog post to handle comments "backfed" by "Brid.gy" from platforms like BlueSky and photog.social requires manual effort, such as adding specific syndication links post-publication. Interactions via micro.blog requires manual HTML formatting to include microformat2 classes.

Screenshot of Backfeed Comments

Reflecting on insights from the Incoming criticism section on the IndieWeb challenges page, I can see that I am not alone in how I feel about this.

As Kev Quirk notes in "Will the IndieWeb Ever Become Mainstream?":

Unless something drastic changes with the fundamental makeup of the IndieWeb, I don't think it will ever gain anything close to mass adoption. Maybe if WordPress picked it up and rolled into the system by default, then it would have a chance; but short of that, I don't see it happening.

I felt excitement when Kev speculated about the potential impact of Automattic integrating IndieWeb features into WordPress.

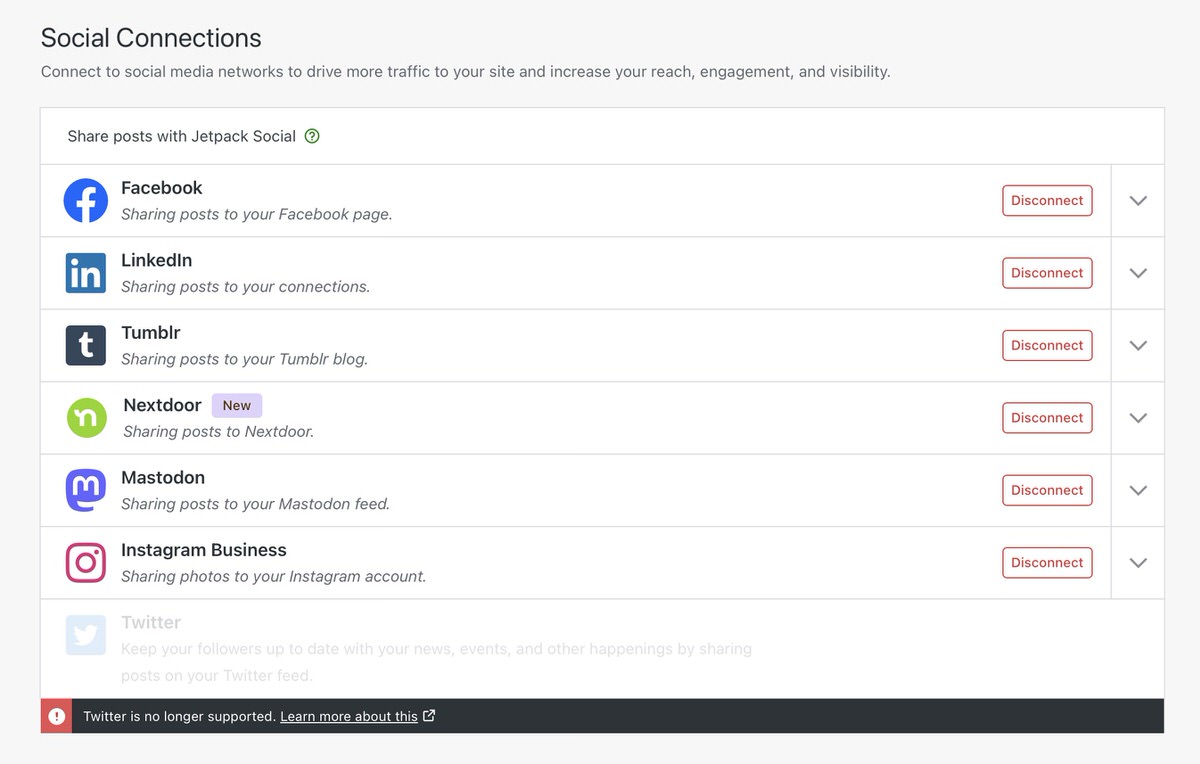
I am wondering if continued use of the Syndication Links plugin is worthwhile. The Syndication Links plugin is supposed to automatically add syndication links on each blog post, so I don't need to do it manually. However, the Syndication Links plugin is not integrated with any JetPacks social sharing services - Instagram, Facebook, NextDoor, Mastodon, Tumblr, and LinkedIn. So when JetPack shares my content to Instagram, Facebook, NextDoor, Mastodon, Tumblr, or LinkedIn, the Syndication Links plugin is unaware and does not set a u-syndication link. I had been visiting each social platform, copying the shared link, opening the original blog post for editing, and manually setting the link. It's tedious.

Given that Brid.gy was forced to abandon Instagram, X, and Facebook, and does not support NextDoor, Tumblr, and LinkedIn, the Syndication Links plugin is not useful for helping Brid.gy "backfeed" comments and reactions from those platforms. The time and effort involved in backfeeding comments from social platforms have led me to question the practicality of continuing the use of most of the IndieWeb plugins.

While IndieWeb tools aim to improve data portability, the varying standards and protocols often result in interoperability issues, making seamless data exchange between different systems challenging. As of today, I've turned off all IndieWeb plugins except Webmention and Syndication Links.

Fediverse Unlocked

Embracing the Fediverse with ActivityPub.

I was excited when Automattic, the parent company of WordPress.com, announced that they had acquired the popular WordPress plugin ActivityPub.

Although I had enabled the ActivityPub plugin in 2019, I hadn’t committed to using it and soon disabled it. Matthias Pfefferle’s later announcement that Automattic had enabled ActovityPub across all of WordPress.com filled me with confidence to re-enable the plug-in and commit to the fediverse.

The ActivityPub plugin for WordPress is a tool that extends the functionality of a WordPress website to make it compatible with the ActivityPub protocol. ActivityPub is a decentralised social networking protocol that allows different social media platforms to communicate and share content in a standardised way.

My WordPress site can interact with other ActivityPub-compatible platforms such as Mastodon. This means I can follow and be followed by users on other ActivityPub-compatible social networks like Mastodon, Pleroma, or Pixelfed. I can share my posts, articles, and updates from my WordPress site directly to subscribers on other platforms that support ActivityPub.

ActivityPub enables interactions such as liking (favouriting), sharing (boosting), and commenting (replies) on my WordPress posts from other ActivityPub users. The plugin allows me to control the visibility of my posts, making it possible to share them publicly or restrict it to specific audiences.

Once a person follows the @khurtwilliams@islandinthenet.com profile, any blog post I publish publicly will land in their Home feed on Mastodon. I receive notifications for interactions with my blog, such as when someone likes, shares, or comments on my posts from those external platforms.

The ActivityPub plugin enhances my WordPress website's connectivity, enabling it to become a part of the larger decentralised social web. It fosters a more open and interconnected online social experience, where users on various platforms can engage with my website seamlessly.

Optimizing Website Performance

I used JetPack Boost and Google's PageSpeed Insights to optimize CSS and improve website performance.

?I’m always looking to improve the performance of my website. I’m using the free version of [JetPack Boost] and Google’s PageSpeed Insights services to check my website performance. I look at the recommendations for improvement and implement them where I can. I have turned on features in JetPack Boost to optimise CSS load and defer non-essential Javascript until after the page loads, so the important stuff loads faster. I enabled lazy image loading to load only images the user can see. Doing all of that can make the website feel snappier.

The Image CDN feature delivers images from Jetpack's Content Delivery Network (CDN). The CDN Automatically resizes your images to an appropriate size, converts them to modern, efficient formats like WebP, and serves them from a worldwide network of servers. When I have uploaded later edits of images, I have had issues with the CDN serving the old versions of images instead of the updated version. I did not enable the Image CDN feature.

JetPack Boost Config

However, I was only partially happy with the results. When I ran a test using PageSpeed Insights, I got a pretty shitty score with a message that the website had failed the Core Web Vitals Assessment. I wanted to do better. The cool thing about PageSpeed Insights is that it will diagnose performance issues and suggest recommendations for improvement. PageSpeed Insights recommended using a more optimised theme, an optimisation plugin, or upgrading the server.

JetPack Boost Score
JetPack Boost Score

I’m using an IndieWeb version of the Twenty Sixteen theme. It has an additional markup for microformat2, which could be causing some performance issues. However, removing that code is not an option since I need microformat2 support to use the IndieWeb plugins. I’m using a fairly robust virtual private server from Digital Ocean. I don’t see any issues in the Digital Ocean dashboard to indicate that server performance is an issue.

PageSpeed Insights
PageSpeed Insights

The other recommendation from PageSpeed Insights was to use the Performance Lab plugin to convert uploaded JPEG images into WebP automatically. The Image CDN feature of JetPack Boost does this, but as I mentioned before, I have had issues with the CDN serving the old versions of images even after new ones are uploaded.

Digital Ocean VPS Dashboard

That left me with one viable option: an optimisation plugin. The WordPress HealthCheck feature kept complaining that I had no object caching service installed. It recommended Redis. After reading How to Setup Redis Caching for WordPress with Ubuntu 20.04 and Nginx and How to Install Redis on Ubuntu 20.04 / 18.04, I installed and configured a Redis server. I also installed and configured the Redis Object Cache plugin by Till Krüss.

Configuration

As a starting point, I used the following settings from the INSTALL.md on the Redis GitHub. ** Please make sure to change the cache keys to something unique**. I used the wordpress.org salt generator to create a unique key for my installation. By default, the object cache will connect to Redis Server over TCP at 127.0.0.1:6379. For security reasons, I explicitly defined the host and port settings.

//Adjust Redis host and port if necessary ?define( 'WP_REDIS_HOST', '127.0.0.1' );?define( 'WP_REDIS_PORT', 6379 );??// Set a cache key salt and enable a persistent cache with the Redis object cache plugin?define('WP_CACHE_KEY_SALT', ’example.com');?define('WP_CACHE', true); ??// Reasonable connection and read+write timeouts?define( 'WP_REDIS_TIMEOUT', 1 ); ?define( 'WP_REDIS_READ_TIMEOUT', 1 );?

There are other Redis settings that I want to learn more about before enabling them.

Configuration constant Description
WP_REDIS_PASSWORD The password of the Redis server. Supports Redis ACLs arrays: ['user', 'password']

Since I have set the Redis server to only listen on localhost, setting WP_REDIS_SCHEME isn’t critical. However, this setting would add another layer of security.

Results and Up Next

JetPack Boost Score Worese
JetPack Boost Worse

JetPack Boost said my website performance had fallen after enabling Redis. There was a caveat message from JetPack Boost Most of the time, JetPack Boost will increase website speed, but there may be cases where the score does not increase. The JetPack Boost documentation on improving the Site Speed Score recommended using Google’s PageSpeed Insights tool. I found that suggestion humorous. I considered if there was a conflict between JetPack Boost and Redis and how JetPack Boost reports performance. I decided to rely on the results from PageSpeed Insights.

Disabling the Optimize Critical CSS Loading of JetPack boost improved the Desktop Score but worsened the Mobile Sore significantly. I’ll keep experimenting and reading and learning about Redis. I want to ensure I have optimised my website as much as possible. Seeing the word, Failed on the PageSpeed Insights test agitates me.

Jim Grey appears to be using the Yoast SEO caching plugin. I ran one of his posts through PageSpeed Insights, and his website got a Core Web Vitals Assessment: Passed. I’ll try using a caching plugin with Redis and see what happens.?