Essential WordPress Security Tips for Securing Your Website on a New Linux Server

Update: Daniel moved his content to a new domain. This fixes a broken link. Let's hope I don't have to do this again.

Fellow, Desk.pm user, Daniel Brinneman recent wrote an article on how to harden a WordPress website. Daniel's piece is well written and covers the basics. Please visit his site.

While Daniel and I use basically the same process I wanted to cover the personal process I used for securing my WordPress websites. For brevity, I didn't go into detail about how to carry out each step. I may cover these steps in a later article.

Hosting Provider

Let's start with the hosting provider. I want one that is reliable, available and secure. I use a non-shared virtual private server (VPS) hosting plan with Digital Ocean1. Digital Ocean calls these droplets. Digital Ocean has multiple data centres in multiple locations globally offering five popular Linux distributions that can be automatically pre-installed upon deployment of a server: Ubuntu, CentOS, Debian, Fedora, and CoreOS. While I can certainly build my web server stack from scratch I trust the staff at Digital Ocean. I opt to use one of their pre-packaged LAMP/WordPress stacks.

Each digital ocean SSD VPS comes with full root access, a choice of operating systems, and the ability to customise the configuration. With a shared hosting plan, I would be concerned that a compromise on another tenant's account could lead to a compromise of the entire host. With a dedicated VPS, I can configure as much or as little security as I consider acceptable.

Operating System Hardening

On a *NIX system, the root user is the administrative user that has very broad privileges. Because of the heightened privileges of the root account, I would discourage regular use of the root account. This is because part of the power inherent with the root account is the ability to make very destructive changes, even by accident.

Since, with root, I have complete control of the system, I start my hardening process at the operating system level by immediately changing the root password after the server is created. I choose a long and complex password but something that I can also remember. I then create a new non-root account and add it to the sudoers file. Using the new account (via sudo) I change the server SSH configuration to disable root access to SSH, create 4096 bit SSH keys for remote authentication, then disabling and removing any unneeded services, and then install and configure file integrity monitoring software. Next, I harden the web server. I generate and install TLS (not SSL) certificates, configure the web server with forwarding Secrecy, OCSP stapling, Public Key Pinning (HPKP) and Strict Transport Security (HSTS).

Server Services

One I complete work on the web server it is time for MySQL and WordPress. I change the MySQL database password, run the MySQL security script to remove all defaults etc.. I then login to WordPress and create a new admin account -- again with a suitably long randomly generated password -- before deleting the old admin account. I then install and configure a web application firewall with specific rules around the wp-admin URL and when to alert me. I then install a WordPress security audit plugin with rules about acceptable actions and when to alert me. I then delete all default posts and pages.

Just a Bit More

Finally, I configure CloudFlare or some other content delivery network to help with any denial of services issues. Most of these also offer a web application firewall and robust analytics.

From a security operations perspective, I use the VaultPress service to do daily backups and I check to make sure backups are complete. I have a weekly reminder in my calendar to check the Linux server and the WordPress install for security patches and to check my server logs.

I also perform my vulnerability scanning using various open source tools.

I only install plugins and themes from reputable sources. I try to reduce the use of plugins as much as possible to mitigate the risk of exploitation. Plugin updates are part of my regular weekly security checks.

If you need help implementing these WordPress security tips, I am available for hire.

This post was syndicated to How to Secure a new Linux WordPress Server.


  1. Use my referral link to get a discount on Digital Ocean when signing up, and help me keep my site going. ?

Setting Up an Open Source Security Lab with Ubuntu

It's been a while since I had a dedicated Linux server in my home. In the early days of my career, I maintained a small "data centre" in my basement. It included BSD-based network storage via FreeNAS, a Linux Apache MySQL Perl/PHP (LAMP) stack, a Linux-based firewall and directory server, and a Windows domain controller. I spent much time testing my ideas and tinkering with open-source software. Over time, I replaced these machines with commercial off-the-shelf products or moved services to the cloud. Eventually, everything was replaced. This move coincided with my then employer's network, system administration, and application development outsourcing. In the back of my mind, I thought it was pointless to learn something and develop a skill that I couldn't use. It's like learning to play a sport but never getting on the field. I improved my "soft" skills, even as some of my hard skills atrophied.

I recently started consulting independently (again) and realised my knowledge needed updating. While it's great to have business skills that clients find essential to help bridge the communication gaps between non-technical and technical staff, I wanted to stay sharp. I also missed my early days in information security when I was responsible for vulnerability management. I wanted back in, especially to develop and hone a penetration testing skillset. It was time to rebuild my lab.

I have two Raspberry Pi (RPi) devices on my home network and two Macs. The Macs run OS X Yosemite, and the RPi runs Raspbian. The iMac and MacBook Air are capable workstations but inadequate for a server. The RPi is too underpowered and limited by memory and storage constraints. I installed and configured ownCloud on one of the RPi machines, but the performance was terrible. I spent two days getting ownCloud up and running on the RPi but removed the software and reconfigured the machine after only one day of use. A used server might be a better solution.

Server Hardware

I intended to install open-source security tools, including network and system vulnerability scanning, security and event monitoring, intrusion detection, file integrity monitoring, and configuration management systems. I wanted something powerful enough to handle the software stack with enough storage to install, configure, and test other software. After scouring eBay for a week, I purchased a Dell PowerEdge 1950 server for $160. Information on the Dell PowerEdge:

  • Two Intel Xeon 3.0GHz Dual-Core CPUs
  • 4GB of RAM
  • Two 146GB SAS 15K RPM Hard Drives
  • Dual Power Supplies
  • Dual Gigabit network cards
  • VGA/Serial/USB Ports
  • CD-ROM Drive

When the server arrived -- it was larger and heavier than I expected -- I went to the basement to set up. But... I had no power cords, no keyboard, and no display. Over the years, I was spoiled by Apple products. All Macs ship with a display and a keyboard, except for the Mac mini and Mac Pro. This was a frustrating setback, but a few weeks later, I now have a power cord, keyboard, and display. An office colleague donated the power cord and keyboard from the excess he had sitting in a drawer. The display, a Dell P1913S, was purchased used from eBay. It has a small tear, but the price, $50, was good for my budget. It supports VGA, HDMI, and DisplayPort. Waiting and acquiring the peripherals took some time, but I had everything in place last night when I installed Ubuntu. When I booted the device, I noticed a BIOS error. After poking around in the BIOS, I realised that one of the two 146GB drives had failed. I tried rebuilding the drive but failed, so I pulled the drive from the chassis.

Building the Install Media

I intended to install Ubuntu from a flash drive. The general procedure to install Ubuntu from a USB flash drive is:

  • Acquire the correct Ubuntu installation files ('the ISO')
  • Put Ubuntu onto your USB flash drive
  • Configure your computer to boot from a USB flash drive and boot from it
  • Install Ubuntu to your internal drive (hard disk or solid-state drive).

I could download a supported ISO for the Dell PowerEdge 1950 from Canonical's website and use the OS X Disk Utility (DU) app to create a bootable USB. This didn't work. I am trying to understand why. Some Google searches revealed that I first needed to convert the ISO to an IMG file and then do some other things to create a bootable USB flash install on OS X.

:~$ sudo hdiutil convert -format UDRW -o ubuntu-10.04.4-server-amd64.img ubuntu-10.04.4-server-amd64.iso

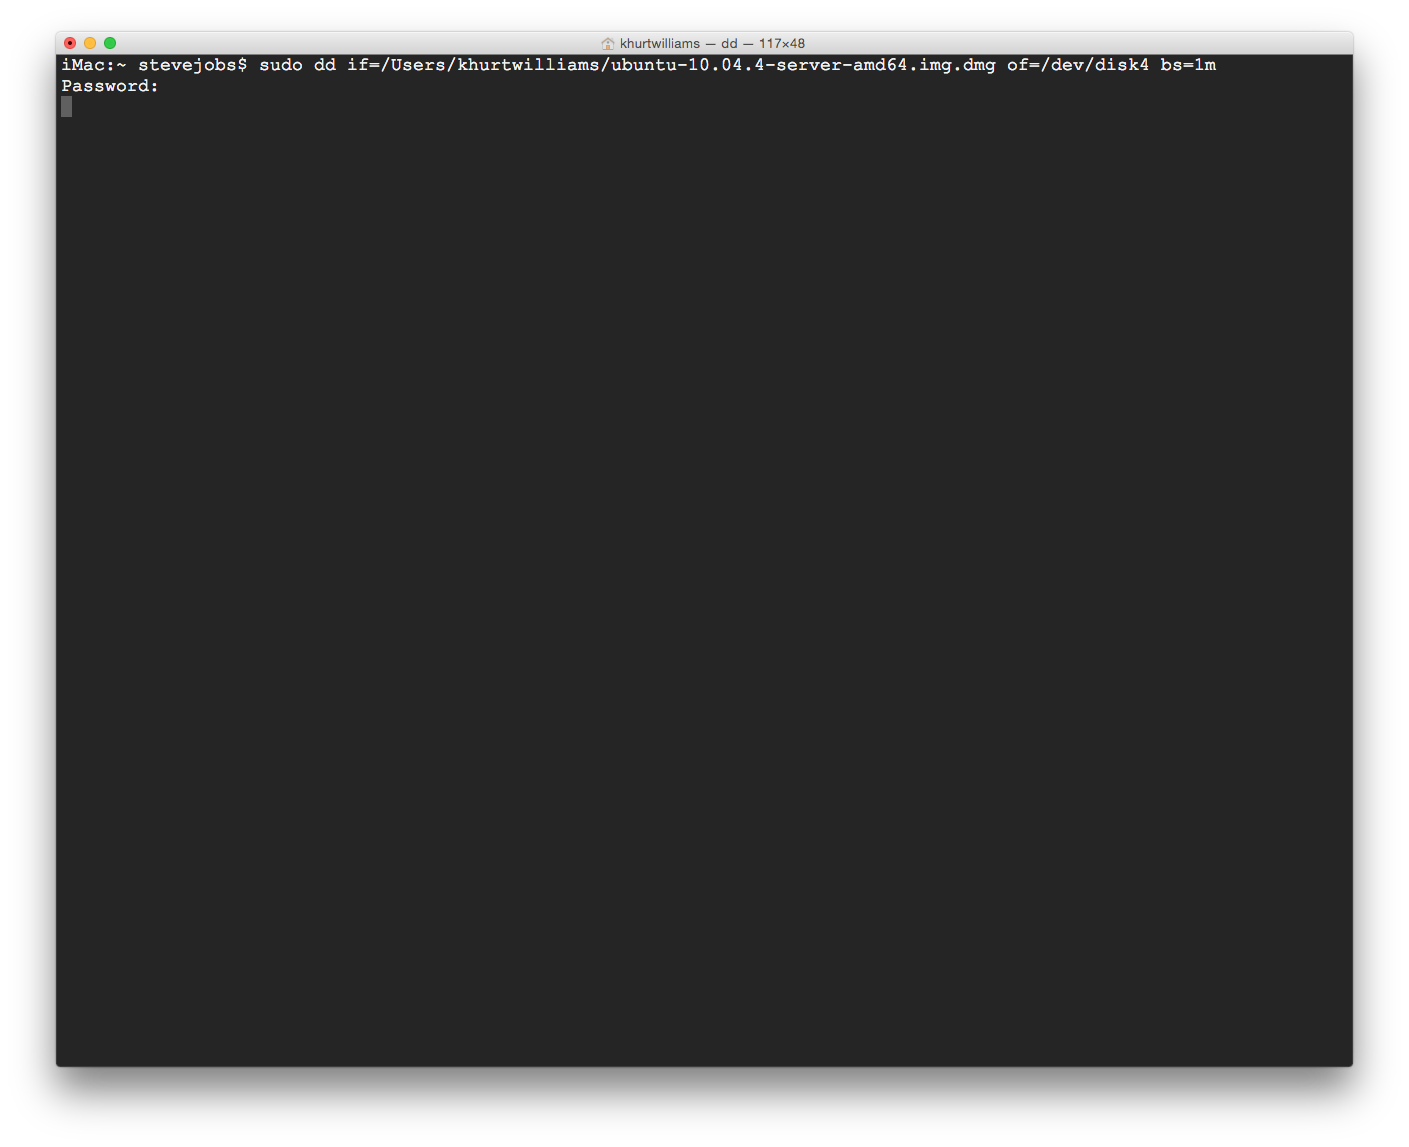
After converting the ISO, I followed the instructions to burn the IMG to disk. The flash drive imaging was taking forever. I lost my patience after about 20 minutes. I wanted to get started right away. So, while the USB flash drive was being imaged, I tried burning the ISO to DVD with DU. That failed, too. After a few minutes of scratching my head, I burned the IMG I had just created to DVD with DU. This method finished before the USB flash drive was ready—time for the OS install.

Screenshot 2015-03-30 20.22.22

Install the OS

I booted the Dell from the install DVD, answered many questions, and created the root and a standard user account. Once the server booted into Ubuntu, I ensured the SSH daemon was running and sat on the couch with my MacBook Air to complete the initial security configuration. This is one thing I love about UNIX/Linux. Almost anything can be accomplished from the terminal -- remote or local. I used apt to install missing OS patches, but after doing that, I realised I should do an OS release update instead.

:~$ sudo do-release-upgrade

The release upgrade seemed to take forever, but once it was complete, I configured the server firewall using UFW. I remember having to create Linux iptables firewall rules by hand. UFW makes changing the firewall rules trivial. I edited /etc/default/ufw to ensure IPV6 support was enabled (IPV6=yes) and started creating firewall rules. At a minimum, I needed a way to secure remote access to the server and allow web services. From a security perspective, I wanted to follow my practice of "that which is not explicitly allowed is denied". I enabled access to SSH on port 22 and secure web services on port 443 via a firewall on Ubuntu with UFW.

:~$ sudo ufw allow ssh
:~$ sudo ufw allow www
:~$ sudo ufw allow 443
:~$ sudo ufw enable
:~$ sudo ufw logging on

Next Steps

My next steps are to install other security software on the Ubuntu server. I took an early stab at installing Tripwire and OpenVAS, but I'll need more time to understand how to configure these correctly.

Open Source Softare has to be better

The thing about open source by Bijan Sabet (bijansabet.com)

I think we need to aim even higher with open source movement. It’s not just about an open source version of Photoshop or Windows or MS Office. It has to be bigger and more ambitious than free and open. It has to be better.

I’m a proponent and critic of man Open Source Projects. Some projects like PHP, Perl, Apache, Linux, MySQL, are very successful and provide very capable solutions to enterprises and small businesses.

Other projects like GIMP and OpenOffice are a disappointment. They are poor alternatives for the products they are meant to replace. They are the “poor mans” software. The poor deserve better.