The following information is based on OS X 10.10 Yosemite and iOS 8.1. If you are running an earlier version of either OS the information might still useful but you may have to look in different system preferences.
Using your iCloud account, Handoff lets you start something on one device -- e.g., writing and email or using a web site on your iPhone -- and instantly pick up where you left off another devices. The app you need appears in the lock screen, app switcher and Dock on your Mac. Handoff works with your favorite apps like Mail, Safari, Pages, Numbers, Keynote, Maps, Messages, Reminders, Calendar, and Contacts. And clever developers are building Handoff into their apps.
One clever feature of Handoff is the ability to use the cellular features of your iPhone to make and receive phone calls and send and receive SMS messages. Apple calls this feature Continuity. I love this feature.
Quite often when I'm at home using my iMac or reading on my iPad, I'll get a call on my iPhone. Sometimes I may have my iPhone charging or I left it in another room. I don’t want to get up. I don’t want to leave what I’m doing and go get my phone. Voila, with Continuity I see the incoming call on my Mac or iPad. With a flick of the wrist and a click of the mouse I can answer that call. Right on my Mac.
When a call comes in I can see the caller’s name, number, and profile picture. I can even choose ringtones just like on my iPhone. Dude, this is so cool!
The Continuity feature also works for SMS messages via the Messages app. I send text messages to my friends and family, some of whom have BlackBerries and Android phones, right from my Mac’s keyboard.
Ok, this all sound great, but how do you set it up and use it?
Apple's support site has the official requirements but you'll need a free iCloud account, an iPhone 5 or 6 with an activated carrier plan and running iOS 8.1 and a 2012 (or later) Mac running OS X Yosemite.
For Handoff and Continuity to work your iPhone and your Mac must be connected to the same Wi-Fi network and you will need to enable Bluetooth on each device. On your iPhone and/or iPad, go to Settings-> General-> Handoff & Suggested Apps and make sure Handoff is On. If you’re out of Wi-Fi range, your Mac can connect to your iPhone’s personal hotspot.
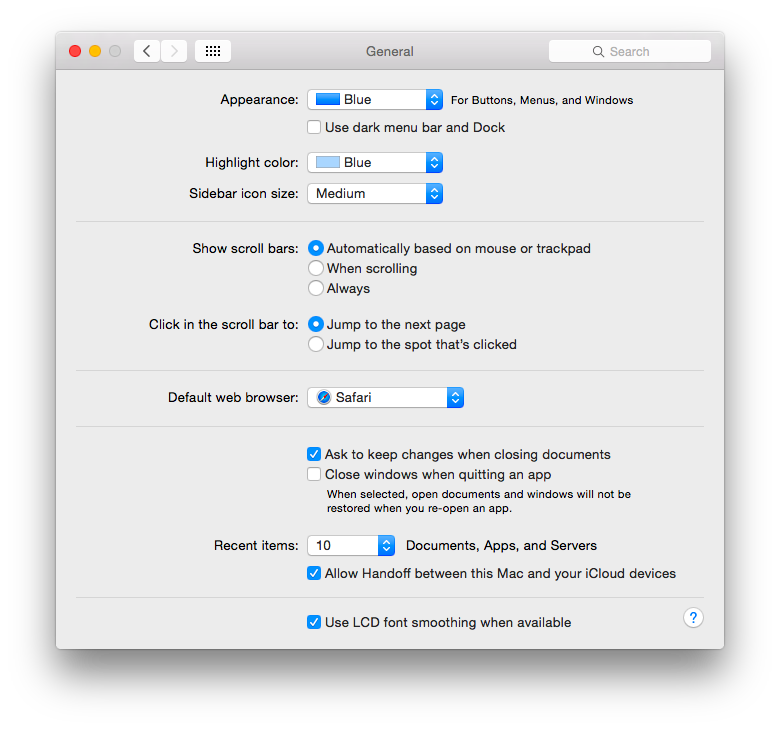
On your Mac, open System Preferences and go to General. Select “Allow Handoff between this Mac and your iCloud devices.” If you don't see this setting, your Mac may not support Handoff.
[fusion_builder_container hundred_percent="yes" overflow="visible"][fusion_builder_row][fusion_builder_column type="1_1" background_position="left top" background_color="" border_size="" border_color="" border_style="solid" spacing="yes" background_image="" background_repeat="no-repeat" padding="" margin_top="0px" margin_bottom="0px" class="" id="" animation_type="" animation_speed="0.3" animation_direction="left" hide_on_mobile="no" center_content="no" min_height="none"]
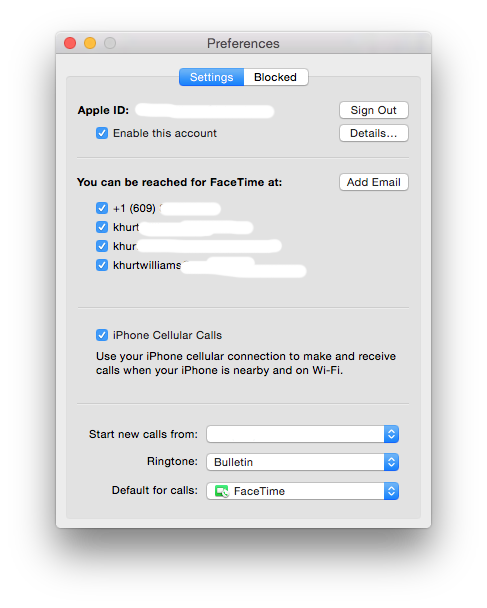
On your Mac, open the FaceTime app. Go to FaceTime->Preferences and turn on “iPhone Cellular Calls.” You can exit FaceTime once this step is complete.
[/fusion_builder_column][fusion_builder_column type="1_1" background_position="left top" background_color="" border_size="" border_color="" border_style="solid" spacing="yes" background_image="" background_repeat="no-repeat" padding="" margin_top="0px" margin_bottom="0px" class="" id="" animation_type="" animation_speed="0.3" animation_direction="left" hide_on_mobile="no" center_content="no" min_height="none"]
Next, go to System Preferences, and sign out and then sign in again to your iCloud account. I’m not sure why this step is required but things won’t work unless you do this.
[/fusion_builder_column][fusion_builder_column type="1_1" background_position="left top" background_color="" border_size="" border_color="" border_style="solid" spacing="yes" background_image="" background_repeat="no-repeat" padding="" margin_top="0px" margin_bottom="0px" class="" id="" animation_type="" animation_speed="0.3" animation_direction="left" hide_on_mobile="no" center_content="no" min_height="none"]

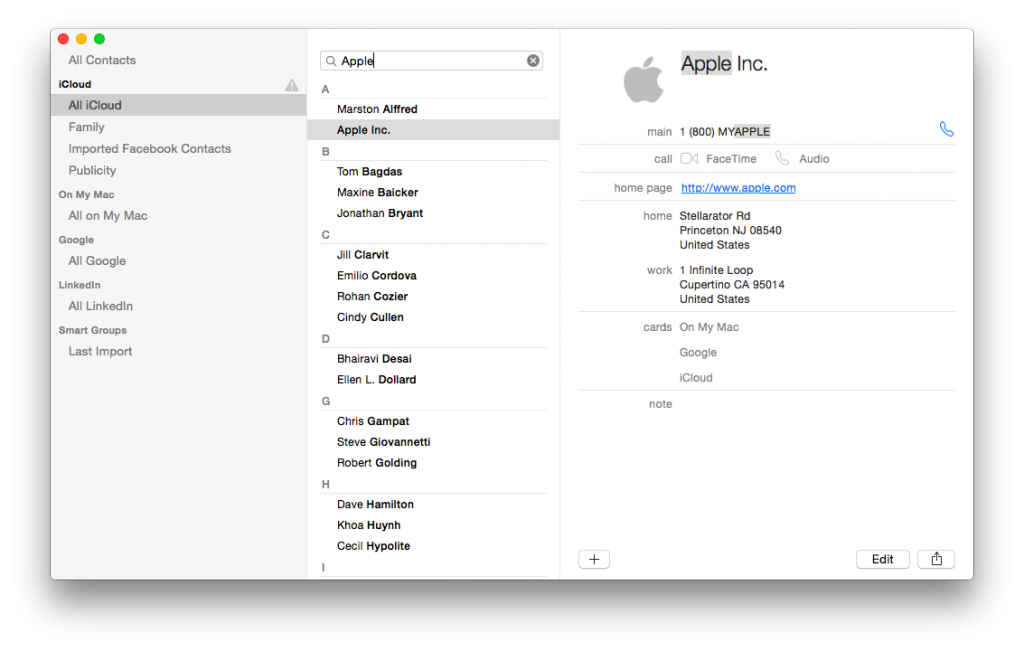
Making calls requires a little more work. You can make calls by selecting a contact from the Contacts app and clicking the little blue telephone icon.
[/fusion_builder_column][fusion_builder_column type="1_1" background_position="left top" background_color="" border_size="" border_color="" border_style="solid" spacing="yes" background_image="" background_repeat="no-repeat" padding="" margin_top="0px" margin_bottom="0px" class="" id="" animation_type="" animation_speed="0.3" animation_direction="left" hide_on_mobile="no" center_content="no" min_height="none"]
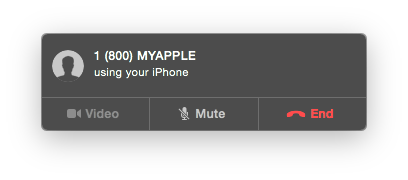
OS X will notify you of the outgoing call with a pop-up.
[/fusion_builder_column][fusion_builder_column type="1_1" background_position="left top" background_color="" border_size="" border_color="" border_style="solid" spacing="yes" background_image="" background_repeat="no-repeat" padding="" margin_top="0px" margin_bottom="0px" class="" id="" animation_type="" animation_speed="0.3" animation_direction="left" hide_on_mobile="no" center_content="no" min_height="none"]
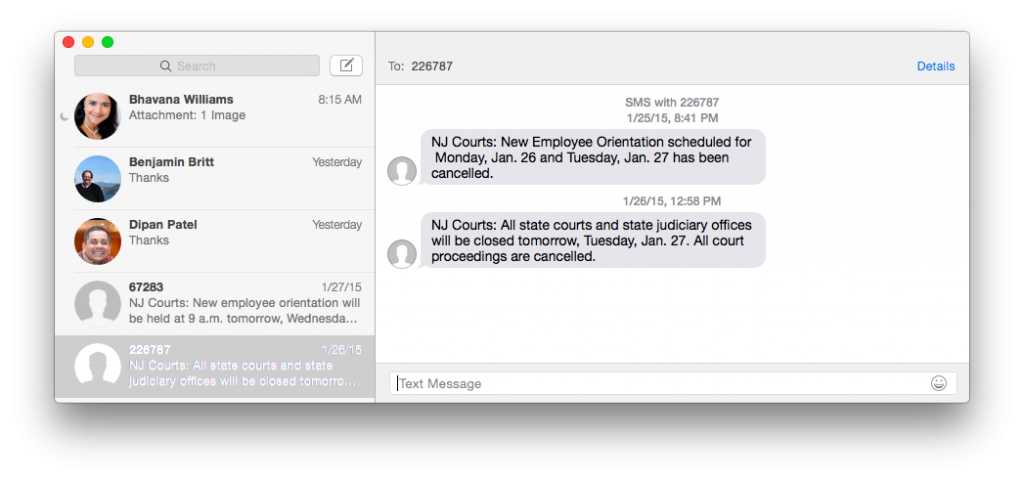
Sending and receiving SMS messages on the Mac is easy. Open the Messages app, type in the recipient's phone number, and start type. It's no different from doing it on your iPhone. You can use emoticons and attach images and video.
[/fusion_builder_column][fusion_builder_column type="1_1" background_position="left top" background_color="" border_size="" border_color="" border_style="solid" spacing="yes" background_image="" background_repeat="no-repeat" padding="" margin_top="0px" margin_bottom="0px" class="" id="" animation_type="" animation_speed="0.3" animation_direction="left" hide_on_mobile="no" center_content="no" min_height="none"]
My iPhone 6 and iCloud have become the hub of my digital communications. Being able to extend the capabilities of my iPhone to my Mac and make and receive phone calls and SMS messages has been a time saver.[/fusion_builder_column][/fusion_builder_row][/fusion_builder_container]