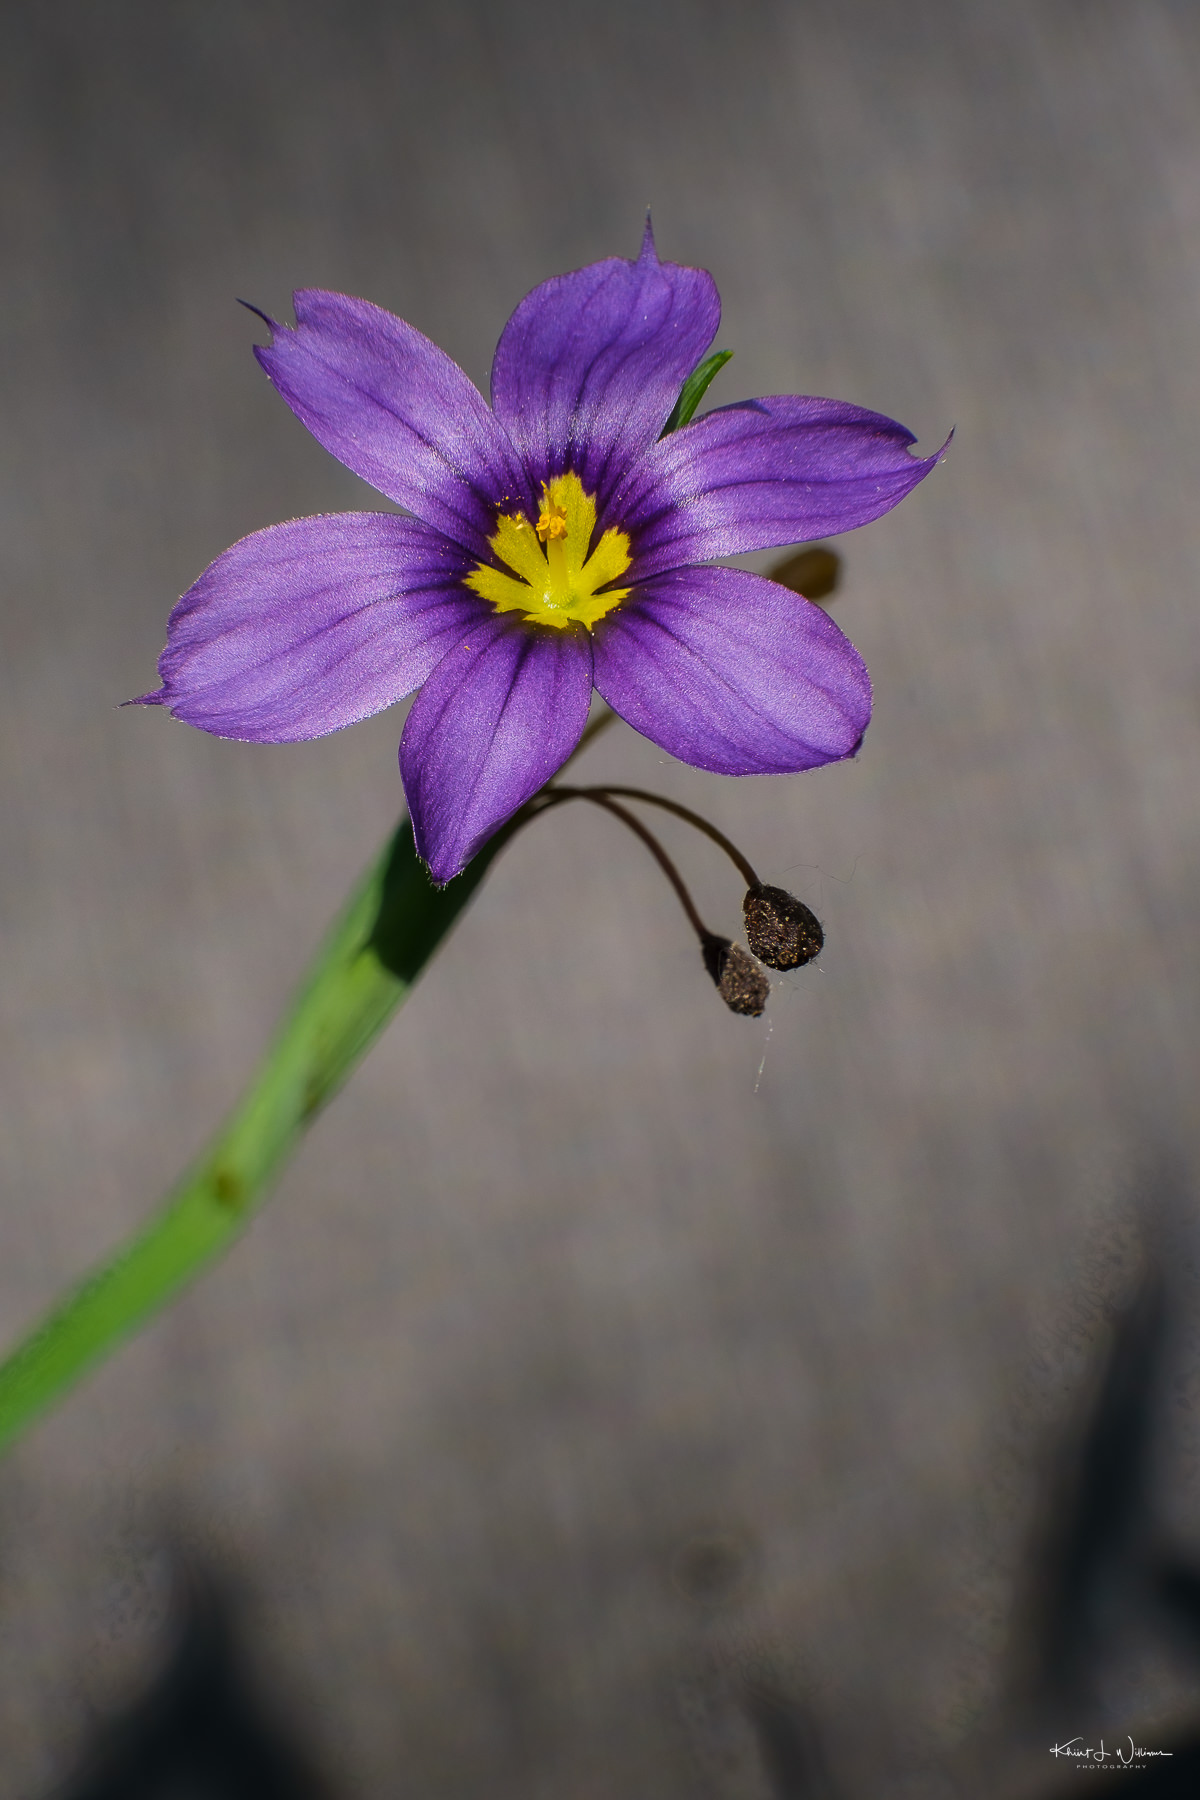
The Blue-eyed Grass, a perennial flowering plant native to New Jersey, tends to be overlooked in some gardening circles. The online descriptions and photos feature a plant with petite blue flowers and yellow centres blooming on stalks above grass-like leaves. But the flowers on my blue-eyed grass plant appear more purple than blue. This is not a trick of the light or an incorrect white balance on my camera sensor. To my eyes, the flowers appear to be a deep shade of purple.
Blue-eyed grass blooms from late spring to early summer. The plant forms small clumps of grass-like leaves that can slowly spread, serving as a ground cover and helping to retain moisture in the soil.
Blue-eyed Grass thrives in consistently moist soil but can tolerate some drought once established. My patio planters have a basin at the bottom that catches and retains rainwater. There is also a layer of moss growing in the planter. Both of these things help retain moisture and keep the container soil moist.
Blue-eyed grass is not grass. Blue-eyed Grass belongs to the Iris Family and attracts bees, butterflies, and other pollinators. This was one of my main goals in planting Blue-eyed Grass. While having bees on my patio could be annoying, I wanted to attract butterflies. With any luck, I may attract some interesting photography subjects.
Blue-eyed grass plant can be found in all regions of New Jersey and thrives in specific ecoregions like the coast and Pinelands. Princeton is far from the coast or the Pinelands area of New Jersey.
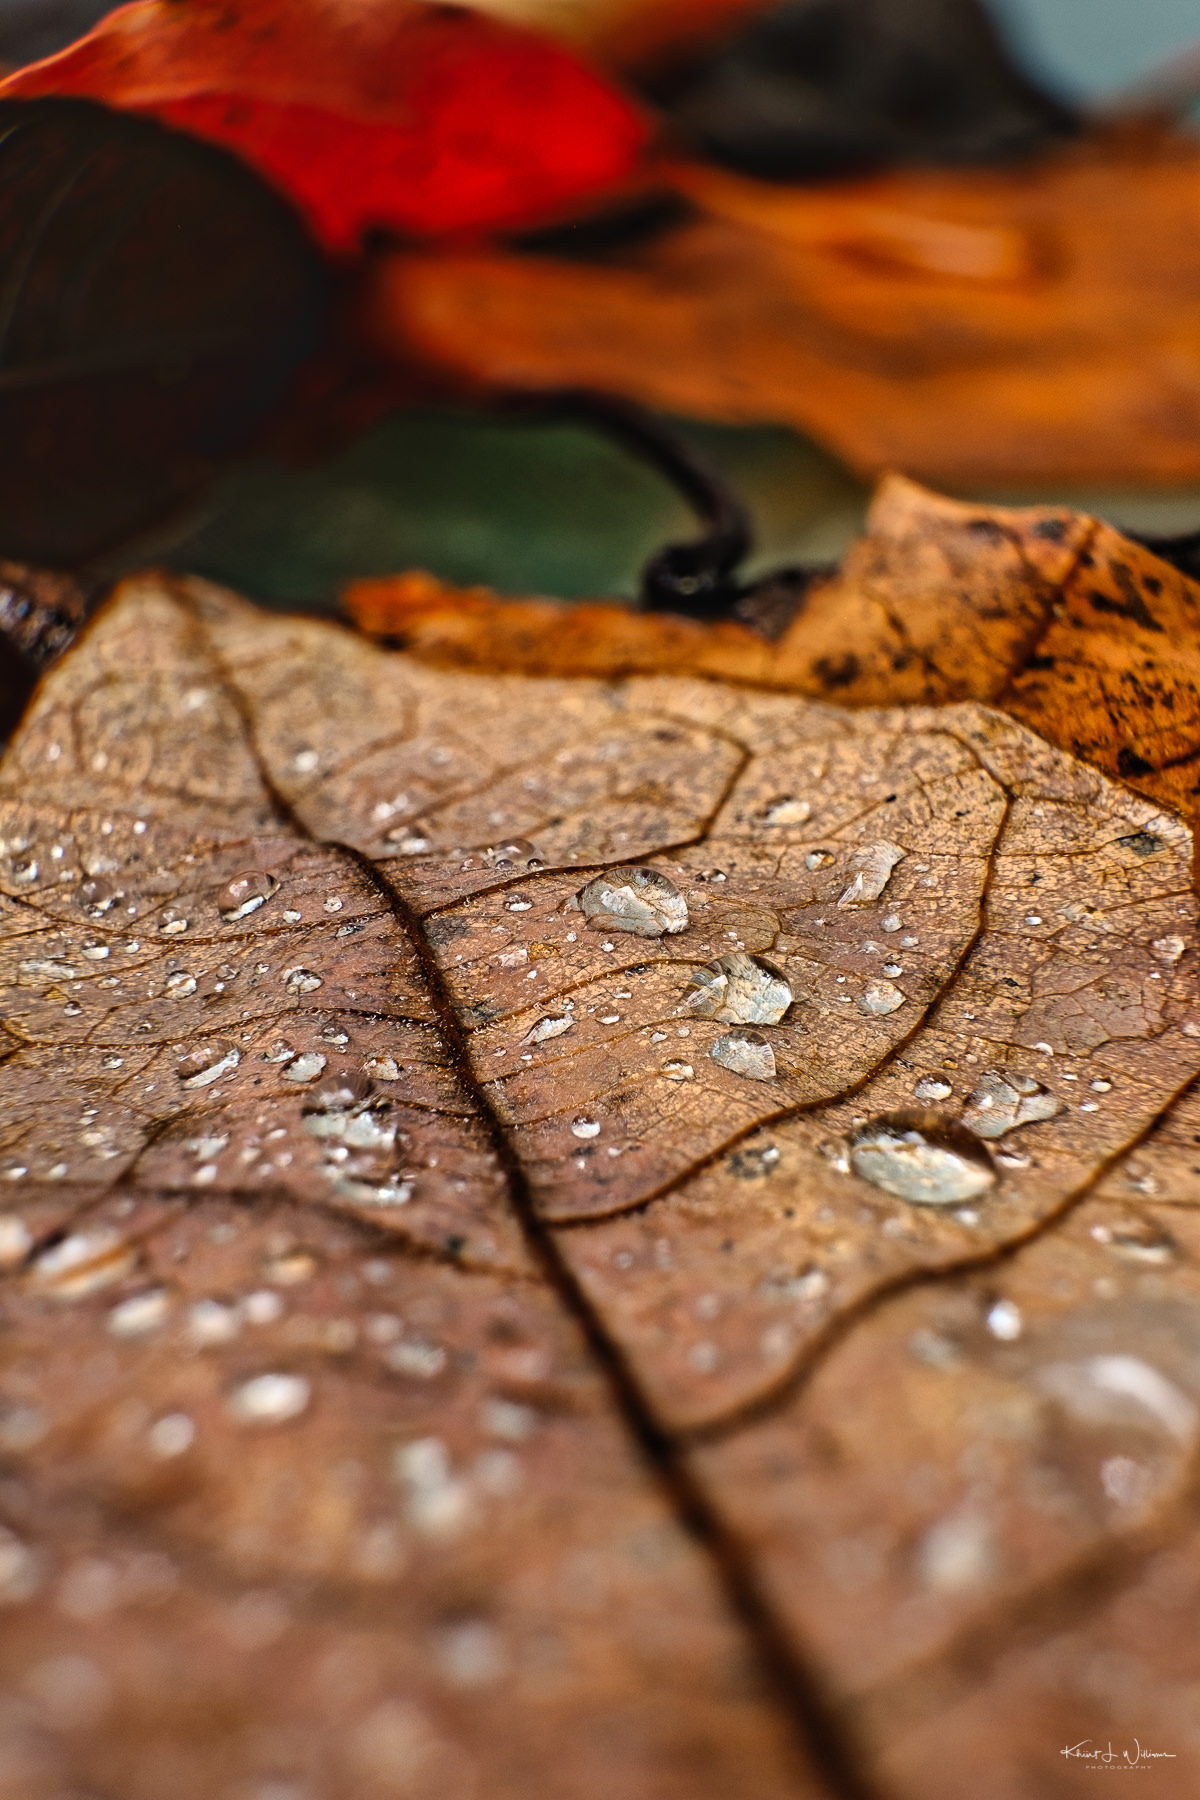
Forty-two images were captured and stacked using the DMap method in Zerene Stacker.
The Lens-Artists Challenge #171 is all about the weird stuff we can find around us. I consulted the Weird NJ website and found some weird things about New Jersey. But given the expected weather for the weekend, a trip out of town seemed ill-advised. So I decided to do something much, much closer to home.
It's almost a year since I have dabbled with macro photography. Until I purchased the Fujinon MCEX-16 extension tube, I last did any macro photography in the spring of 2020 when I rented an XF80mmF2.8 R LM OIS WR Macro lens. It was almost two years since I switched to Fuji, and when I rented the XF80mmF2.8 R LM OIS WR, I had forgotten the technique of focus stacking. I failed to maximise the potential of that lens when I was out in the field photographing spring wildflowers. Before that rental, I last did any significant macro photography work during a water droplet macro photography workshop with Don Komarechka in 2017. Don's course taught me some handy tips and techniques. My first attempt at focus stacking for macro photography was because of Don's 2015 blog post. Back then, I did not have a dedicated macro lens, and my technique involved using macro extension tubes and a macro rail or shooing handheld with a Lensbaby Composer. Most of my knowledge returned during the week after I started using the Fujinon MCEX-16.
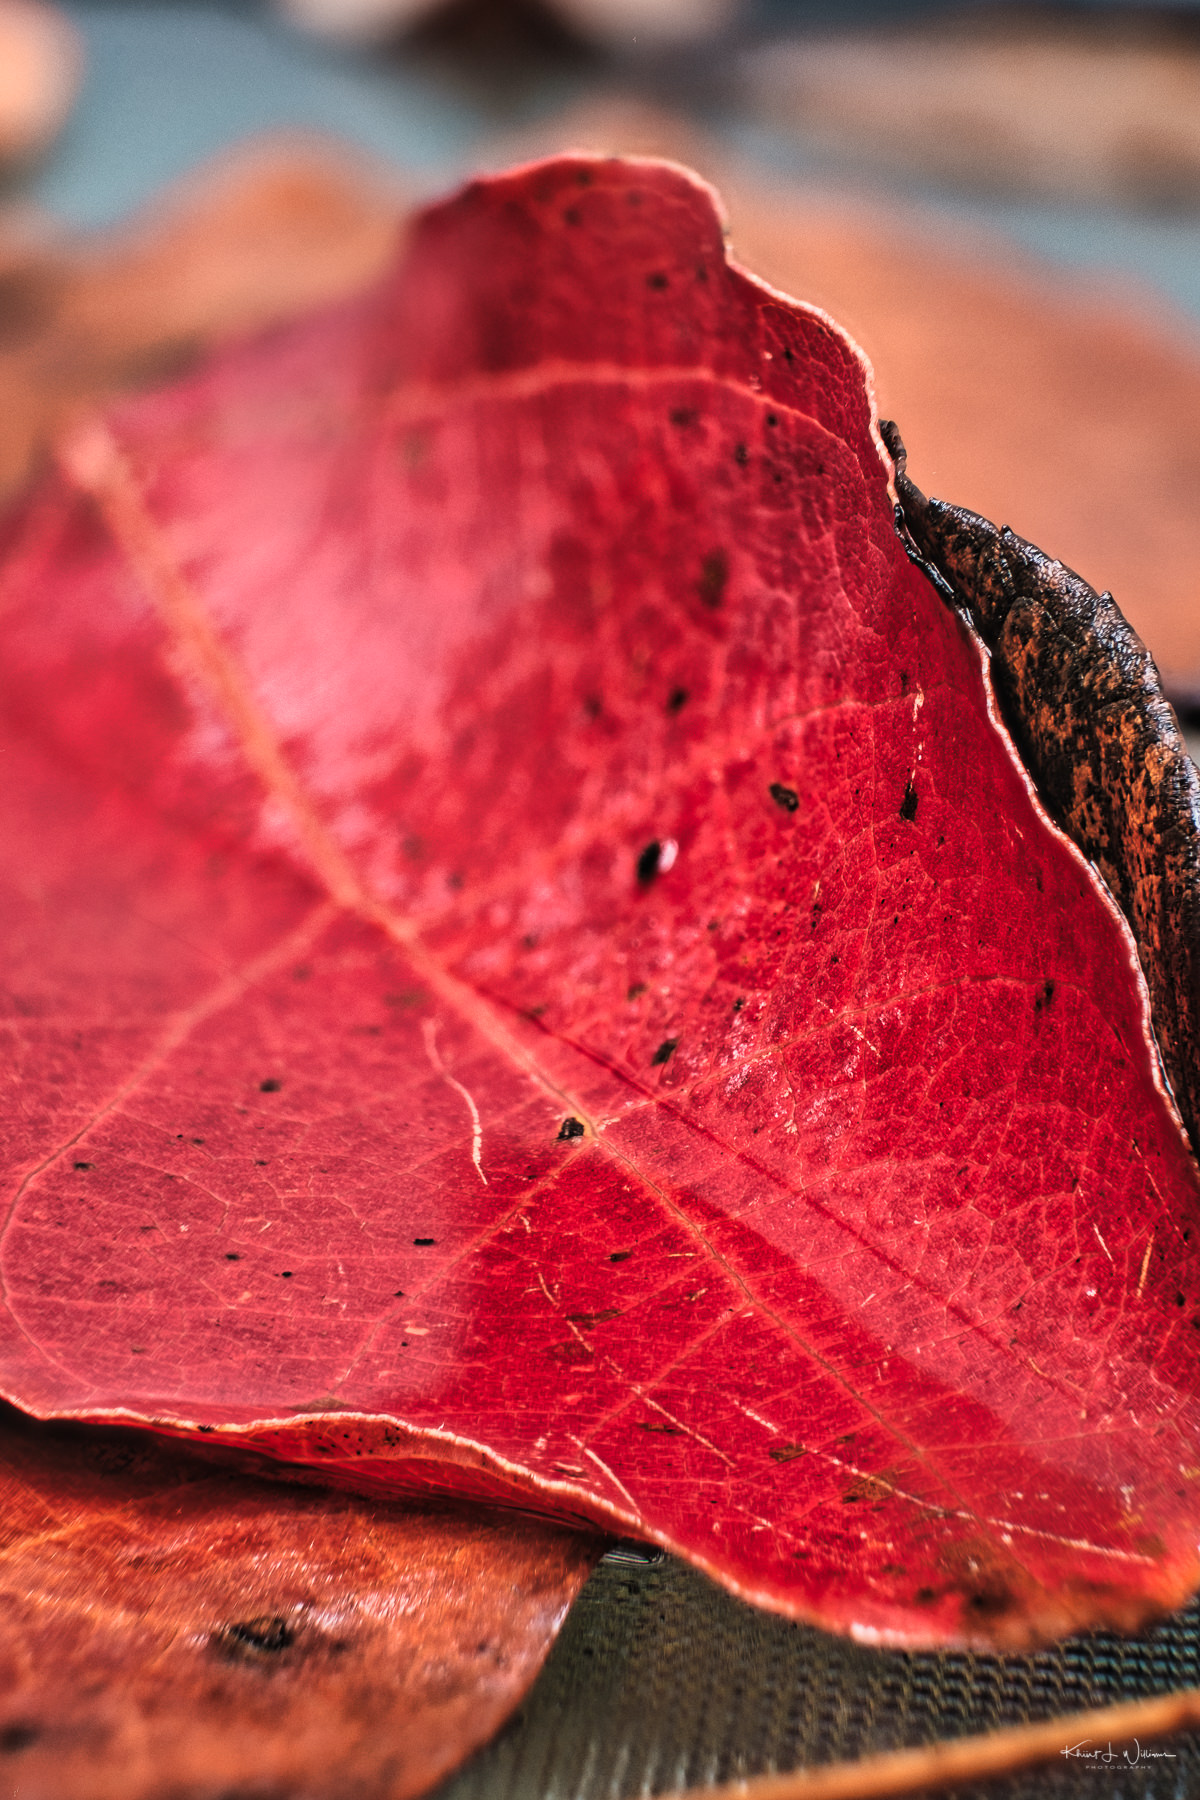
At first, I tried shooting handheld and on a tripod, but I didn't like the results. I opened the aperture too wide, and the first image's depth of field (DOF) was too narrow. When I stopped the aperture down to f/8, I got a better depth of field, but the images were so dark that I had to increase the ISO to 6400. There is a lot of noise in the images. What I wanted was a way to increase the depth of field while shooting at low ISO.
Monday 25 October, 2021 | FujiFilm X-T3 | XF27mmF2.8 | 1⁄125 sec at f/2.8 | ISO 5000Monday 25 October, 2021 | FujiFilm X-T3 | XF27mmF2.8 | 1⁄60 sec at f/8.0 | ISO 10000
This week I experimented with the focus bracketing feature of the Fujifilm X-T3 and focus-stacking the images in software. At first, I fell back on the Adobe Photoshop techniques I learned in Don's workshop. I focus bracketed about 40-50 images and attempted to export and align them in the most recent version of Adobe Photoshop CC. However, I soon realised that my 2013 iMac was not up to the task. Photoshop struggled to auto-align the images even after several hours. In 2017, the 2013 iMac quickly processed the 16-megapixel photos from my Nikon D5100. But it seems my iMac's 3.5 GHz Quad-Core Intel Core i7 CPU, 32 GB 1600 MHz DDR3 RAM, and NVIDIA GeForce GTX 780M 4 GB GPU are no match for much larger 26-megapixel images from my Fujifilm X-T3. I tried all weekend to process these images. Late last night, I remembered trying other software to process and focus stack my picture. After a quick Google search, I rediscovered Zerene Stacker, which I had first used with the macro rail technique.
The Zerene Stacker Adobe Lightroom plugin imported, auto-aligned, and stacked the image in several minutes, typically six minutes or less. Zerene Stacker has two stacking methods, PMax and DMap, which produce slightly different results. I ran both methods on my images and compared the results, but I didn't see much difference. I won't try to explain them here. The Zerene Stacker website has the details.
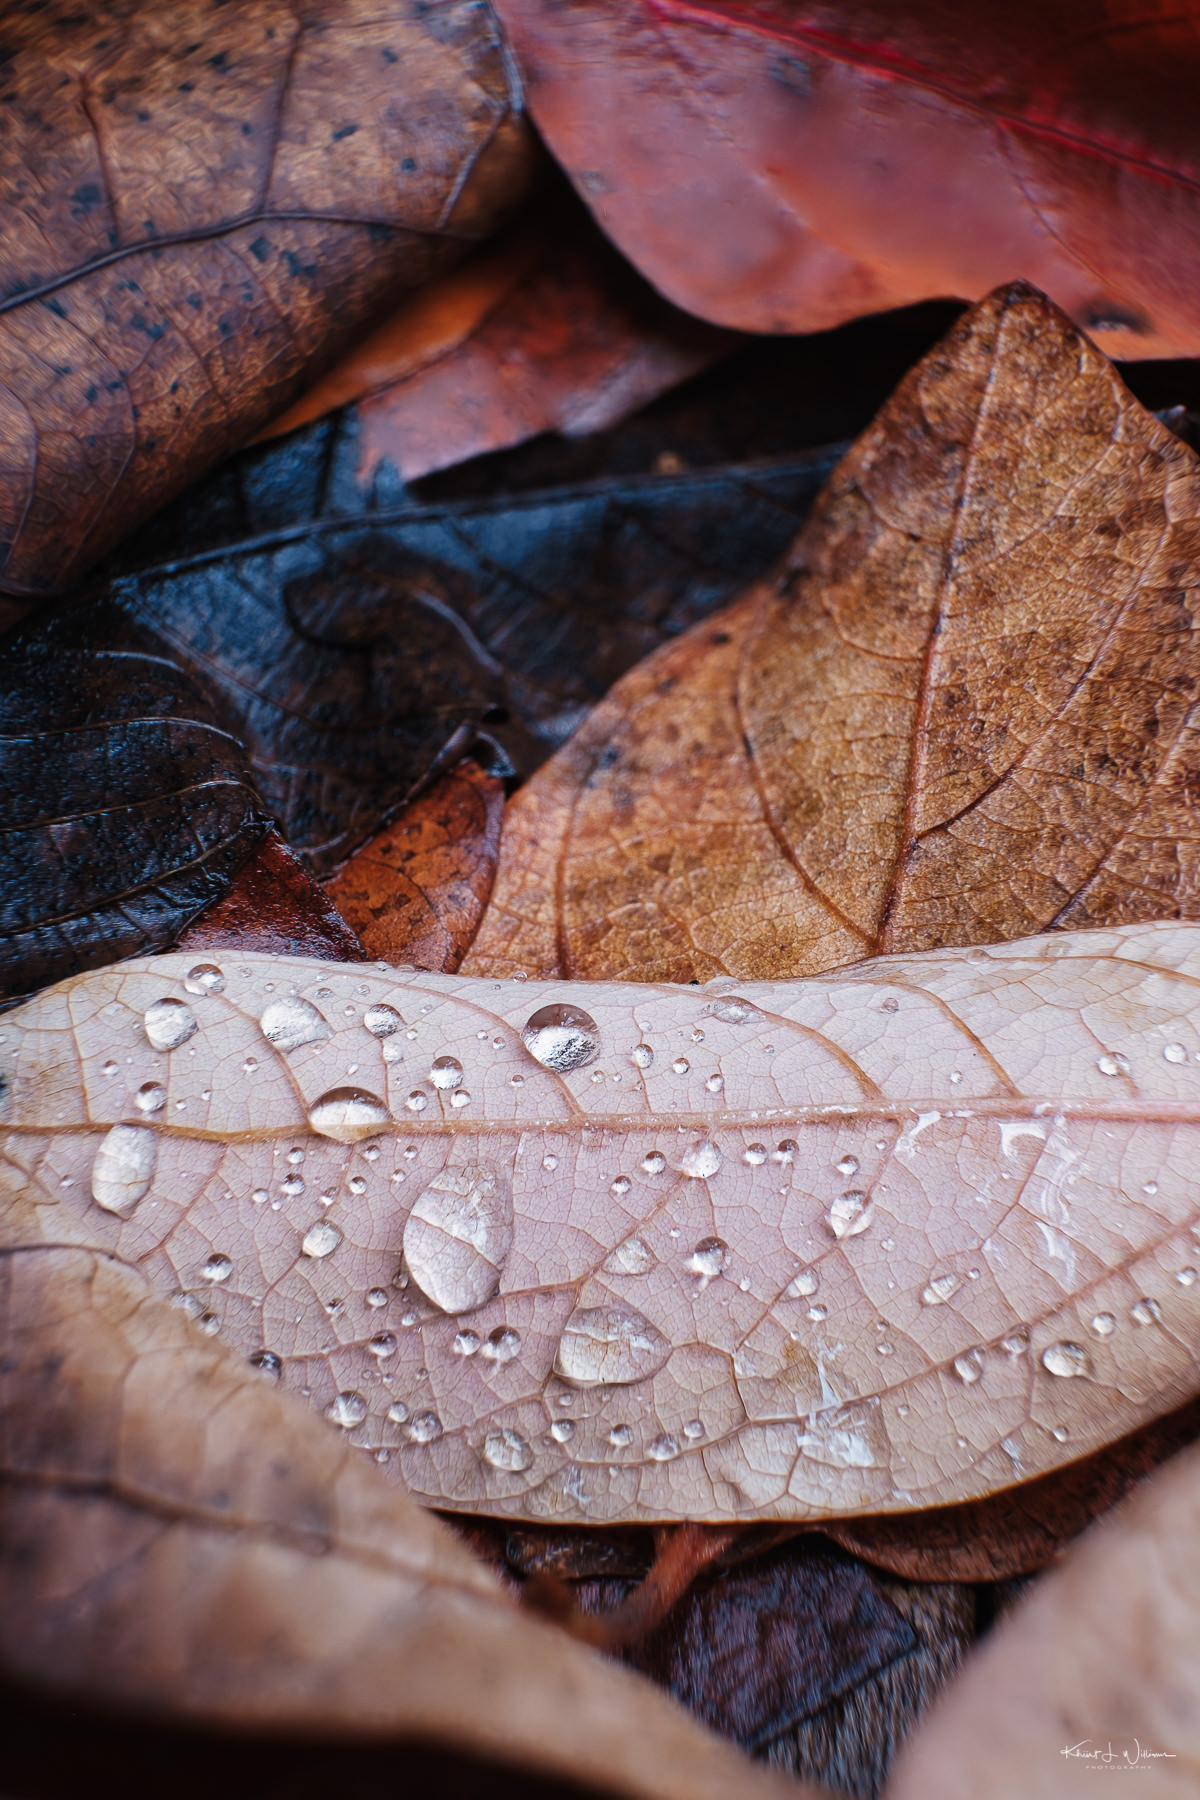
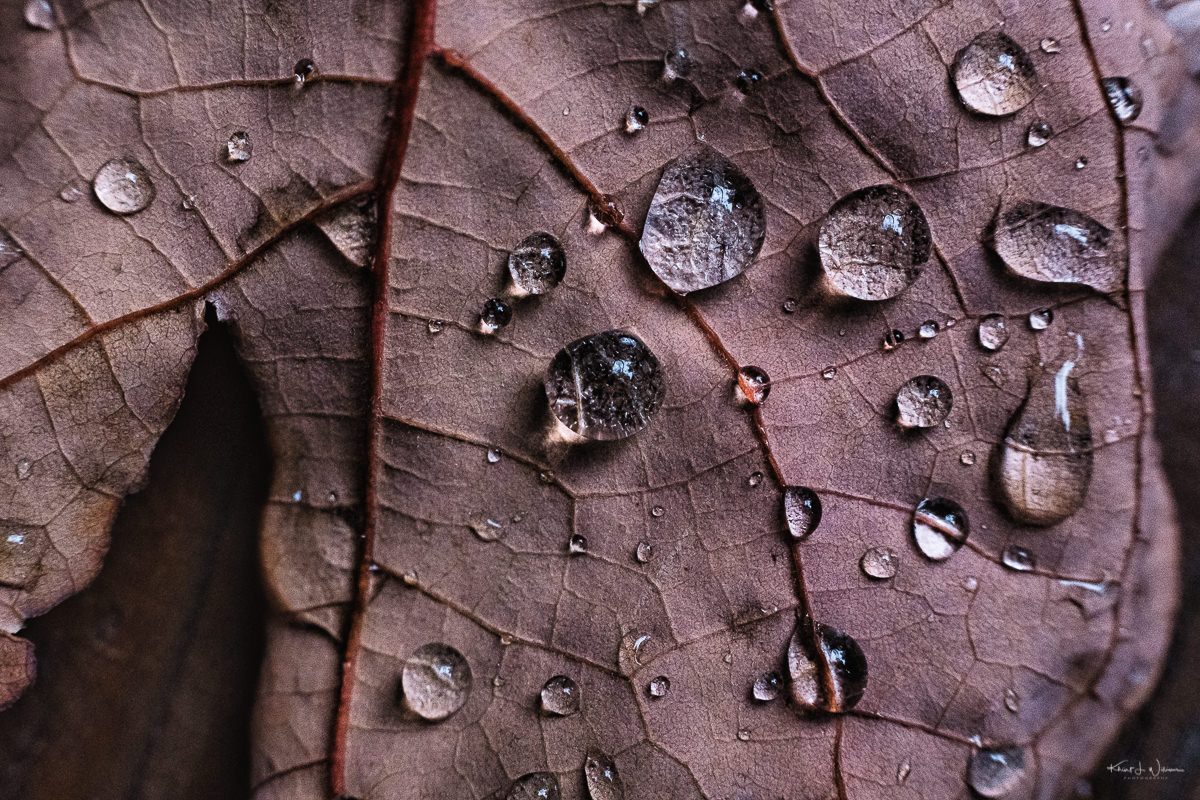
The images were a bit dark. I needed more light, but larger apertures would have reduced the DOF of each focus slice. I had set the Fuji X-T3 to capture 50 images adjusting the focal point from near to far in steps of 10, but I think I should have used an off-camera flash for additional lighting and captured one hundred images in steps 10 with a 3-second pause between each capture.
I don't know if this entry meets the criteria for weird, but given that I don't normally see objects at this level, it may be.
Wednesday 27 October, 2021 | FujiFilm X-T3 | XF16-55mmF2.8 R LM WR @ 55 mm | 0.5 sec at f/8.0 | ISO 160Wednesday 27 October, 2021 | FujiFilm X-T3 | XF16-55mmF2.8 R LM WR @ 55 mm | 0.3 sec at f/8.0 | ISO 160
During the past 20 months of the pandemic, I’ve been extremely restricted in terms of photographic opportunities. Not being able to shoot my regular action material and being confined to a small area has forced me (or rather I should say encouraged me) to go out and to shoot the same few scenes over and over again, and to try and do something different with it each time.
This is something that I would recommend any photographer do (but maybe not for this long), no matter your chosen genre or experience level. Wrapping yourself up in something that you’d perhaps never even considered and then re-imagining it is a great creative learning exercise.
The best camera is not necessarily the one you have with you, though that helps, too. It’s the one that does the job you need it to do: no more, no less.
I did my due diligence, thought long and hard about what I wanted versus what I needed, and I understood the choices I was making when I decided to purchase my first Fuji X camera. I knew why I wanted the Fuji X-T2. I knew the advantages and disadvantages and I accepted them. Unless it breaks, my current Fuji camera will be my camera of choice for a very long time.
In Things I wish I hadn't bought, photographer Hugo Pinho looks back at his photographic purchase history and writes about purchases he regrets and what he has learned along the way,
Many of these bad decisions and things that I regret buying are mistakes that we can only learn with time and experience. And some purchases I can't correctly define as a mistake because our needs change, evolve, and certain items stop making sense.
I have not bought a new digital camera since 2006. All subsequent digital cameras (replaced due to too many drops) were purchased pre-owned from KEH or MPB (never eBay). Unless I break the current one (X-T3), I expect to own it until it no longer functions.
I, too, have made many amateurish errors when purchasing accessories such as memory cards, batteries, backpacks, etc.
Putting cheap memory cards or batteries into a digital camera is like putting cheap tyres on your car. Something is sure to go wrong. When a cheaply made tyre wears out quickly and explodes, it can wreck your car as easily as a cheap exploding battery wreck a camera.
The first camera backpack I bought (2010) was also the last. Getting gear in and out of the pack was a hassle, especially while photo-walking in a city where the only place to put it is on a dirty sidewalk. Ugh! I switched to a sling camera strap, and honestly, I can't imagine returning to another option.
I put much effort into choosing lenses when I switched to Fuji several years ago. I analysed my Lightroom catalogue to guide my purchase decision. When I had my Nikon, I had three lenses; an AF-S DX Nikkor 35mm f/1.8 G, an AF-S DX 85mm f/1.8 G, and a Tokina 11-16mm zoom. I used the 35mm and the Tokina much more often than the 85mm but rarely used the 11mm end of the Tokina.
For my Fuji, I have two lenses. The XF16-55mmF2.8 R LM WR weighs less and needs less space than the combination of the XF16mm, XF35mm and XF50mm primes and covers the "standard range" of those primes. The XF27mmF2.8 is a lightweight lens for street photography and photo walks. Those two lenses cover most of what I need to do. I occasionally rent the XF100-400mm for a bird photography workshop.
I go backwards and forwards about what I want gr36.com to be. Over the years it has been a portfolio of sorts, an attempt at being a news website, a podcast host and lots of things in between. Nowadays it’s decidedly more amateur and more of an extension of me that evolves over time depending on what I am up to and an extension of me.
I don’t even have a ‘thing’ I want to write about. Most people seem to have an issue or a cause, or even an interest they want to cover all the ins and outs of. I loosely revolve around technology but expand into all sorts of areas that interest me, but I guess that's the point a personal blog should be an extension of the person hitting the publish button.
My blog, this blog is over 18 years old. It started as a tech blog where I wrote about security testing, Linux system administration, open-source, and web development. It became a blog about my early experience living with type 1 diabetes. It then morphed once more into its current state as a photography-related blog. I don’t know what’s next for me or this blog, but I do know it will continue to reflect my interests and thoughts.
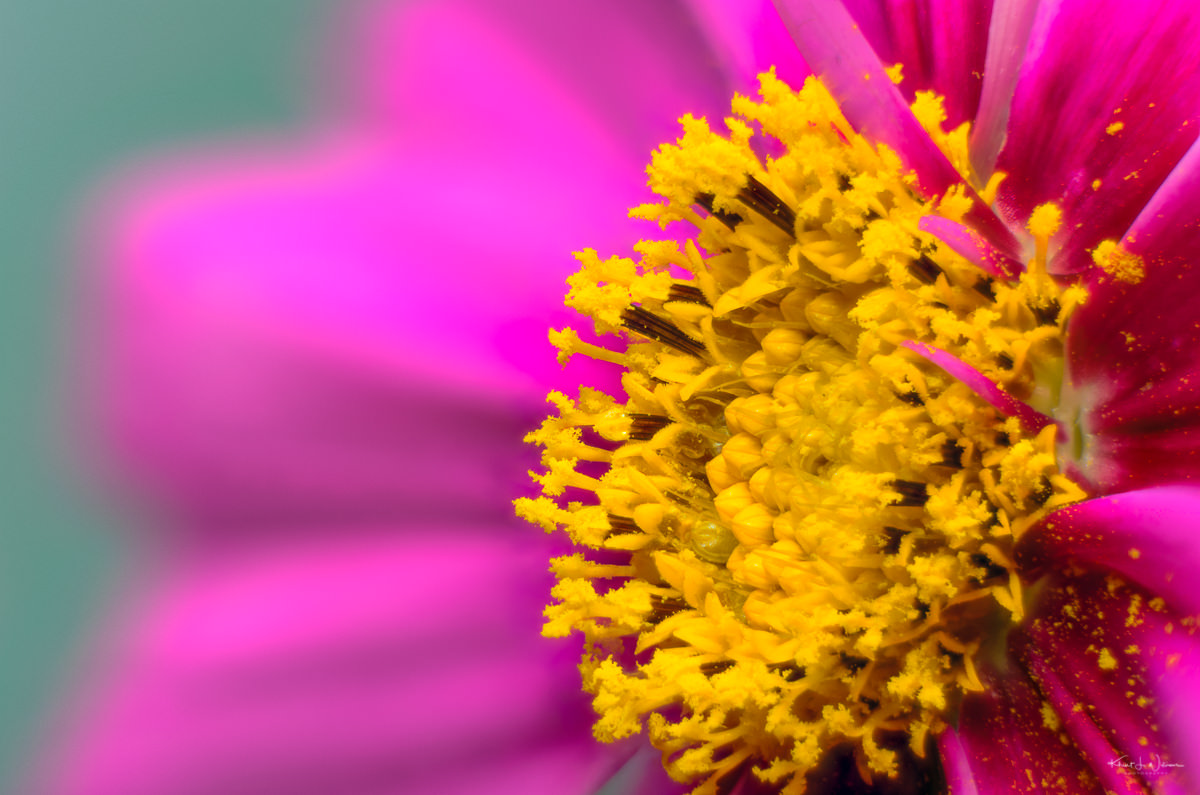
I created the header image of the pink flower from a bouquet my wife cut from the field of flowers at the local organic farm (CSA). I staged the flower on a stool I placed in my living room. I used a FotodioX extension tube with a Nikkor AF-S 85mm f/1.8 lens and a Nikon SB-600 flash. I mounted the camera on a macro rail. I set the flash on manual, and the shutter speed was 1/200s at ISO 100.
I focused the lens at the near edge of the flower pollen area, and I adjusted the rail incrementally toward the far end of the pollen area. I took about 30 images, but I used 28 photos to make this final image. I pulled the 28 images into Photoshop and used the Auto-Align Layers function. I then used the Auto-Blend Layers function and then flattened the layers. I exported the final image back into Adobe Lightroom.
The capture, import, blending, and re-import took about 30 minutes. At this point, I was tired, and I just wanted to be done with the effort. As seen below, some of my earlier attempts were not good.
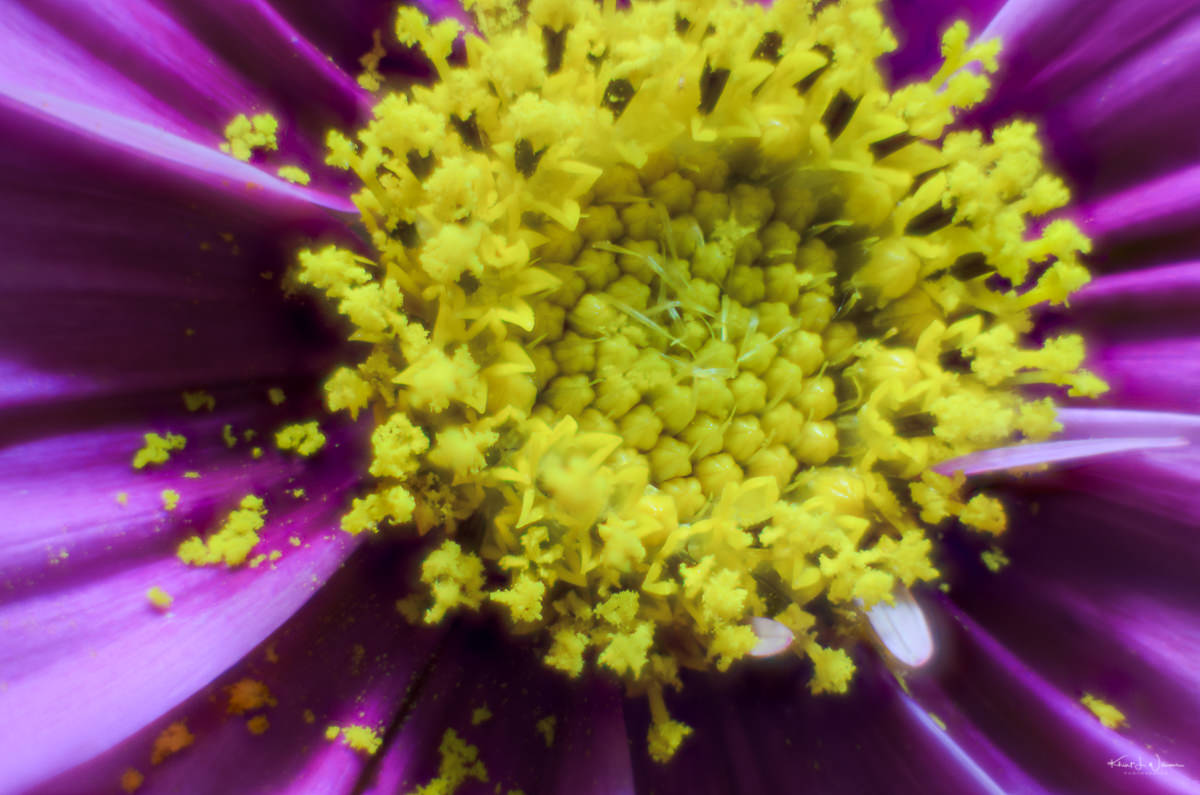
This attempt is my second serious try at doing macro and, so far, my best result. I used a focus stacking technique from a blog post by Don Komarechka. The technique uses Photoshop CC's Auto-Align and Auto-Blend Layers feature. My initial results were mixed. I don't think I shot enough images to stack, and I think something moved slightly between captures.
I re-read the blog post a few times, and after searching the web, I discovered a software package called Zerene Stacker. I used the same set of images. However, instead of Photoshop, I used Zerene Stacker focus stacking software. The images were exported as TIFF to the hard drive and imported into Zerene Stacker. Zerene Stacker did all the work of auto-aligning the photos and creating the stacked image. I imported the final PMax image back into Adobe Lightroom.
I am somewhat proud of my final result. I learned a lot. I learned to overcome some vanity. I had to use reading glasses to see the LCD screen clearly so I could focus. I had to be patient as I made slight adjustments on the rail and shot each frame. I had to think through what I wanted to accomplish and what I needed to do to get a good result. I learned that I could operate my camera entirely in manual mode.
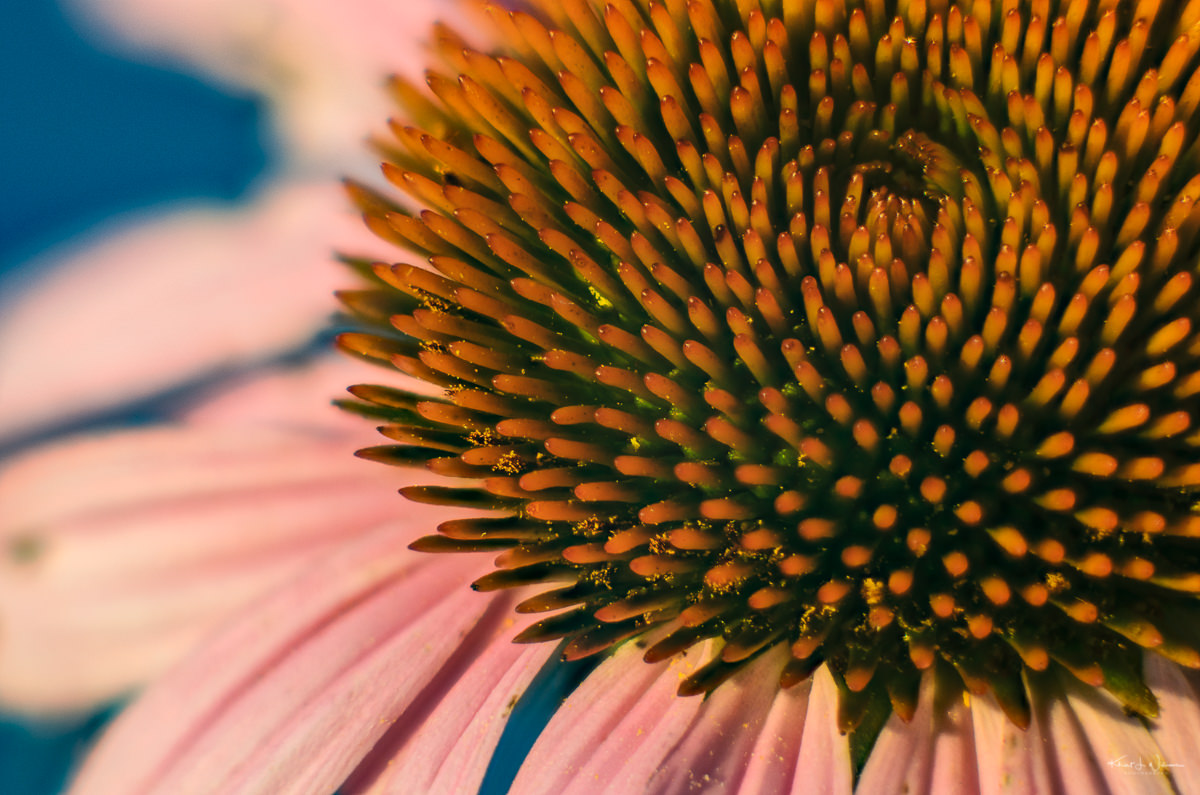
Personal insight: For live outdoor subjects, macro photography is 10% focusing, 40% patience and 50% dumb luck.
We use cookies on our website to give you the most relevant experience by remembering your preferences and repeat visits. By clicking “Accept”, you consent to using ALL the cookies. However, this website has no interest in selling your information. It does not explicitly use social media cookies from Facebook, Google, Twitter, Threads, Instagram etc. Read More
This website uses cookies to improve your experience while you navigate through the website. Out of these, the cookies categorized as necessary are stored on your browser as they are essential for the working of basic functionalities of the website. We also use third-party cookies that help us analyze and understand how you use this website. These cookies will be stored in your browser only with your consent. You also have the option to opt out of these cookies. But opting out of some of these cookies may affect your browsing experience.
Necessary cookies are absolutely essential for the website to function properly. These cookies ensure basic functionalities and security features of the website, anonymously.
Cookie
Duration
Description
cookielawinfo-checkbox-analytics
11 months
This cookie is set by GDPR Cookie Consent plugin. The cookie is used to store the user consent for the cookies in the category "Analytics".
cookielawinfo-checkbox-functional
11 months
The cookie is set by GDPR cookie consent to record the user consent for the cookies in the category "Functional".
cookielawinfo-checkbox-necessary
11 months
This cookie is set by GDPR Cookie Consent plugin. The cookies is used to store the user consent for the cookies in the category "Necessary".
cookielawinfo-checkbox-others
11 months
This cookie is set by GDPR Cookie Consent plugin. The cookie is used to store the user consent for the cookies in the category "Other.
cookielawinfo-checkbox-performance
11 months
This cookie is set by GDPR Cookie Consent plugin. The cookie is used to store the user consent for the cookies in the category "Performance".
viewed_cookie_policy
11 months
The cookie is set by the GDPR Cookie Consent plugin and is used to store whether or not user has consented to the use of cookies. It does not store any personal data.
Functional cookies help to perform certain functionalities like sharing the content of the website on social media platforms, collect feedbacks, and other third-party features.
Performance cookies are used to understand and analyze the key performance indexes of the website which helps in delivering a better user experience for the visitors.
Analytical cookies are used to understand how visitors interact with the website. These cookies help provide information on metrics the number of visitors, bounce rate, traffic source, etc.
Advertisement cookies are used to provide visitors with relevant ads and marketing campaigns. These cookies track visitors across websites and collect information to provide customized ads.