This is a follow-up to my previous blog entry on my Lepanthes Telipogoniflora orchid.
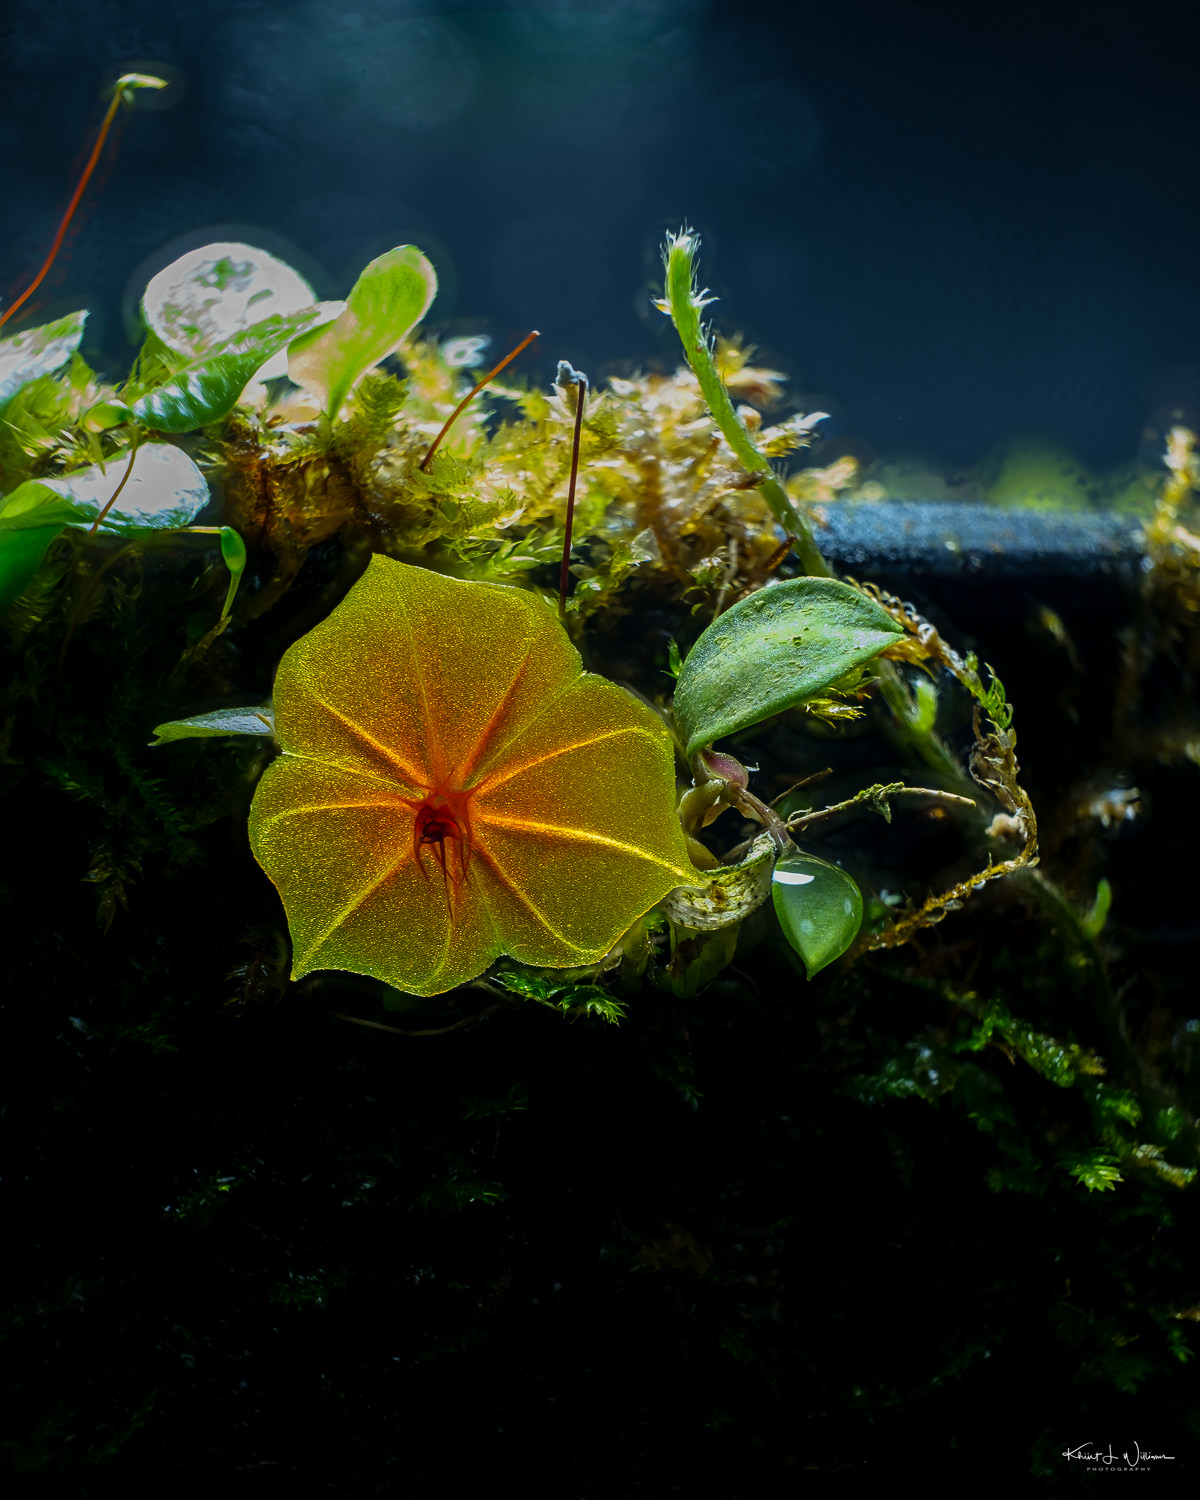
When I published my previous blog post, the Lepanthes Telipogoniflora flower had partially bloomed. However, it has now fully opened, revealing its distinct parabolic shape. Interestingly, the colours of the flowers differ from my initial expectations. Instead of the vibrant red in online photos, they possess a lovely orange-brown hue. Nevertheless, they remain remarkably beautiful.
I employed focus bracketing techniques to capture this image, starting from the tip of the Lepanthes Telipogoniflora's stamens.
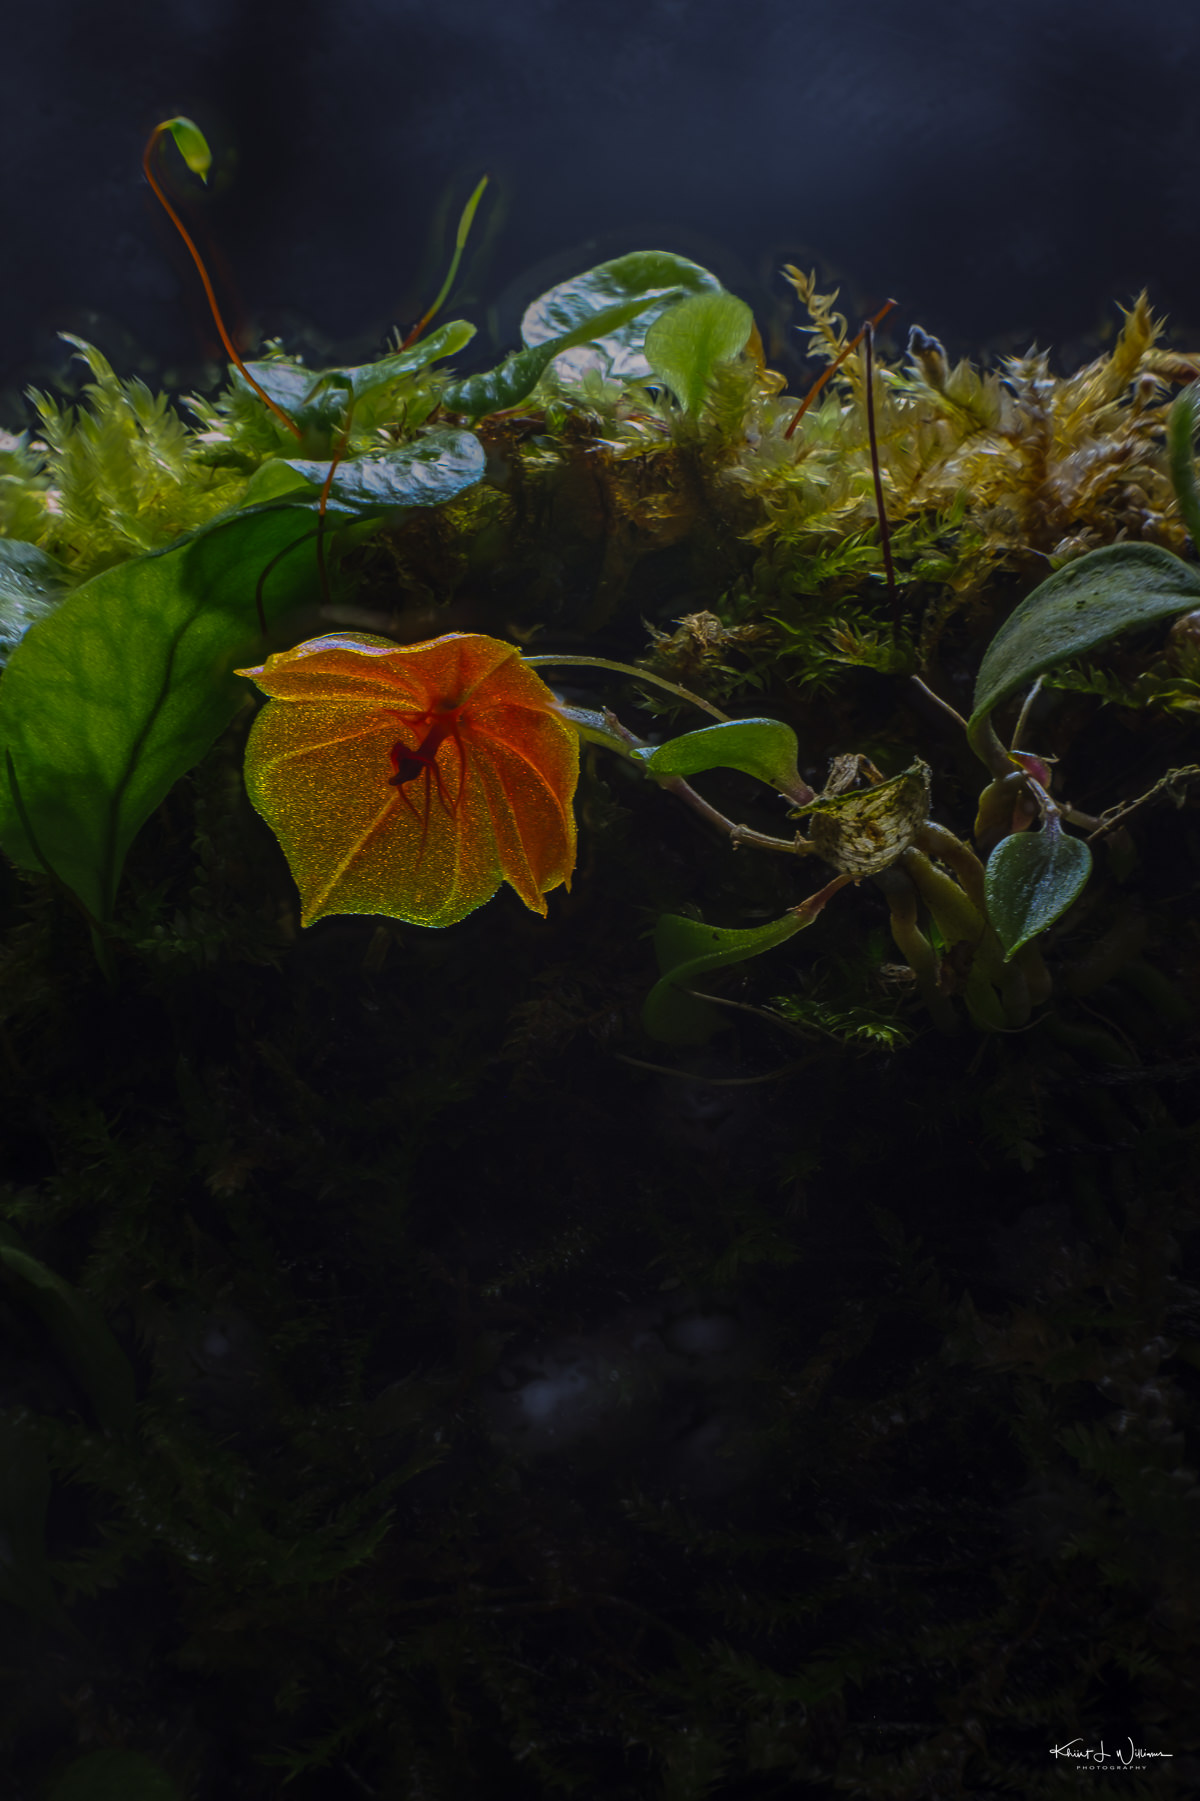
My recent success capturing a Lepanthes telipogoniflora orchid using macro extension tubes.
I wrote focus stacking with my Fuji gear over two years ago. When I wrote that post in February 2021, I had a Fuji X-T2 body and two lenses, the Fujinon XF16-55mmF2.8 R LM WR and Fujinon XF27mmF2.8. Both are very versatile lenses, but neither is a macro lens. At that time, I rented a Fujinon XF80mmF2.8 R LM OIS WR and tried to focus bracketing and focus stacking using just the Fujinon XF16-55mmF2.8 R LM WR. I decided to add the Fujinon XF16-55mmF2.8 R LM WR to my kit. Somewhere between the winter and fall of 2021, I made a different decision.
Last fall, I bought a Fujifilm MCEX-16 macro extension tube. Considering how soon it followed my initial musings about acquiring the Fujinon XF80mmF2.8 R LM OIS WR lens, the exact reasoning behind that purchase is a bit foggy now. It's quite possible I decided that spending a whopping $1,199 on a brand-new lens wasn’t my first choice. Maybe my inner self gently saying, "Hey, you probably won't be using this lens all that much". Looking back at how frequently I've used the MCEX-16, my inner self was onto something!
You know, even though I had plans to dive deeper into macro photography during the pandemic, I've only had the chance to take my MCEX-16 out for a spin a handful of times, just six. But you know what? Compared to $1,199, the $129 price tag feels well worth it. Sure, a twinge of guilt nags me for not using the MCEX-16 more, but it's certainly less than if I had splurged on the XF80mmF2.8 R LM OIS WR. And guess what? Yesterday, I found several opportunities to brush off the MCEX-16's cobwebs. Hopefully, there will be more opportunities to come.
Lepanthes telipogoniflora · Tuesday 6 June 2023 · FujiFilm X-T3 · XF16-55mmF2.8 R LM WR · MCEX-16
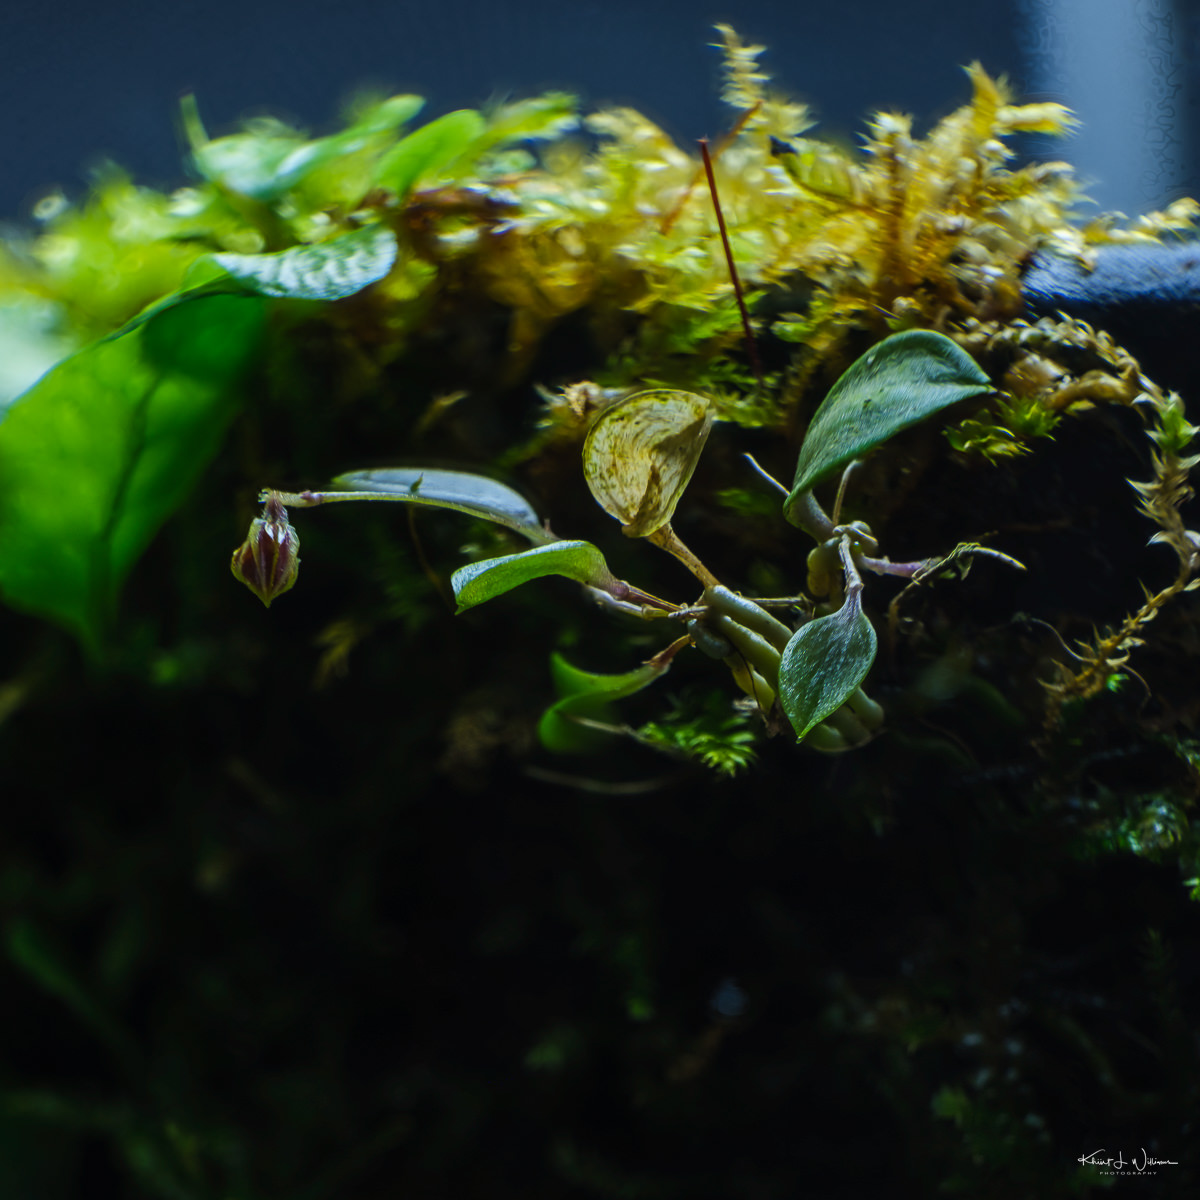
The tiny but amazing Lepanthes telipogoniflora orchid in my forest terrarium (the one I set up wabi-kusa style!) has gifted me a fresh new flower bud. It hasn't unfurled completely yet, but its very presence is a clear shout-out that my loving care for the terrarium is paying off, and boy, am I stoked!
I wanted to freeze this moment of victory in a photograph. The Lepanthes telipogoniflora orchid is a petite little thing, and its flowers aren't exactly billboard size either; when in full bloom, I expect the flower to be about 6-12mm wide. So I knew I needed to capture a detailed image to do justice to this little wonder.
That's when my brain lit up like a lightbulb, "Hey, why not whip out your extension tube and show off your focus bracketing skills?" So, without wasting a moment, that's exactly what I did.
Focus bracketing and focus stacking are both techniques used in photography to achieve a greater depth of field.
Focus bracketing involves capturing multiple images of the same subject, each with a slightly different focus point. The photographer adjusts the focus manually or uses autofocus at different distances, creating a series of images with different areas in focus.
Focus stacking involves using specialised software to select the sharpest areas from each captured frame, then blending them together, taking the in-focus portions from each image and creating a composite image that is entirely sharp from foreground to background. This technique is particularly useful in macro photography or any situation where achieving a deep depth of field is challenging. The result is typically a single image with an extended depth of field.
To capture the delicate beauty of the Lepanthes telipogoniflora orchid, I used my Fuji X-T3 and attached my trusty Fujinon XF16-55mmF2.8 R LM WR lens and added the MCEX-16 extension tube. Ensuring stability, I mounted the camera onto my reliable Manfrotto tripod. I zoomed out to 55mm, set my focus point using autofocus, and switched the camera to manual focus.
Lepanthes telipogoniflora · Tuesday 6 June 2023 · FujiFilm X-T3 · XF16-55mmF2.8 R LM WR · MCEX-16
Using the convenient focus peaking and focus check features of the X-T3, I set my focus point on the tip of the orchid's miniature flower. Initially, I opted for focus bracketing 60 frames with a one-step size and one-second intervals between exposures. Why 60 images?
I wanted to experiment with different compositions and ensure good depth of field overlap between each frame to prevent any unwanted blurring. By capturing a series of focal points with a step size of one, I could create a properly stacked image encompassing everything from the front of the flower bud to the moss in the background.
I had worked with JPEG images in my previous attempts at focus stacking using Photoshop. However, this time, I desired a higher resolution and the flexibility to post-process the stacked image. I decided to export the RAW (RAF) files as TIFF and import them as layers in Photoshop. Unfortunately, I encountered some challenges along the way.
I don't know what caused the issue, but the auto-alignment process never completed when I opened the TIFF files as layers in Adobe Photoshop v24.5. Despite attempting multiple times, I couldn't achieve the desired results. Naturally, I felt disappointed by this setback and knew I had to change my approach.
Before Photoshop introduced the focus stacking feature, I relied on specialised software called Zerene Stacker for my focus stacking needs. Zerene Stacker is designed to help photographers achieve greater depth of field by combining multiple images with different focus points into a single composite image that is sharp from front to back.
Zerene Stacker offers advanced algorithms and features that help align and blend the images precisely, resulting in high-quality focus-stacked images. It provides options for automatic alignment and stacking and manual control for fine-tuning the stacking process. The software offers various tools for retouching and optimising the final stacked image, such as dust and artefact removal and output options for different file formats.
Zerene Stacker is a valuable tool for overcoming macro photography's limited depth of field. It allowed me to open the series of TIFF images I exported and seamlessly merge them to create a final image with extensive sharpness throughout the subject. The fact that I could process a series of 60 TIFF images, each with a resolution of 26 megapixels, in under five minutes highlights the software's speed and performance.
I noticed that even though the resulting image looked pretty sharp, the depth of field wasn't quite what I wanted. I decided to make some adjustments. I recomposed my shot and tweaked the focus bracket settings to capture 60 images, with each step being two units apart. The results turned out much better this time around.
One important point is that frames can be set to a higher number than necessary. If the lens reaches infinity during the bracketing process, it will automatically stop, ensuring no additional frames are taken unnecessarily.
When considering the "Steps," think of it as the amount the focus shifts between each frame. This becomes particularly crucial when dealing with a shallow depth of field, as achieving a convincing stack requires a significant overlap in focus. Therefore, when shooting macro photography, it is advisable to use a smaller step number. The range of steps recommended is usually between 1 and 5, which is believed to correspond to 20% to 100% of the depth of field of a single frame. However, there is currently no official documentation from Fujifilm that confirms this.
In terms of the interval setting, adjusting it can be beneficial in specific situations. I typically use a tripod when doing macro photography. But if you are concerned about camera shake, increasing the interval between frames can help mitigate that issue. Allowing more time between shots reduces the likelihood of introducing camera shake.
After taking my initial set of photographs of the flower bud, I exercised some patience and waited for a few weeks. And my patience paid off. As I went about my routine maintenance of the forest terrarium, I noticed that the flower had finally blossomed; its delicate petals unfolded. This tiny flower measures just over 1mm in diameter, showcasing nature's intricate beauty on a miniature scale. I intend to cherish and savour its presence for as long as it graces my terrarium.
I have created a terrarium inspired by the wabi-kusa concept. Wabi-kusa terrariums are influenced by the Japanese philosophy of wabi-sabi, which embraces the beauty of imperfection and transience in nature and art.
Growing up on islands in the Caribbean surrounded by dense tropical rains forest and streams filled with unique fish and amphibians, I developed an appreciation for nature. My Uncle Clifford often took the family on adventures into the jungle1.
I started creating freshwater aquariums as a hobby during my childhood and continued into adulthood. It started with a small 1-gallon glass aquarium that Dad bought for me and added guppies caught from a local stream. But soon after that, I owned larger planted aquariums and multiple species aquariums and taught myself the art of freshwater fish breeding. I was always attracted to the planted aquarium.
In the mid-1990s, I discovered the aquarium designs of photographer and aquarist Takashi Amano. Takashi-san was the author of Nature Aquarium World (TFH Publications, 1994), a three-book series on aquascaping (underwater gardening) freshwater plants and aquarium fish. I bought all of his books. Takashi-san's designs had a distinctive style of plant layout which utilised Japanese gardening concepts such as wabi-sabi and Zen rock arrangements. His tank compositions aspired to mimic nature in their appearance.
I was inspired to create several planted freshwater aquariums focused on creating a biotype environment suitable to discus (Symphysodon) and angelfish (Pterophyllum). I enjoyed planting the tank and watching the fish, but Bhavna keenly watched my hobby's cost. It was expensive to recreate and maintain specific ecosystems of fish and plants within the confines of a "glass box".
Takashi Amano's interest in aquaria led him to create the Japanese company Aqua Design Amano (ADA). While perusing the ADA website, I learned about wabi-kusa terrarium.
Wabi-kusa terrariums are influenced by the Japanese philosophy of wabi-sabi, which embraces the beauty of imperfection and transience in nature and art.
The concept of wabi-sabi comprises two interconnected aesthetic principles: wabi, meaning "subdued, austere beauty," and sabi, referring to "rustic patina." It draws inspiration from the Buddhist teachings on impermanence, suffering, and the absence of self-nature. The characteristics of wabi-sabi include asymmetry, roughness, simplicity, economy, austerity, modesty, intimacy, and an appreciation for natural objects and the forces of nature.
Wabi-kusa, in turn, draws inspiration from wabi-sabi. The term "kusa" means grass. Over time, wabi-sabi has come to symbolise "wisdom in natural simplicity" in Japan and is often referred to as "imperfect beauty" in art. Wabi-kusa combines these ideas and embodies the appreciation of simple, natural, and imperfect beauty.
In wabi-kusa, various aquatic plants in their emersed form are planted into small soil balls. Takashi Amano and his company, Aqua Design Amano (ADA), popularised this technique. Amano used wabi-kusas to efficiently plant larger aquarium tanks by placing pre-cultivated soil balls in the tank instead of individually planting each aquatic plant. Over time, the plants transition to their submersed form and establish roots in the substrate. However, wabi-kusas are not limited to aquarium use. They are also commonly displayed in beautiful vases or bowls made of glass, either emersed or above the water line, as independent and aesthetically pleasing design objects.
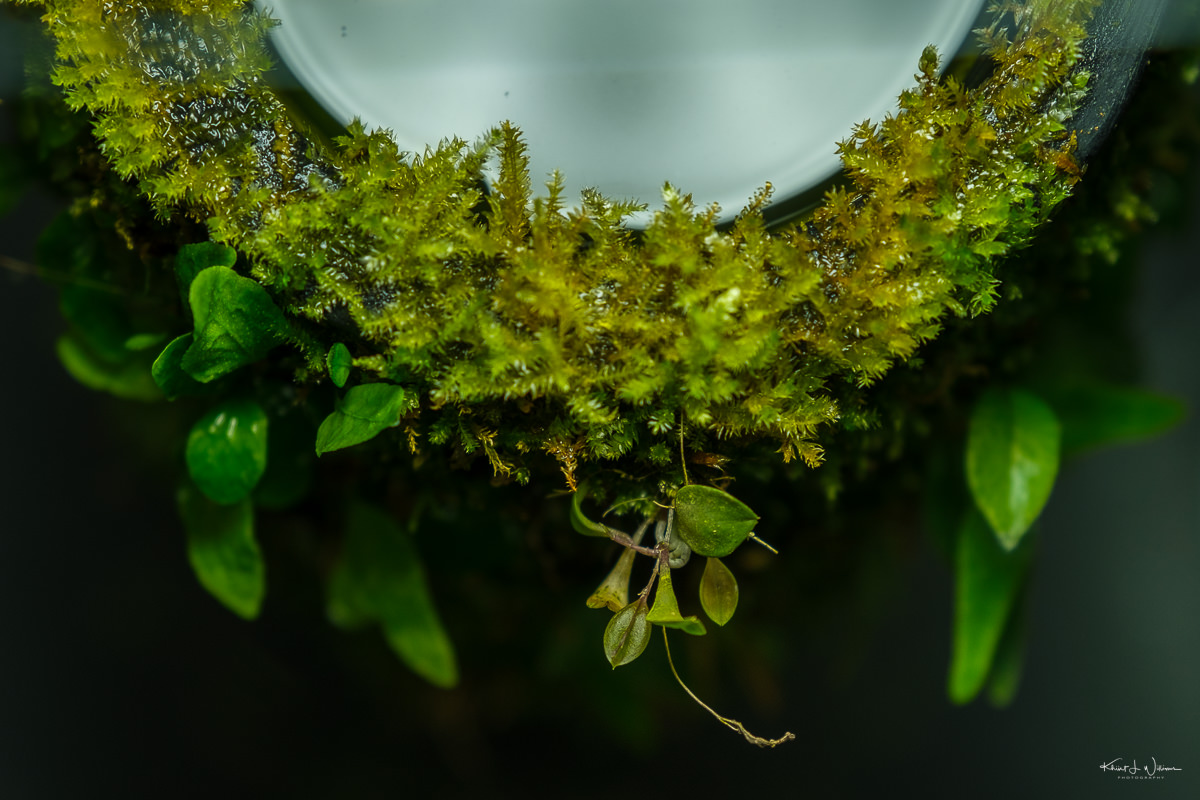
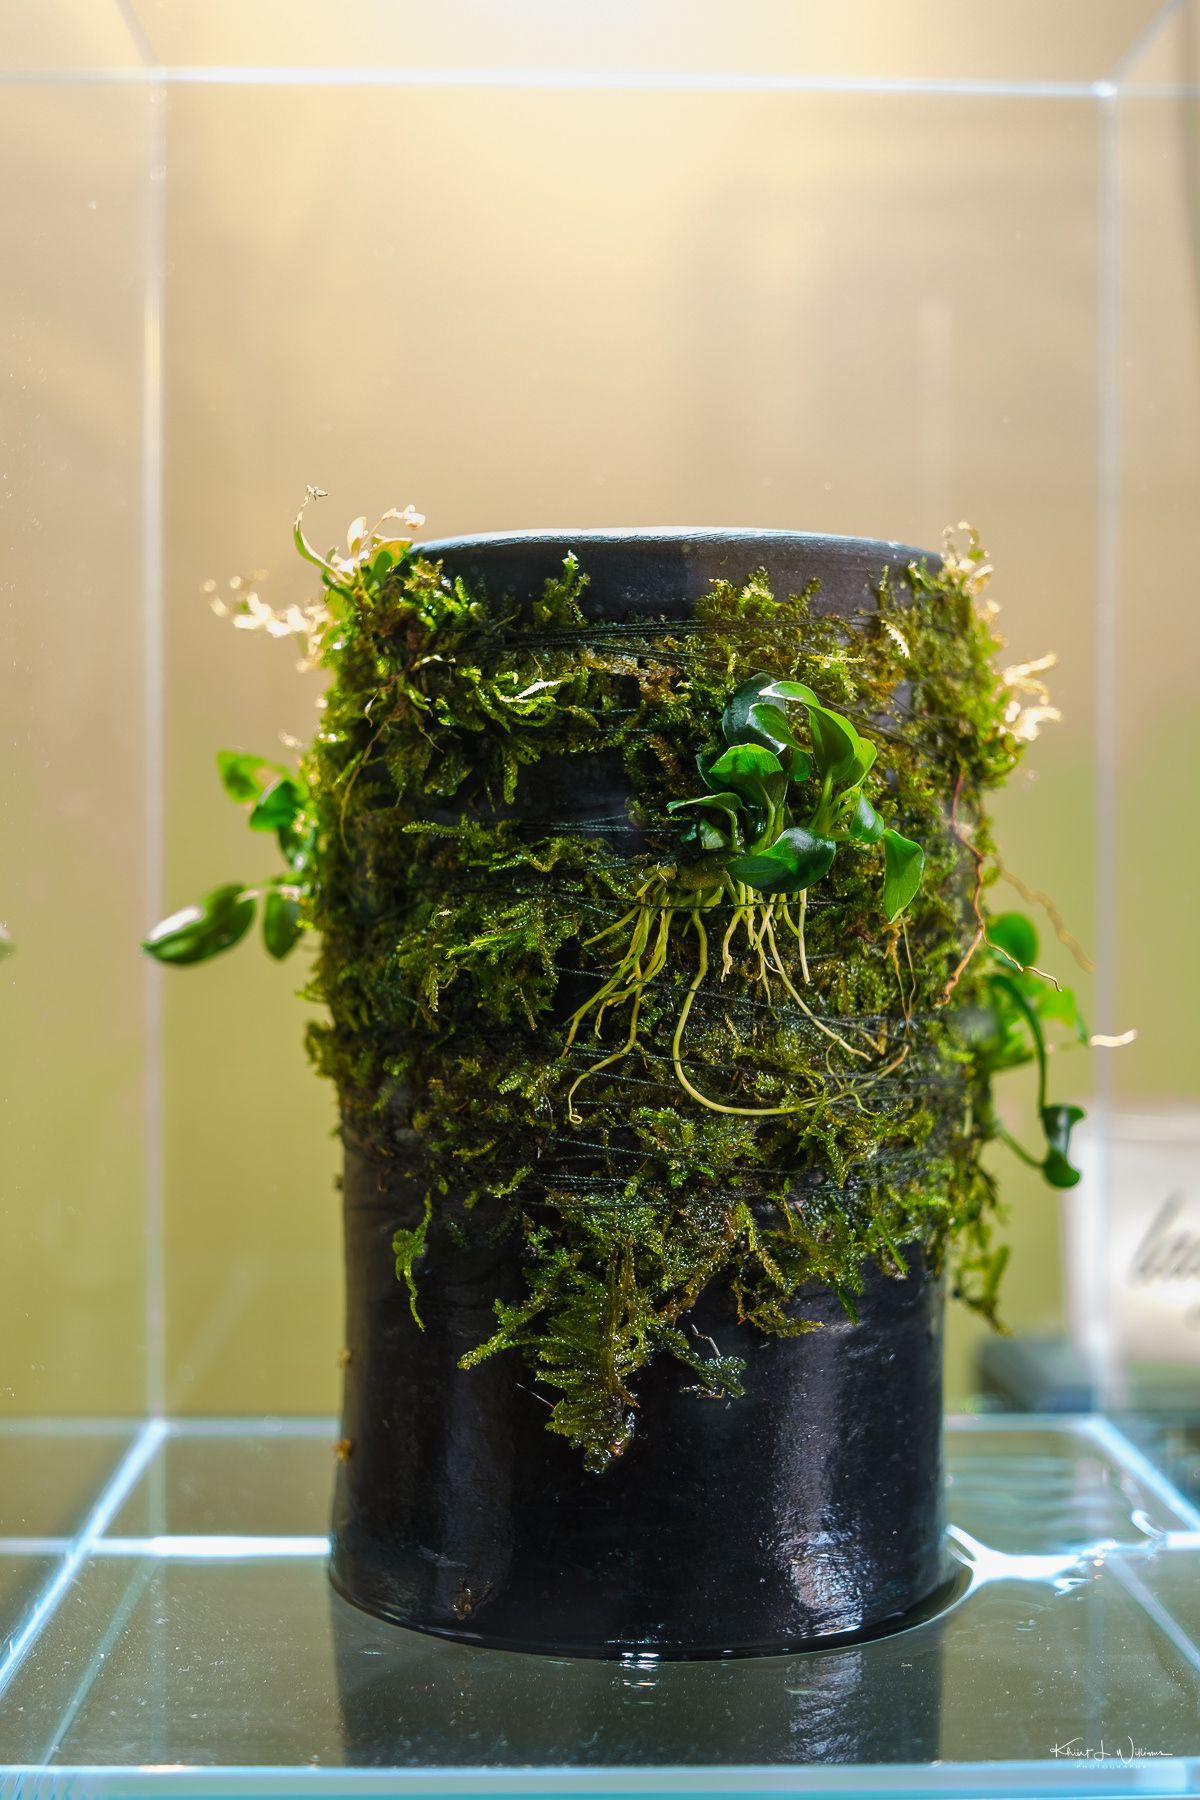
So that led me down a rabbit hole of links to articles that led me to the DOOA Terra Base, a new product from Aqua Design Amano (ADA). Aqua Design Amano (ADA) have taken the wabi-kusa concept further by developing a method to grow tiny epiphytic orchids and ferns on small moss mats instead of soil balls. These moss mats are then attached to the surface of a porous stone cylinder called a DOOA Terra Base using delicate strings. The TERRA BASE has a hollow centre where water is poured, and throughout the day, the moss slowly absorbs moisture from the stone, nourishing the epiphytes. The moss also acts as an anchor, allowing the epiphytes to cling to the sides of the TERRA BASE. The appeal of the TERRA BASE lies in its ability to simulate the natural habitat of mosses, ferns, and orchids, resembling a decaying tree trunk in a tropical forest.
As soon as I saw it, I was hooked and wanted to create a TERRA BASE terrarium inspired by the wabi-kusa concept. The most significant decision I had to make was which size I wanted.
I enclosed the wabi-kusa setup in a Neo Glass AIR aquarium tank with a glass top to complete my terrarium. The tank is lit using a full-spectrum LED light for approximately 12 hours daily. Additionally, I spray the TERRA BASE with a liquid "mist" fertiliser, DOOA Wabi-Kusa Mist, once a day to provide essential nutrients to the plants. The mist also enhances the colour of the leaves and has some repellent effect on pests.
This is what my initial creation looked like in October of last year.
Monday 31 October 2022 · FujiFilm X-T3 · XF27mmF2.8 R WR
I spent a total of US$233 on this bit of kit. It feels expensive. It is expensive. But I enjoyed creating this slice of nature inside my home. It reconnects me to the tropical rainforests I explored growing up in the West Indies. Observing the plants as they grow is a joy and provides a respite from the grey doldrums of winter.
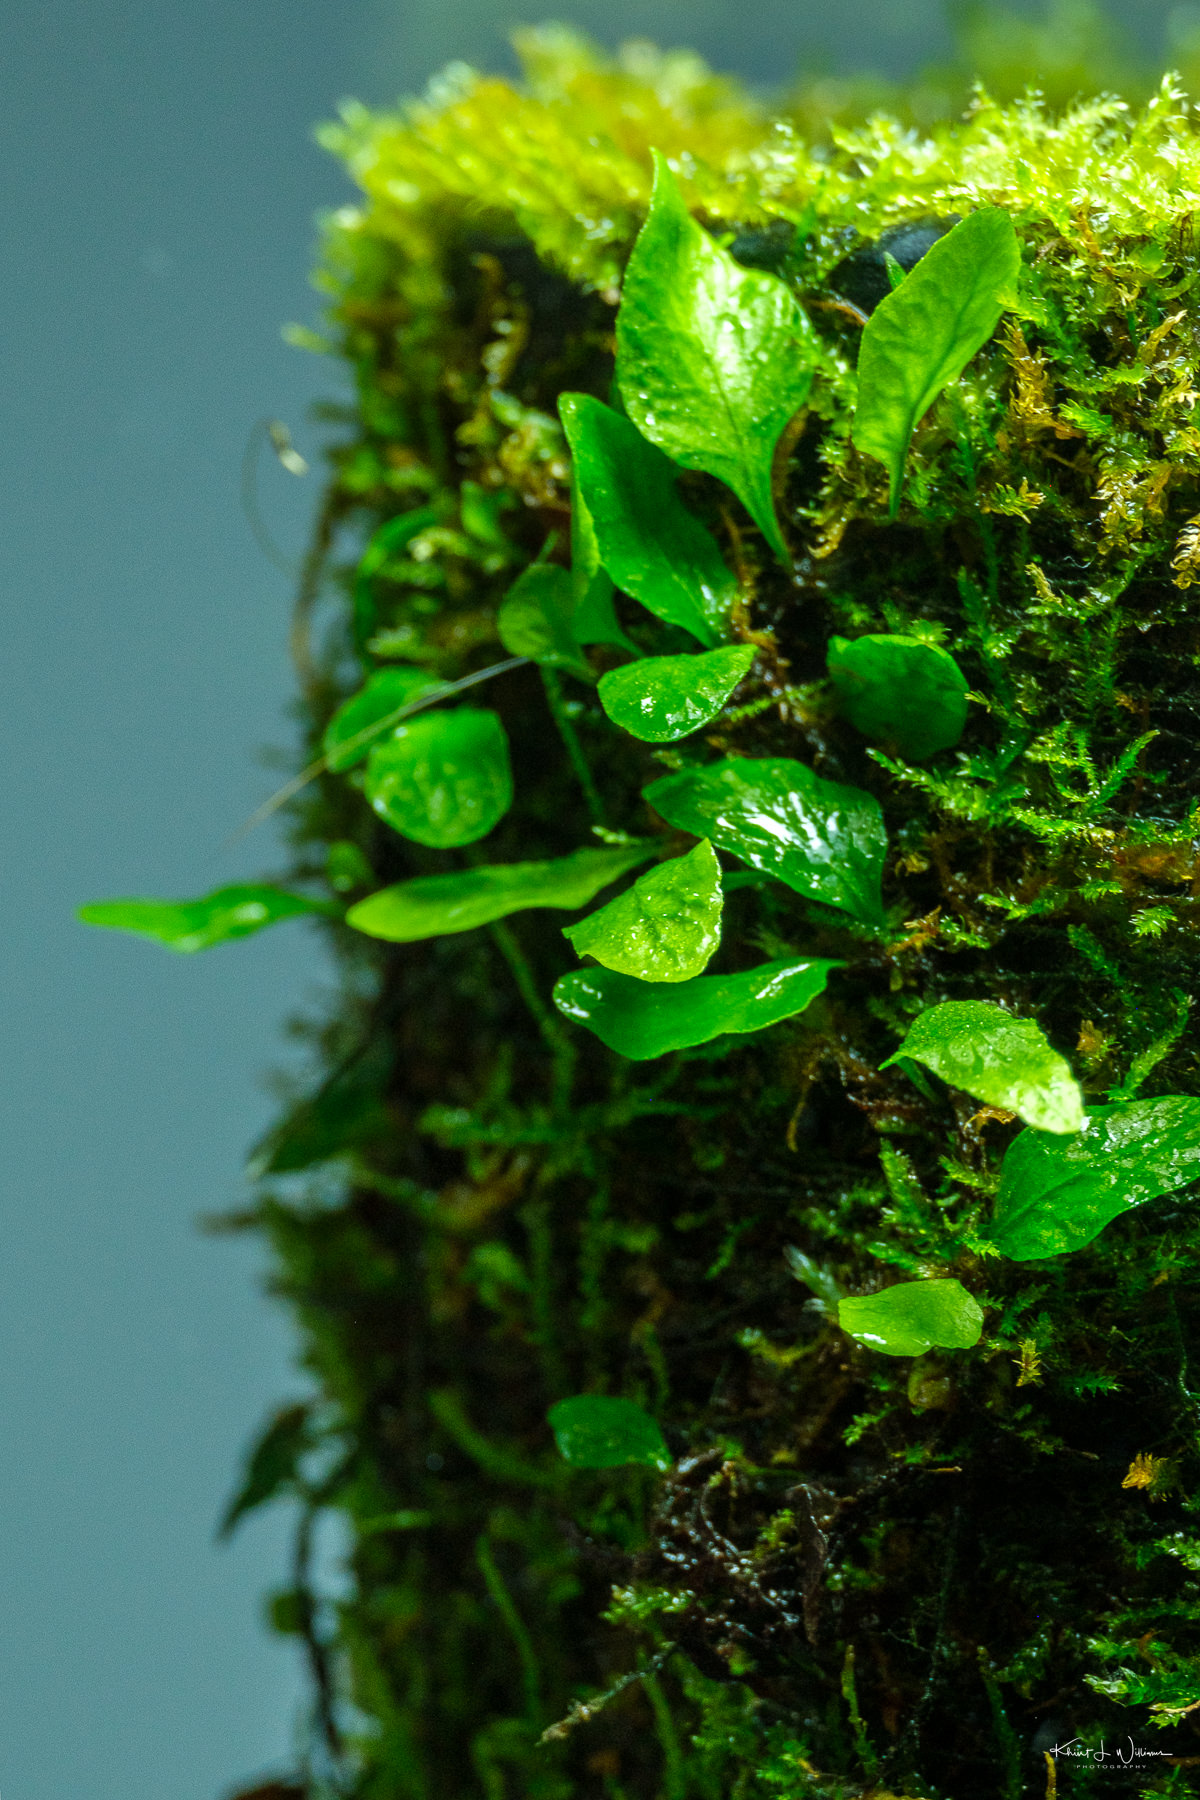
While waiting for the Terra Base to arrive, I learned as much as possible about how to keep suitable mosses, ferns, orchids and other plants to create my forest terrarium. Glassbox Tropical sells several plants amenable to the Wabi-kusa style of terrarium. I am especially drawn to the miniature ferns in the genus Microgramma. Regions and countries include Mexico, the Caribbean, Central America, South America (including Argentina and Brazil), tropical Africa, southern Africa, and western Indian Ocean islands. They are also found in Asia. I ordered a Microgramma piloselloides from specimen Glassbox Tropical and carefully wrapped it around the small DOOA Terra Base.
Terrabase after 9 months · Wednesday 10 May 2023 · FujiFilm X-T3 · XF16-55mmF2.8 R LM WR
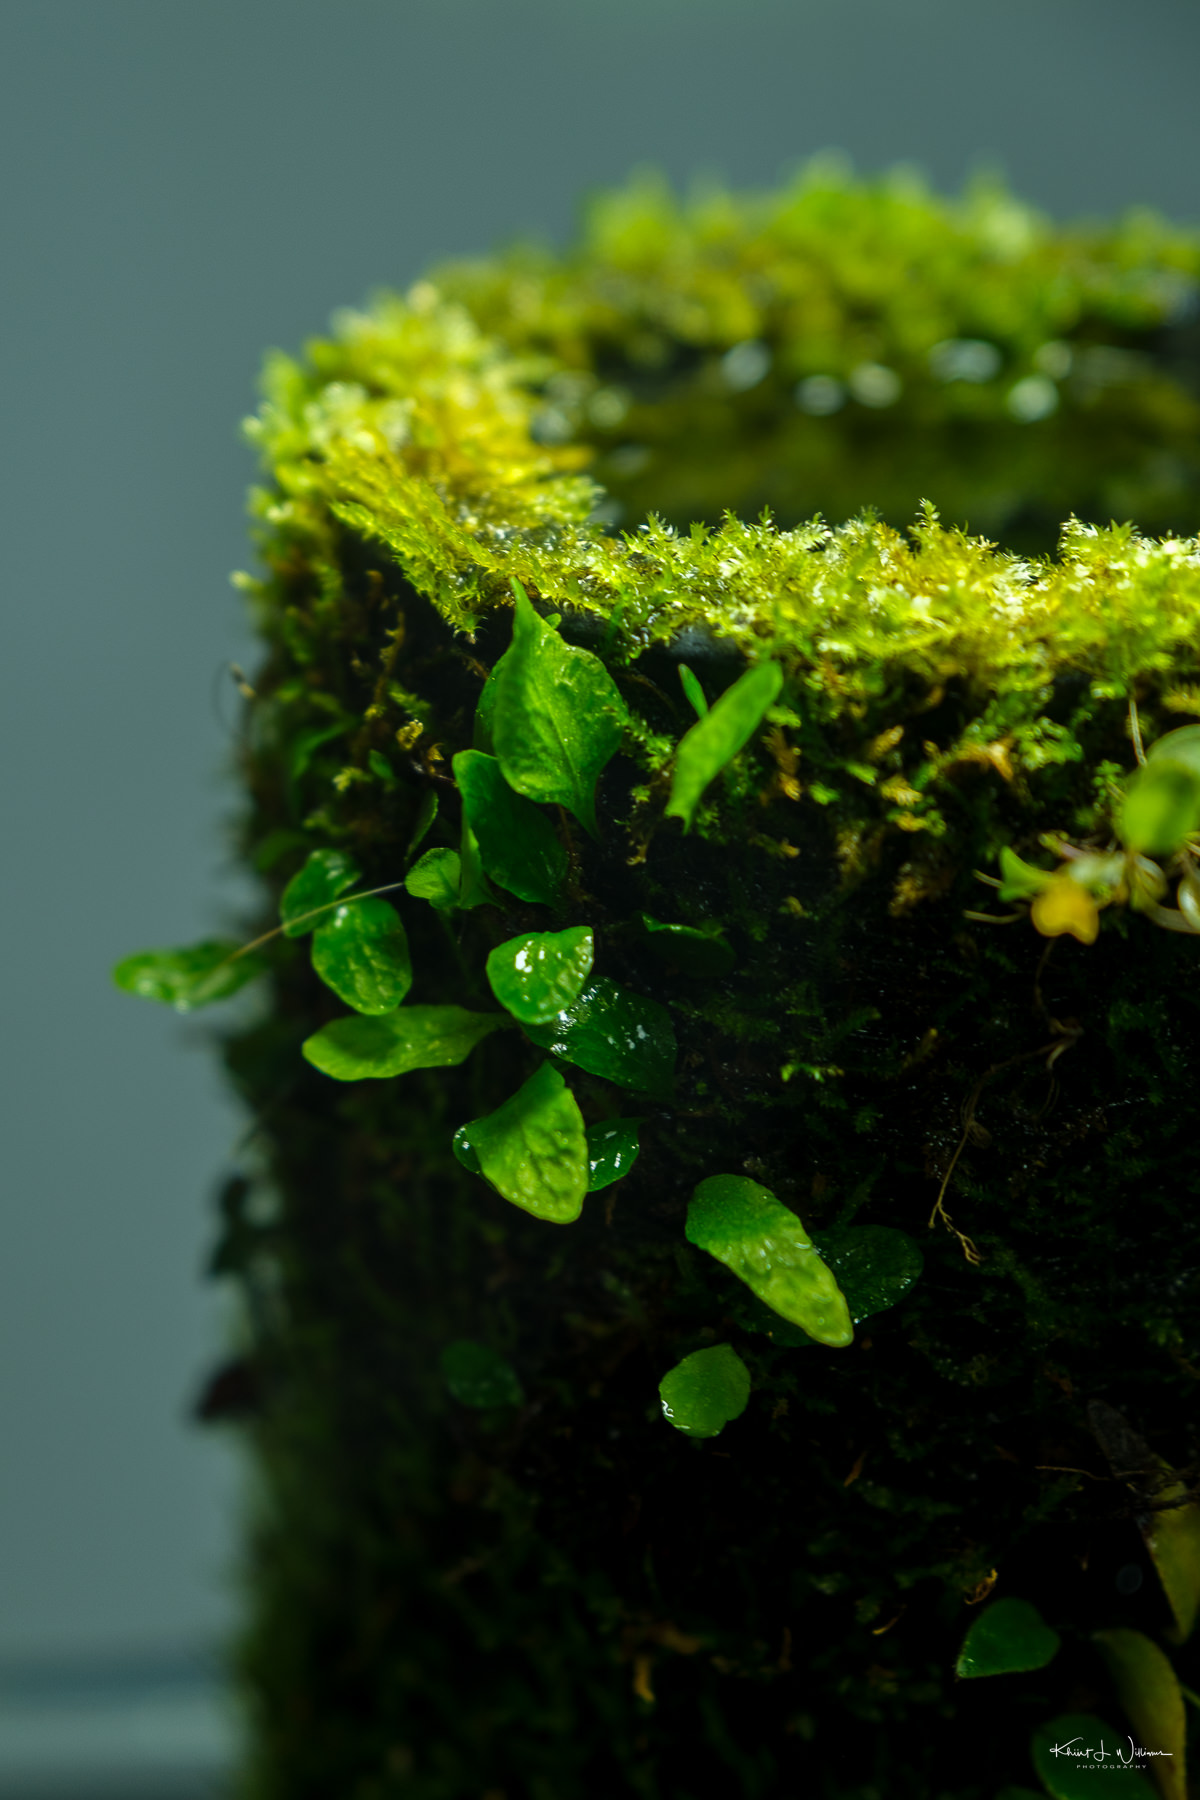
Anubias Nana is a popular aquatic plant known for its easy growth and adaptability to various water conditions. It belongs to the Araceae family and originates from West Africa. This plant can thrive in both aquariums and terrariums, whether submerged or emersed. It is best attached to hard surfaces like wood or stones using its rhizome. Anubias Nana has low to medium light requirements and benefits from regular fertilisation. It grows to 3-5 inches. It is commonly used in planted tanks and is recommended for beginners, which is one of the reasons I chose to use it for this terrarium. But my experience with the anubias in the aquarium did help me with the terrarium. After a few weeks, the anubias nana wilted, turned brown and died.
Wednesday 10 May 2023 · FujiFilm X-T3 · XF16-55mmF2.8 R LM WR
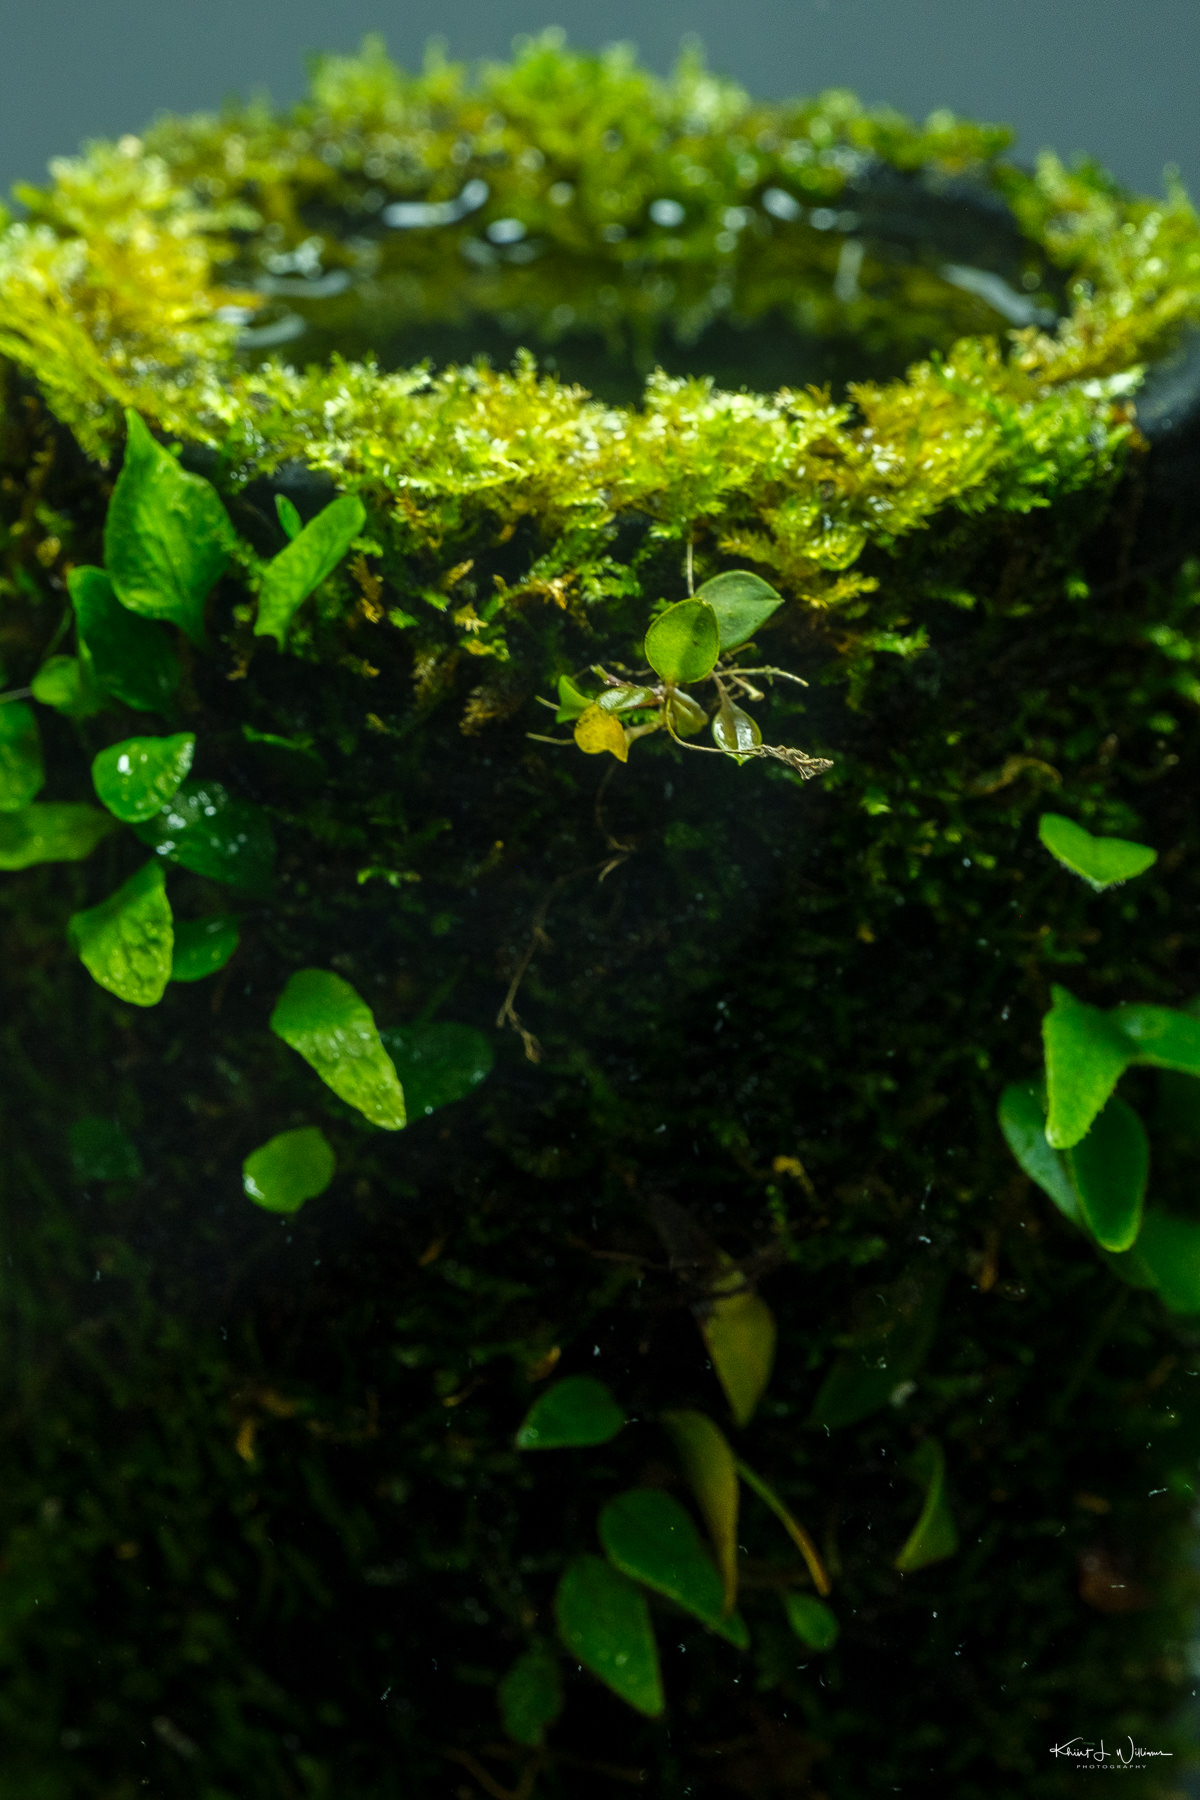
Christmas Moss, also known as Xmas Moss or Vesicularia sp., is a freshwater aquarium moss that is easy to care for. The moss forms mats that create a textured look to the Terra Base. Christmas Moss can adapt to various conditions but thrives in cooler temperatures between 20ºC to 25ºC, and it prefers low to medium light levels. It is sold as loose portions measuring approximately 2 inches.
Lepanthes is a large genus of orchids with about 800–1000 species, distributed in the Antilles and from Mexico through Bolivia. Almost all the species in the genus are small and live in cloud forests. Lepanthes derives its generic name from the Greek lepis (scale) and anthos (flower), referring to the tiny flowers of many of the species in this genus. Lepanthes telipogoniflora is native to Colombia. It is an epiphytic species with small, green leaves. However, its flowers are striking, with large iridescent orange and yellow blooms that shimmer under certain lighting. It thrives in warm to hot temperatures and prefers medium to high moisture levels. Glass Box Tropicals rates its care difficulty as a 7 out of 10. My Lepanthes telipogoniflora specimen was about the size of a thumbnail and had one flower on it when it arrived, but it has not flowered since "planting".
Wednesday 10 May 2023 · FujiFilm X-T3 · XF16-55mmF2.8 R LM WR
I set up my NEO Terra Base with a layer of moss using the DOOA Terra Line to wrap it around the top and mid-section. I then added a few anubias to the middle of the base. Lastly, I attached the Lepanthes telipogoniflora from Glassbox Tropicals near the top of the Terra Base. For lighting, I bought an inexpensive plant light from Amazon, but after a few months, I realised it might not provide enough light, so I purchased a DOOA Magnetic Light G. I also realised that the Christmas moss might not do well under the new lighting. I removed the Christmas moss and replaced it with Peacock moss.
Peacock moss is an aquatic moss species. It is commonly known as "Peacock moss" because it resembles a peacock's fan tail when well-grown. It has a softer texture compared to Christmas moss. Peacock moss originates from Southeast Asia and has a medium growth rate. It typically reaches a length of 4-6 cm. It requires low to medium light and moderate CO2 levels for optimal growth. It thrives best in water temperatures below 25.5ºC (78ºF).
Microgramma piloselloides · Wednesday 10 May 2023 · FujiFilm X-T3 · XF150-600mmF5.6-8 R LM OIS WR
Given the difficulty rating and that this was my first terrarium project, I was concerned that the whole thing would fail, but I diligently maintained the proper balance of light and moisture. It’s been almost a year since I started Lepanthes telipogoniflora, and Microgramma piloselloides have done quite well. What you see in the photographs are the results of several months of patience and diligence. It has taken this long for the plants to adapt and for me to learn the proper balance of light and humidity.
I am happy with the results, but I am already preparing to work on something more ambitious; a 64 L planted fish tank or another wabi-kusa terrarium using lava rock and the 8 cm tall DOOA Neo Glass Air.
The word jungle originates from the Sanskrit word jangala, meaning "forest". ↩
We use cookies on our website to give you the most relevant experience by remembering your preferences and repeat visits. By clicking “Accept”, you consent to using ALL the cookies. However, this website has no interest in selling your information. It does not explicitly use social media cookies from Facebook, Google, Twitter, Threads, Instagram etc. Read More
This website uses cookies to improve your experience while you navigate through the website. Out of these, the cookies categorized as necessary are stored on your browser as they are essential for the working of basic functionalities of the website. We also use third-party cookies that help us analyze and understand how you use this website. These cookies will be stored in your browser only with your consent. You also have the option to opt out of these cookies. But opting out of some of these cookies may affect your browsing experience.
Necessary cookies are absolutely essential for the website to function properly. These cookies ensure basic functionalities and security features of the website, anonymously.
Cookie
Duration
Description
cookielawinfo-checkbox-analytics
11 months
This cookie is set by GDPR Cookie Consent plugin. The cookie is used to store the user consent for the cookies in the category "Analytics".
cookielawinfo-checkbox-functional
11 months
The cookie is set by GDPR cookie consent to record the user consent for the cookies in the category "Functional".
cookielawinfo-checkbox-necessary
11 months
This cookie is set by GDPR Cookie Consent plugin. The cookies is used to store the user consent for the cookies in the category "Necessary".
cookielawinfo-checkbox-others
11 months
This cookie is set by GDPR Cookie Consent plugin. The cookie is used to store the user consent for the cookies in the category "Other.
cookielawinfo-checkbox-performance
11 months
This cookie is set by GDPR Cookie Consent plugin. The cookie is used to store the user consent for the cookies in the category "Performance".
viewed_cookie_policy
11 months
The cookie is set by the GDPR Cookie Consent plugin and is used to store whether or not user has consented to the use of cookies. It does not store any personal data.
Functional cookies help to perform certain functionalities like sharing the content of the website on social media platforms, collect feedbacks, and other third-party features.
Performance cookies are used to understand and analyze the key performance indexes of the website which helps in delivering a better user experience for the visitors.
Analytical cookies are used to understand how visitors interact with the website. These cookies help provide information on metrics the number of visitors, bounce rate, traffic source, etc.
Advertisement cookies are used to provide visitors with relevant ads and marketing campaigns. These cookies track visitors across websites and collect information to provide customized ads.