Macro Fun Workshop with Loren Fisher

I've always been fascinated by macro photography, especially images of insects and amphibians. I sometimes spend hours looking at the work from some of the photographers I follow on flickr.

I had done some web searching and realized that while macro was interesting, it was challenging to do it well, and I possibly needed speciality lenses and other equipment. I wasn't sure macro was something I would want to do often enough to justify the cost of a dedicated macro lens. I bought a focus rail and macro extension tubes. The first set of extension tubes did not support auto-focusing or allow control of aperture. This made things difficult for me. But in my trial and error struggle with the focus rail and manually adjusting shutter speed, aperture and adjusting focal point, I learned a lot. You can see some of my earlier efforts on my flickr.

macro, flower, stacked 
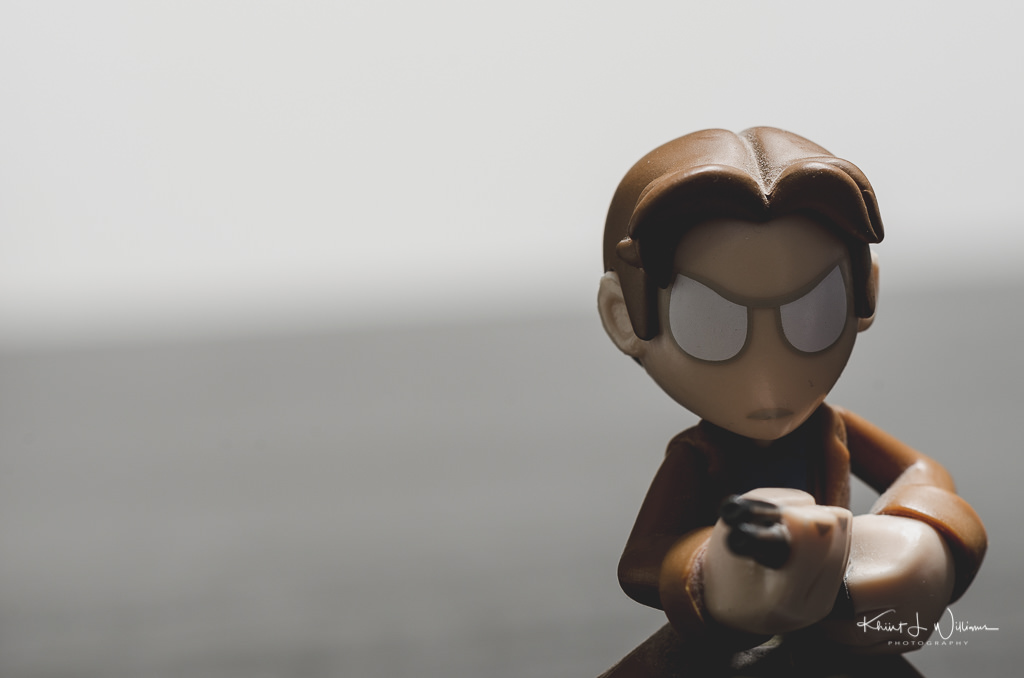
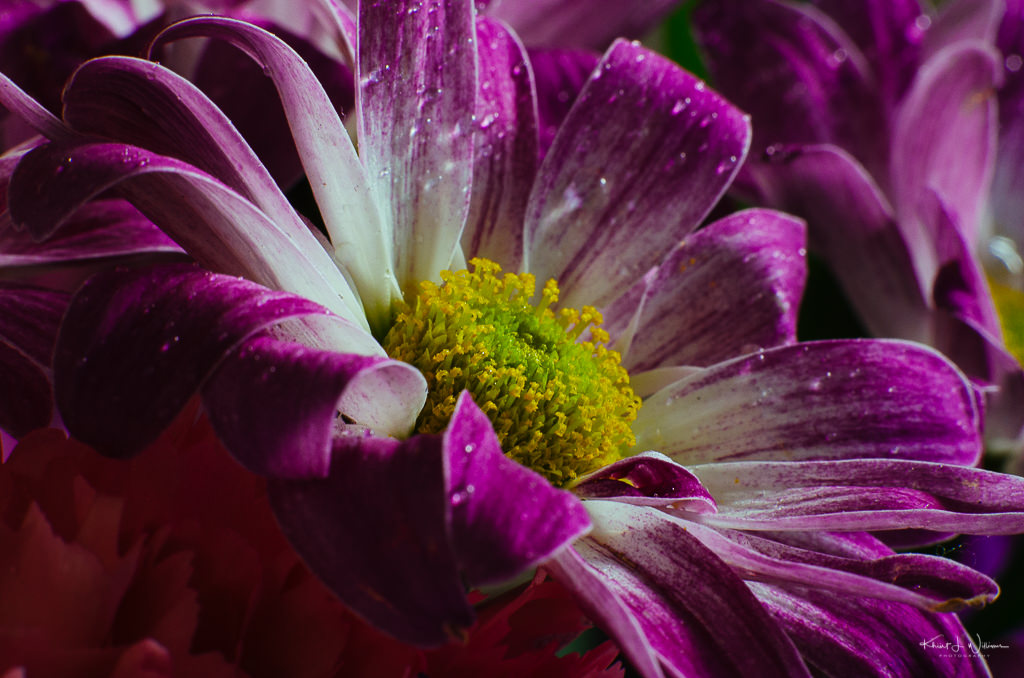
Focus stacked image.
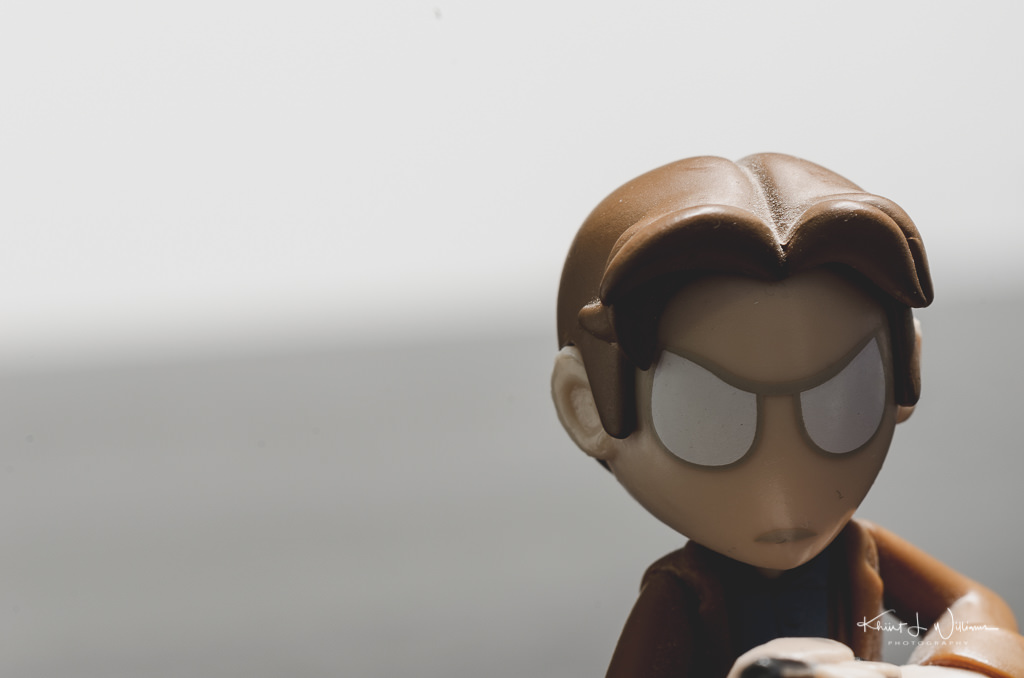
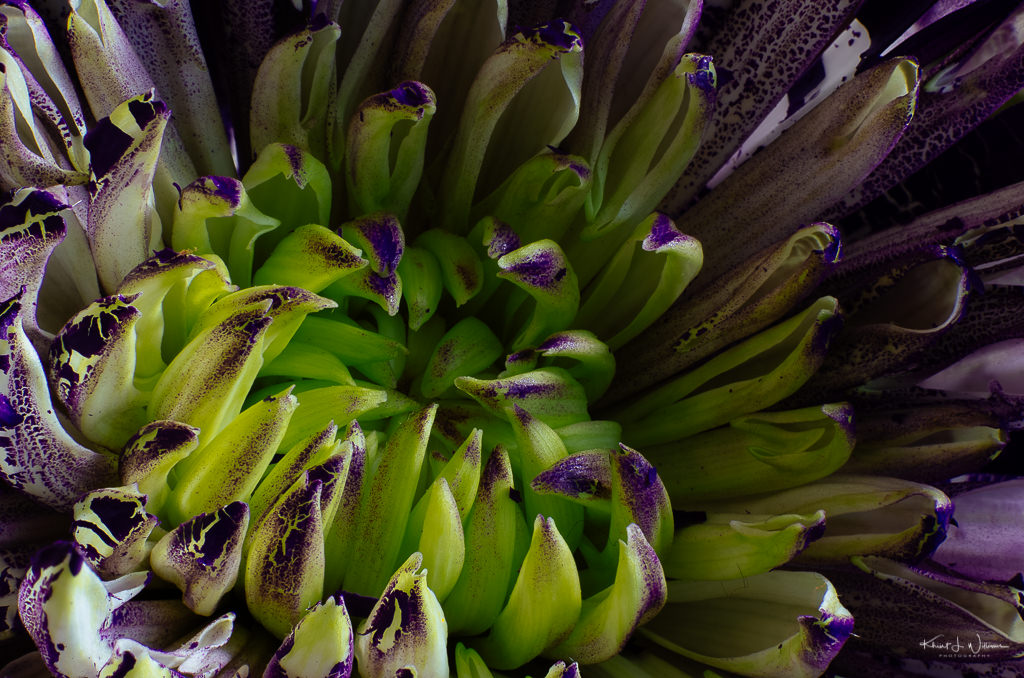
[exif id="24528"]

I learned about focus stacking and perspective shift. I realized that I should have bought the more expensive extension tube (and I did) and that I could improve my focus stacking method by using software with my Mac to move the focal point of my lens automatically.

But I also learned that technique alone was not enough. I wanted help with ideas for what to shoot and "seeing" in macro. I wanted to learn what I could do while stuck indoors during the winter. Wouldn't it be great if I could spend some time with a talented photographer and instructor to help me find fun things I could do with macro photographs? Enter, Loren Fisher.

A few weeks ago, I attended a half-day macro photography workshop. Loren hosted at his studio in Somerville. There are about twenty students in the class, many of them I had met before at other photography events in the area. There were a few new faces. Some people had travelled from New York and other neighbouring states to attend the class.

oil, water, soap, macro, bubbles
Water, oil, and soap = macro fun.
[exif id="24531"]

This was my first macro photography workshop and Loren planned a day of indoor macro fun. Loren started with a presentation explaining macro and not and giving us equipment tips and techniques. But more so, he wanted his students to experiment, to pay attention to what we were seeing.

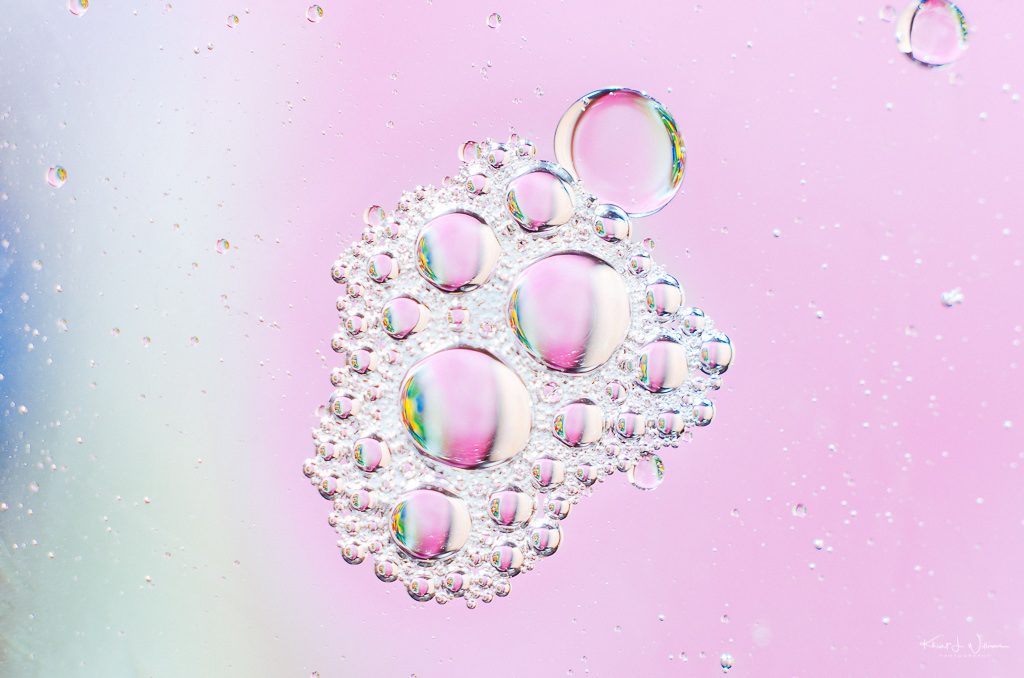
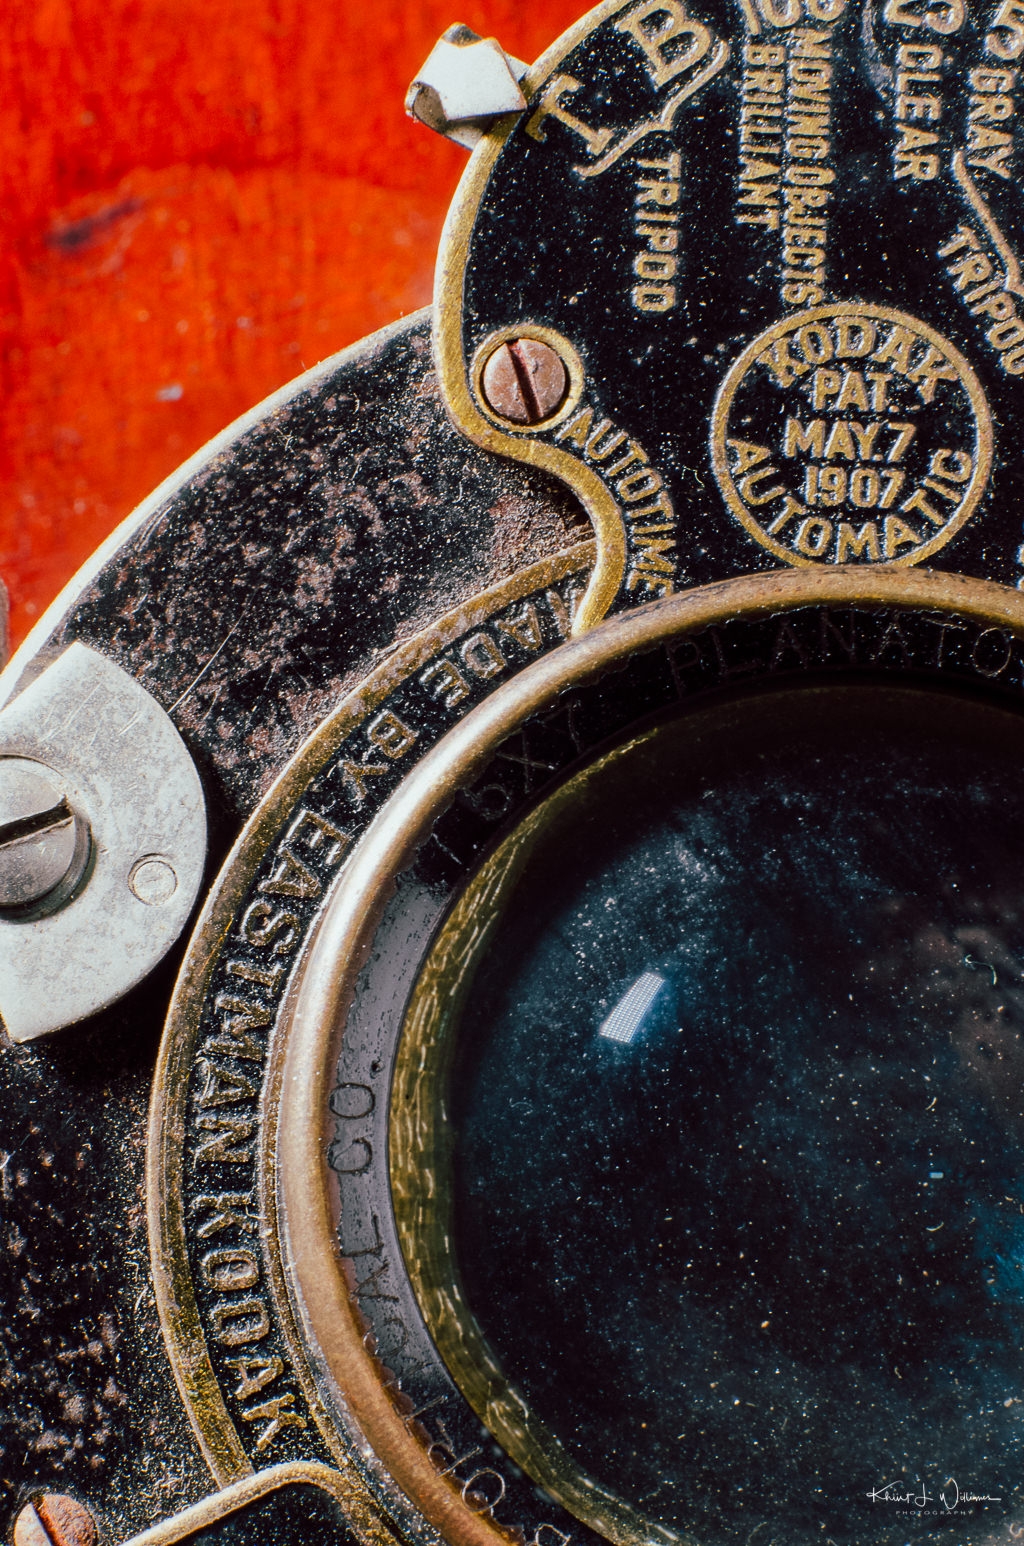
Loren set up several studio rooms with different props and paired us off. One window lit room let in the winter day sunlight onto a bouquet. One interior space had a glass into which we poured seltzer water and photographed the bubbles coming off an inserted lemon. In another interior room, we photographed light through oil and water in a Pyrex dish. We photographed an antique bellows camera and M&Ms with the image refracted through glycerin and plexiglass in two more window-lit exterior spaces.

Kodak Planatograph 3 ¼” x 5 ½” f8/64 6 ¾” Lens by Bausch and Lomb
[exif id="24530"]

I had a lot of fun with this workshop. Loren taught me that I don't have to wait for macro photography opportunities to come to me. What we did in the studio that day is easy to duplicate at home. When it snows or when I am bored at home but don't want to get outside, I can still create interesting photographs. And I don't have to go further than my kitchen window.

Using Macro Extension Tubes

I've had the Kenko Auto DG 12mm, 20mm, and 36mm macro extensions tubes for over a year, but I have not used them much. When I bought them, I was very excited but had little experience with macro. I still have little experience with macro. This summer, I experimented with shooting macros of sunflowers and insects, but I was not too fond of the results.

The Extension Tubes have no optics but extend the distance between the lens and the camera sensor. The result is that the sensor's focusing point is moved closer to the front of the lens. This allows a lens to focus closer than the natural focusing distance of that lens. This magnifies the subject, making it appear larger. This is useful for doing macro photography without a dedicated macro lens.

Recently I was reading some of the feeds in the WordPress Reader. One of the articles about macro photography inspired me to pull out my Nikon 85mm f/1.8 and my Kenko Auto DG 12mm, 20mm, and 36mm extension tubes. The Kenko DG extensions tube set has three metal tubes of different lengths - 12mm, 20mm, and 36mm - stacked individually or in combination to increase magnification. I wanted to test which set of tubes would work well with the lenses I have; my AF-S Nikkor 35mm f/1.8 or my AF-S Nikkor 85mm f/1.8.

I wasn't sure which lens to use with the extension tubes, but I shot one image with the Nikon 35 mm f/1.8 and realised that the focusing distance was too short. The front of the lens was mere millimetres from the subject. The point of the extension tube is to be able to shoot close up and magnify the image. Because the 35mm already has a short focus distance, using the Kenko moved the focus distance so close, it was basically inside the lens itself.

Switching to the 85mm provided magnification but enough subject to camera lens distance to allow me to shoot closer. I chose “Mal” as my subject. I received the figurine in one of the Loot Crate I received last year. "Mal" is the name of the main protagonist from the show "Firefly". Firefly was one of my favourite shows until it was cancelled after just one season. I'm not sure why I enjoyed this show so much, but I've watched it several times on Netflix. Maybe I liked the characters because they were regular people just trying to survive in a dangerous universe. Maybe I like the show because the characters are very human, flawed. Mal means "bad" in French. The Firefly characters became like family to each other. And to me.

This post's featured image is the subject shot with my AF-S Nikkor 85mm f/1.8 without extension tubes. I then attached the 12mm and took another photograph. With this extension, I was able to get in much closer to "Mal". The magnification ratio with the 12mm is approximately 1.25. The image should appear 1.25 larger in my viewfinder.

Because the extension tubes also impact the depth of field, I adjusted the aperture to increase the depth of field for each tube. Doing this, of course, also increased the exposure times.  To keep things in focus, I shot these images with the camera mounted on a tripod.

AF-S Nikkor 85mm f/1.8 with Kenko DG 12mm extension tube
[exif id="22765"]

The following image below was taken with the 20mm extension attached. The magnification ratio of the 20mm tube is approximately 1.36. I was able to move in closer to Mal and fill my viewfinder.

AF-S Nikkor 85mm f/1.8 with Kenko DG 20mm extension tube
[exif id="22763"]

I swapped out the 20mm and attached the 36mm. I didn't test with the 20mm and 12mm together. The combined magnification is too close to what can be obtained with the 36mm alone. The magnification ratio of the 36mm tube is approximately 1.59. The difference in magnification is tiny.

AF-S Nikkor 85mm f/1.8 with Kenko DG 36mm extension tube
[exif id="22766"]

Lastly, I stacked all the tubes together and took my last shot. It's like Mal's is life-size and staring at me from right in front of the lens. The combined magnification ratio is approximately 2.79. Not at all 1:1.

AF-S Nikkor 85mm f/1.8 with Kenko DG 12mm+20mm+36mm extension tube
[exif id="22764"]