Isolation Photo Project, Day 122

UPDATE: After completing the course, and with the wisdom of hindsight, I have realised that beverage photography is challenging, and it was naive of me to expect "instantly good" results. Throughout the course, the instructor remained patient and helpful.

A thunderstorm rolled in tonight, precluding any possibility of safe outdoor photography. No barns, bridges and building hunting tonight.

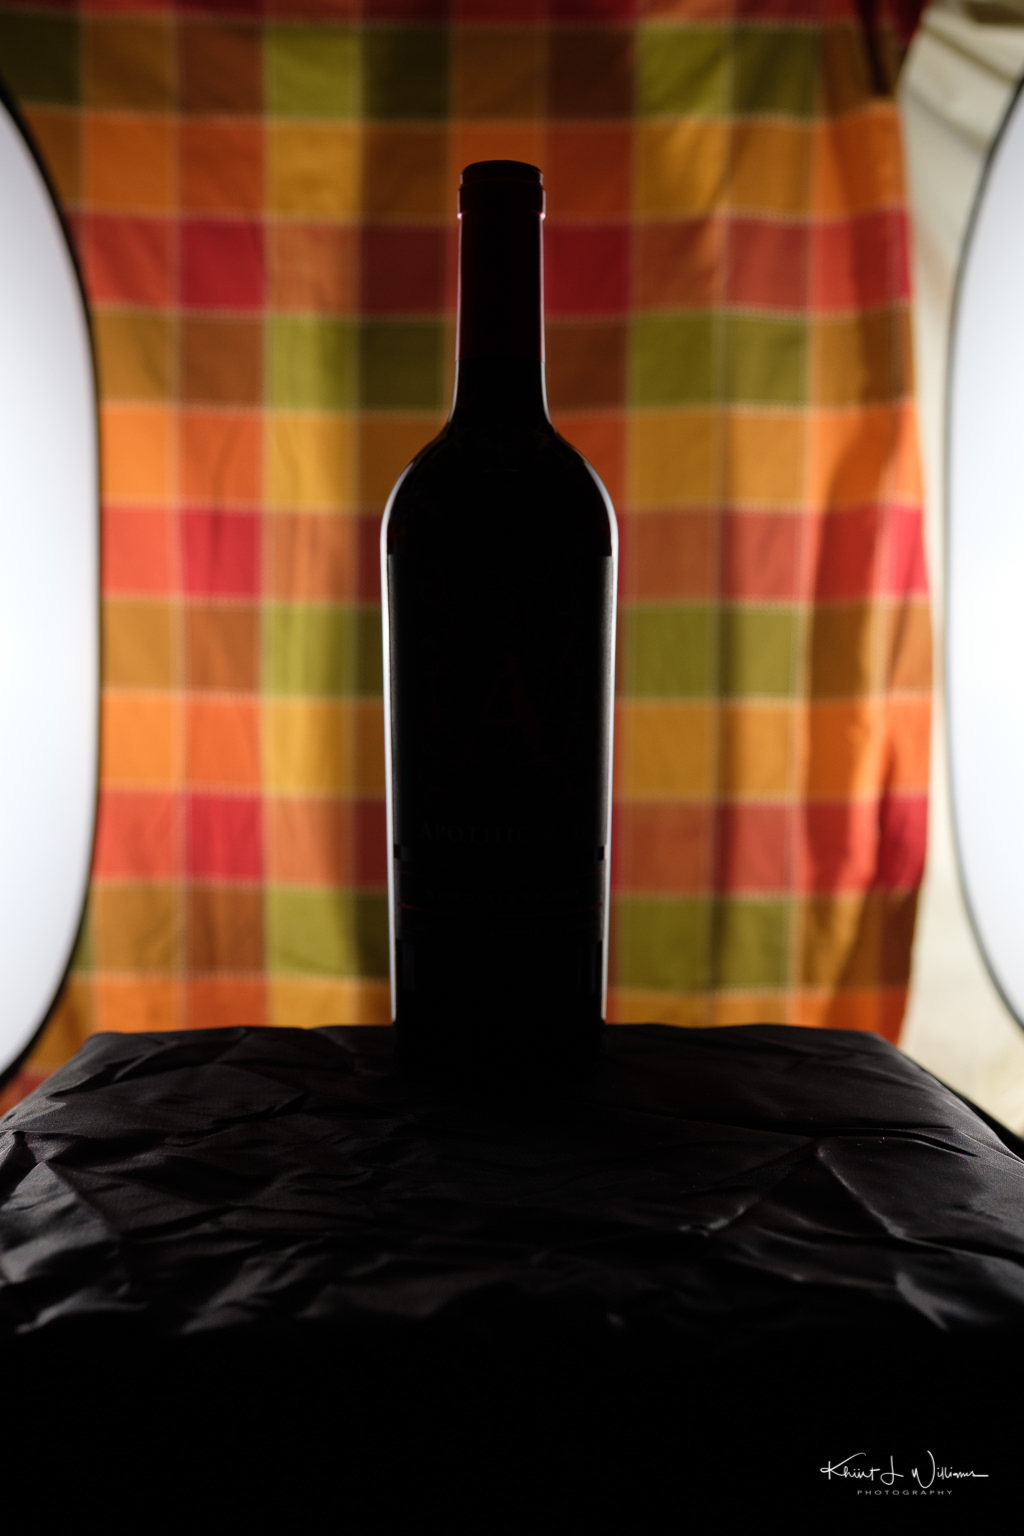
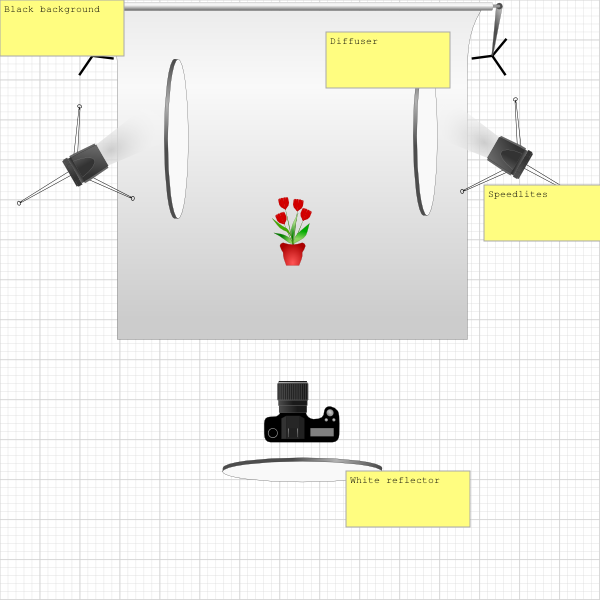
Fortunately, some of the photography equipment I ordered on Amazon.com was delivered yesterday and this afternoon. The order includes a 6 ft X 9 ft black chromakey studio fabric backdrop and a collapsible white oval disc reflector. A reflector disc Holder clip attaches the disc reflector to a AmazonBasics aluminium tripod stand.

The lighting diagram below is a fair approximation of the setup.

Lighting diagram

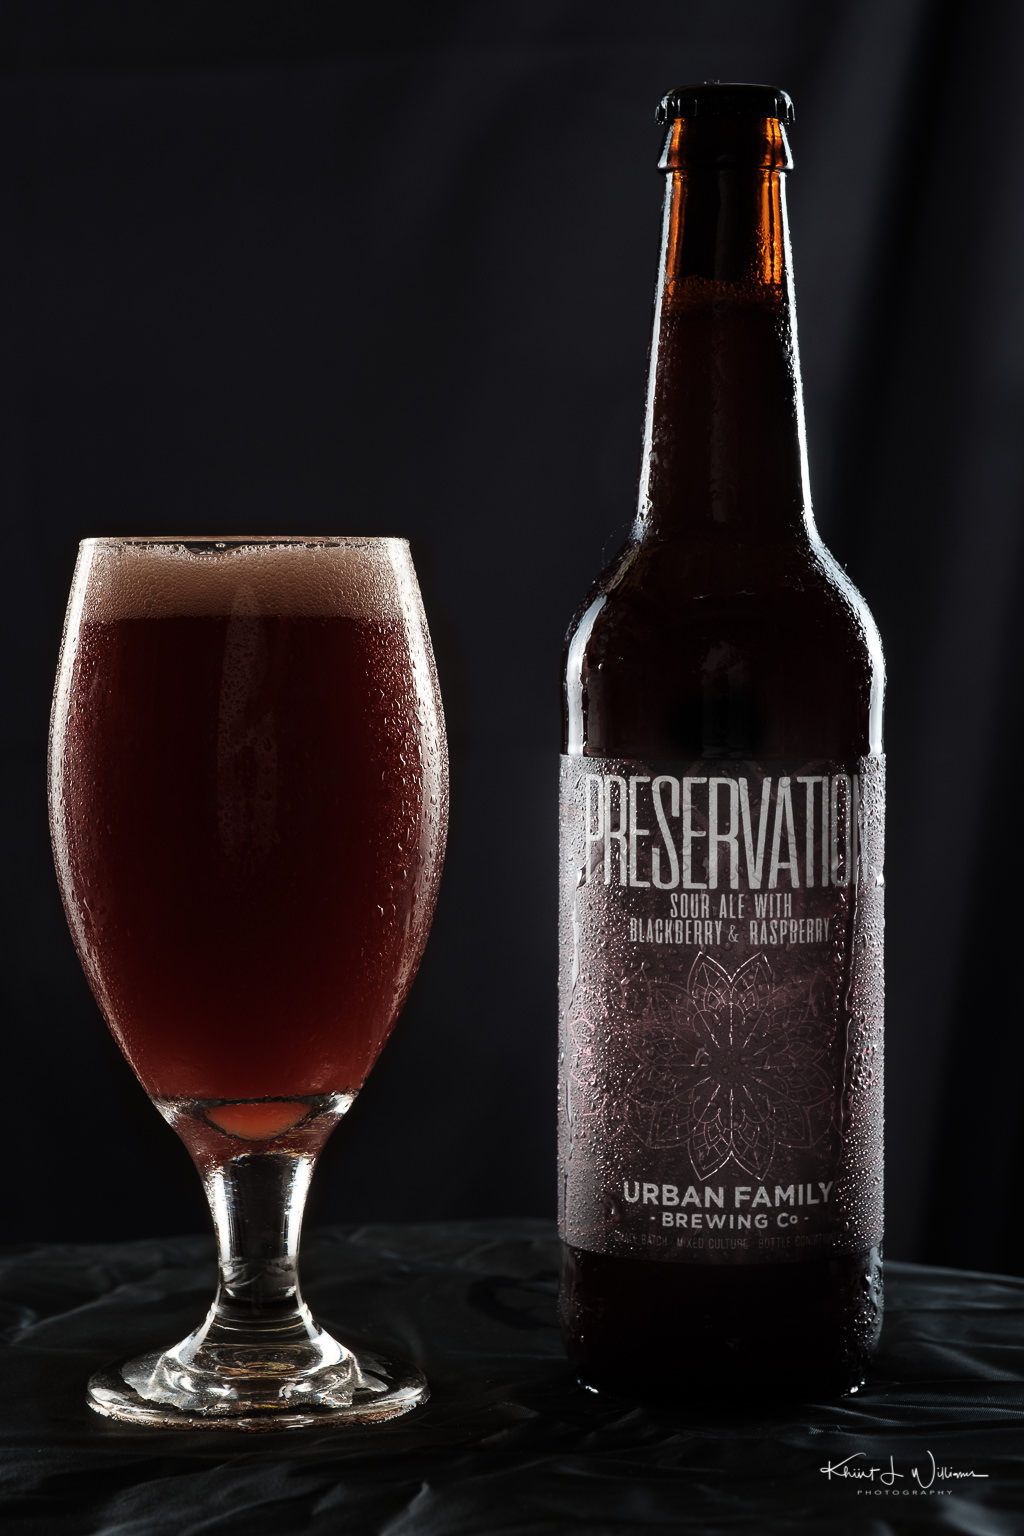
Last weekend, our instructor taught the class the use of a 1 to 1 mixture of vegetable glycerin and water in a spray bottle to create "water droplets" on the glass and bottle. I think I overdid it with the application of the mixture.

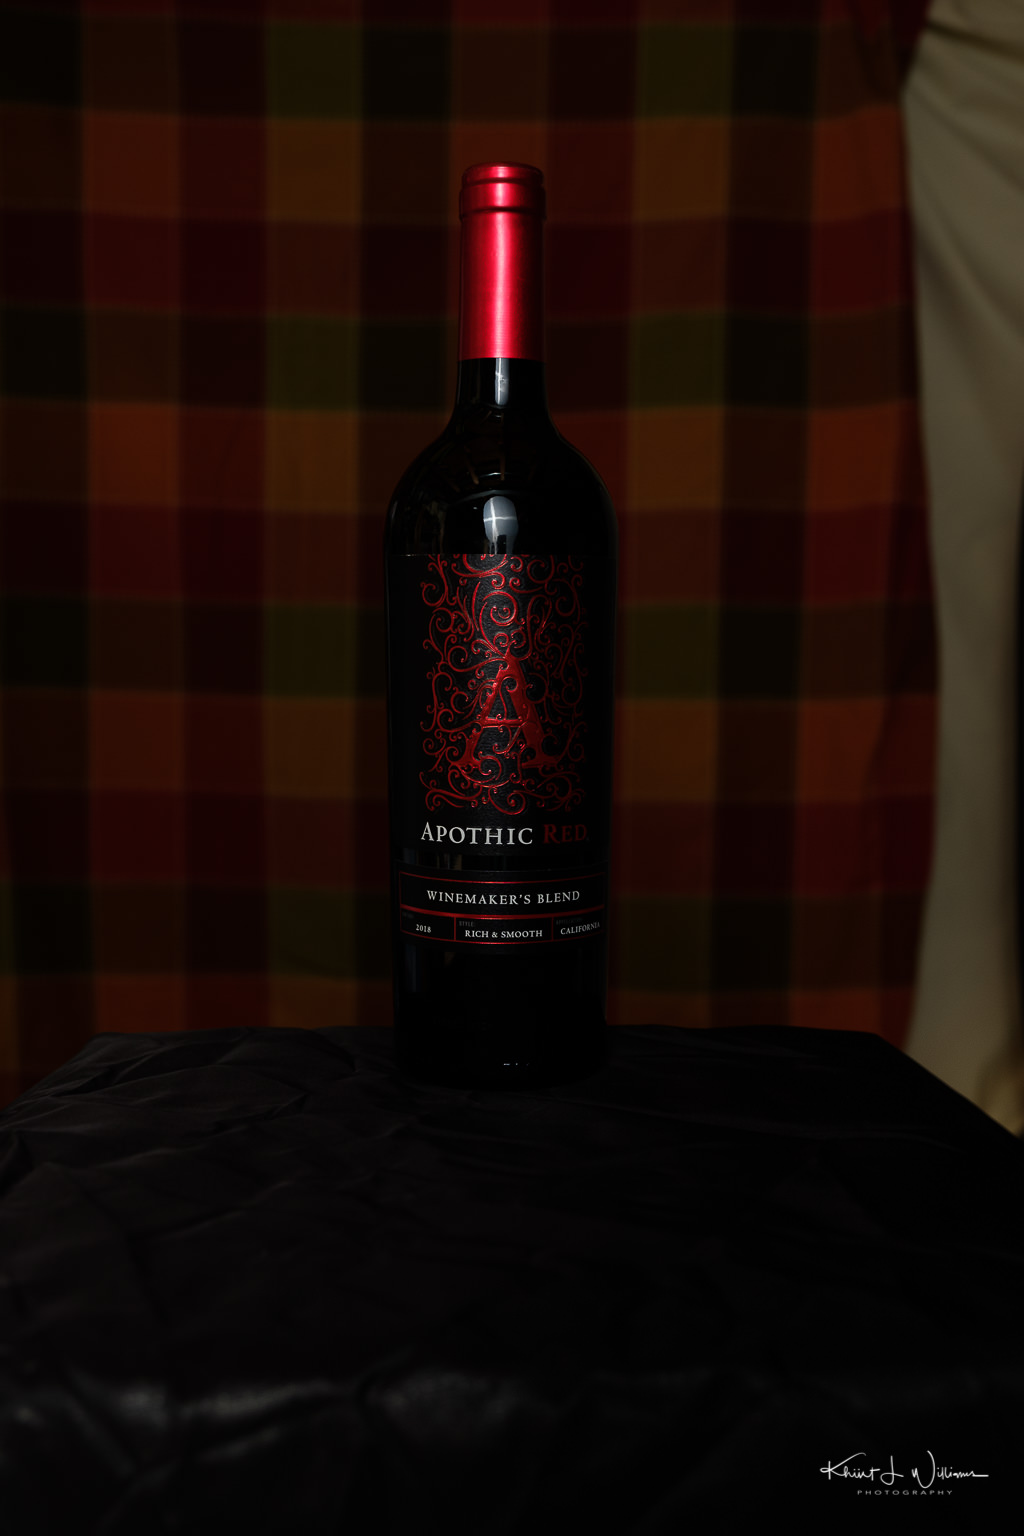
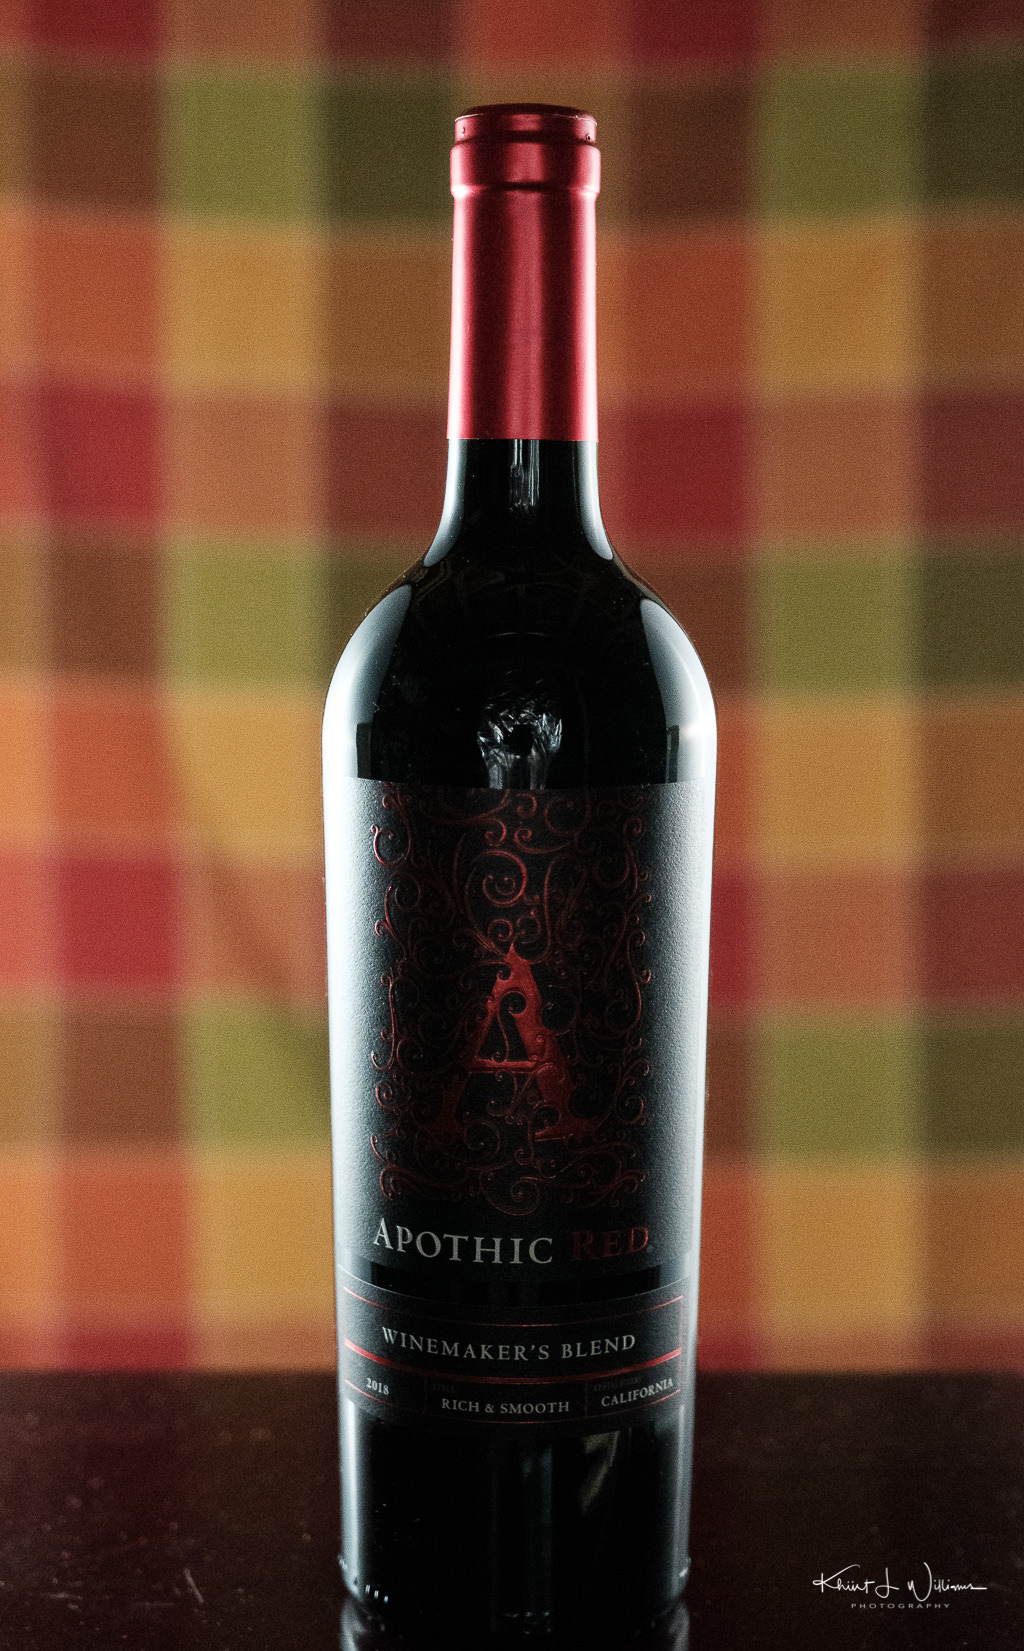
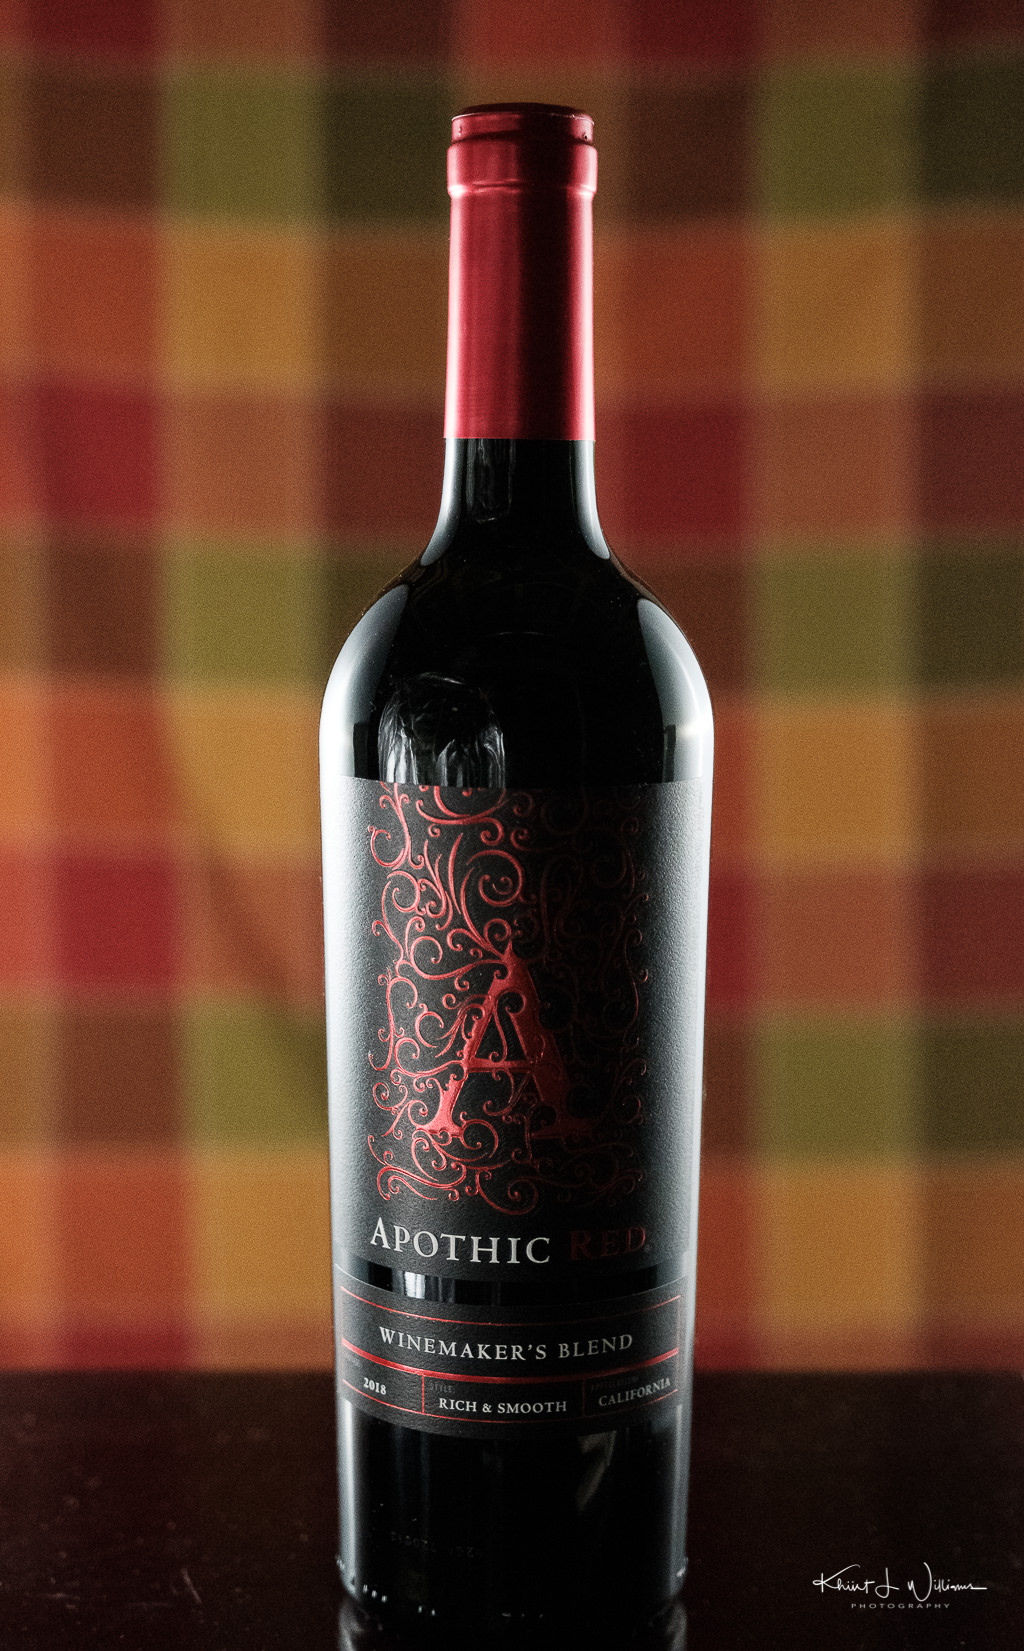
The final image is a composite. I shot the beer glass separate from the beer bottle to get the light outline along the sides of the bottle and the glass and prevent shadows. I then combined the layers in Adobe Photoshop. I have one white reflector behind the tripod to bounce light to the front of the bottle. However, the centre of the bottle was not as bright as I wanted. After I combined image layers, I used the adjustment brush in Adobe Lightroom to lighten the bottle label.

I think backlighting would have brought more impact to the bottle and the glass, and the side lighting from the speedlites may need more diffusion to soften the light source further. I didn't use it, but the Krylon ColorMaster acrylic crystal clear coat spray that I bought on Amazon would help the glycerine bead up to create larger "water droplets". And I should have made sure the beer head went all the way to the top of the glass.

Submitted as part of the 100DaysToOffload project.

Isolation Photo Project, Day 118: Wine Bottle Final Attempt

UPDATE: After completing the course, and with the wisdom of hindsight, I have realised that beverage photography is challenging, and it was naive of me to expect "instantly good" results. Throughout the course, the instructor remained patient and helpful.

If you've followed along the last two days, you've seen my frustrating attempts to light and photograph a wine bottle properly. On Thursday, I was able to get the outline of the bottle nearly correctly lit, but I still had more work to do on lighting. I emailed the course instructor, who suggested I move the lights back further behind the wine bottle.

I tried out his suggestion on Friday, and I got a little closer. However, I struggled to light the front of the bottle properly.

This morning, I spent almost 90 minutes in my basement trying one thing or the other. I moved one of the Speedlites from the stand and handheld it at various places around the basement with little success. The bottle was either too well lit or reflected the unfinished roof of the basement.

Saturday 18 July, 2020 | Day 118 | FujiFilm X-T2 | XF16-55mmF2.8 R LM WR

Just near the end of my session, I experimented with the power settings on the Speedlite, which I controlled via a setting on the Fujifilm X-T2 menu. The idea was to photograph the bottle with the Speedlites lighting the side of the bottle, then photograph the front of the bottle and blend the two images in Adobe Photoshop. The result is the image you see below.

Bottle of Apothic Red Wine
Apothic Red | Saturday 18 July, 2020 | Day 118 | FujiFilm X-T2 | XF16-55mmF2.8 R LM WR

What do you think?

Submitted as part of the 100DaysToOffload project.

Isolation Photo Project, Day 117: Wine Bottle Photography

UPDATE: After completing the course, and with the wisdom of hindsight, I have realised that beverage photography is challenging and it was naive of me to expect "instantly good" results. Throughout the course, the instructor remained patient and helpful.

On my lunch break today, I continued working on photographing a bottle of Apothic Red wine. Yesterday, I was frustrated in my attempts because although I knew that it was not working, I didn't understand why. I found an article, Shooting a “Papo Seco” Wine Bottle, on Diy Photography which was very helpful. They included images of the studio setup that helped me in how to place my diffusers. Today, I am using pool noddles in the rafters, clothespins, and twine to hang my diffusers from the basement rafters. It's not ideal. Any movement in the room causes air movement and the diffusers move around. I am learning the art of patiently waiting for everything to become still.

Other resources I am using are:

Shadow in the centre of the bottle | Friday 17 July, 2020 | Day 117 | FujiFilm X-T2 | XF16-55mmF2.8 R LM WR

The new problem is that while both sides of the bottle seem evenly lit, the centre of the bottle has a dark shadow. I handheld one of the reflectors off to one side of the camera to reflect some light back onto the bottle. It works but only for the side with the reflector. I have resorted to using photoshop to combine images of two images, each one with the reflector on the left and right.

Reflecting light onto the left front | Friday 17 July, 2020 | Day 117 | FujiFilm X-T2 | XF16-55mmF2.8 R LM WR
Photoshop | Friday 17 July, 2020 | Day 117 | FujiFilm X-T2 | XF16-55mmF2.8 R LM WR

But of course, now I can see the reflector reflected off the bottle. One step forward, two steps back and I have forgotten where I was headed.

Photoshop | Friday 17 July, 2020 | Day 117 | FujiFilm X-T2 | XF16-55mmF2.8 R LM WR

Submitted as part of the 100DaysToOffload project.