In a previous post I mentioned that I had already configured my Mac to use some of Google's free services and how I felt that this was a cheap way to get some of the same features offered in MobileMe. Namely, I configured Mail.app for use with Gmail, synced my Address Book to my Gmail Contacts, and connected iCal to my Google Calendar. In this post, I explain how to setup Leopard Mail.app for reading Gmail.
IMAP vs POP3
Google provides three ways to access Gmail, their free email service; via the browser, POP3, or IMAP. The Post Office Protocol version 3 (POP3) is a standard protocol used by local e-mail clients to retrieve e-mail from a remote server and download it to the client. IMAP is also a standard protocol for accessing email but unlike POP3 the email stays on the remote server. With POP3 you are limited to reading your email from one location. With IMAP the email stays on the server and you can read it from any computer. IMAP is the method I use to access my Gmail in Mail.app. If I read an email in a web browser then it is marked as read on the server and in Mail.app.
Configuration
 Configuring Mail.app to use Gmail is relatively easy. Google has provided excellent instructions on their Gmail Help web site. I have provided my own version here. I think screen shots help in understanding. Launch Mail.app and click Mail->Preferences from the menu bar. Click on the Accounts tab and then click the "+" symbol on the lower left to start the account creation wizard.

Enter your name, your Gmail address and password. Be sure to deselect the "Automatically set up account" check box. This check box is enabled by default and automatically creates an entry for POP3 access. We want to setup for IMAP. Now click continue.

Click the Account Type drop down and select IMAP. Be sure to change the Incoming Mail Server address to imap.gmail.com. Leave the other fields as they are and click Continue.

The next screen is for setting up the Outgoing Mail server information. Other than entering a description, e.g Gmail, you can go ahead and click continue. This will take you to a confirmation summary page. If it all looks correct go ahead and click create. The new account should now appear in the Account column on the left.

Tweaks
There are a few small details that will make reading Gmail in Mail.app easier. We will need to change a few things to make Mail.app play nice with Gmail. Google has a number of DO's and DON'Ts that will ensure a smooth experience using Mail.app. Google wants all deleted or sent mail to use the local trash and sent folders. While still in the Accounts tab make sure to deselect all the checkboxes except for "Store draft messages on the server".
Summary
One of the benefits of using Mail.app with Gmail is that you can now take advantage of all of Mail.app goodness. You can set fonts, colors, backgrounds, and signatures, or one of those interesting templates and pick addresses right from your Address Book. Next post, I'll tell you how to sync your Gmail contact straight with Leopard Address Book.


 Some time last year Google updated their online Calendar service to support the CalDAV protocol. CalDAV is a standard protocol that allows access to web-based calendars from desktop clients like iCal. Now from within iCal I can schedule create calendar entries that appear in my Google web calendar and vice versa. Google provides instructions on how to set up iCal to access Google Calendar but ... a screen shot is worth a thousand lines of text.
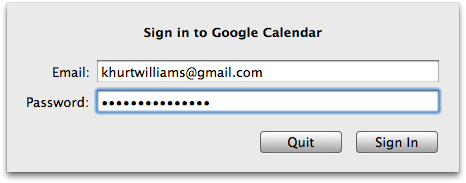
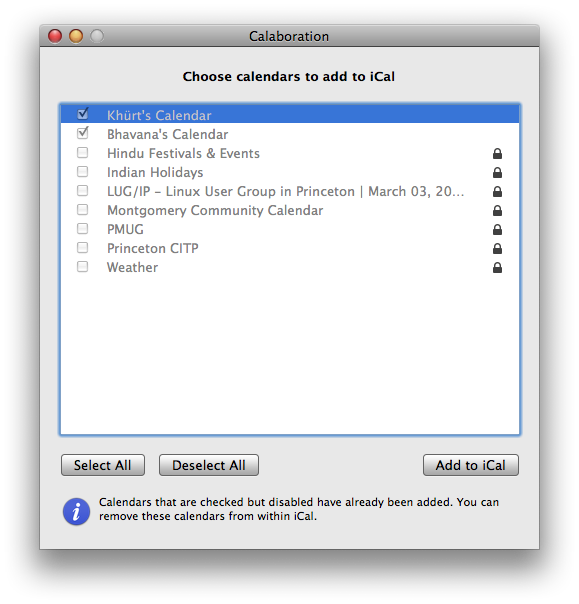 After a few seconds the application will display your Google Calendars. Select the calendars you want to add to iCal and click the "Add to iCal" button. If your email address is not in your Leopard Address Book you will be prompted to do so.
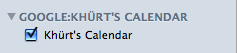 Your Google Calendar will now appear in the list of calendars in iCal. Any changes you make to your Google Calendar in iCal will show up in your Google web Calendar.