During the first few months I've worked from home more often than I did all of last year. I'm not on any official company teleworker program; it's just that we've had quite a number of storms hit the area. I think we had about three snow storms in February that left so much snow on the ground it did not melt until the rains started in early March. Last week we a "small hurricane" knocked over trees and caused streams to flood blocking the normal roadways that take me to work. Fortunately Mac OS X 10.6 has features that easily integrate with the typical corporate systems running Microsoft's and Cisco's ubiquitous enterprise technologies - Exchange, Active Directory and Cisco VPN.
Cisco VPN
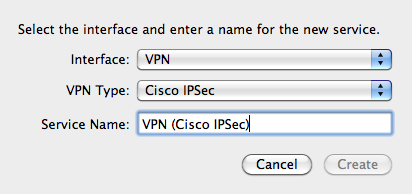
Setting up my Mac to use my employer's Cisco VPN was simple but not foolproof. I had all the information I needed but I had to use a few manual steps and trial and error to get things working just right. OS X 10.6 has support for Cisco VPN built in. The settings we need to configure are in the Network section of System Preferences. Click the + to create a new service. Select VPN for the interface and Cisco IPSec for the VPN Type. Change the service name to something meaningful and clock OK. If you have VPN connections for different things (e.g you are a consultant with many clients), you can name each VPN connection accordingly so that you can keep track of what you are connecting to.
Once the service is created it is time to enter the connection specifics. Select the service and enter the server address and your account login name. Server address can either be a fully qualified domain name or an IP address.
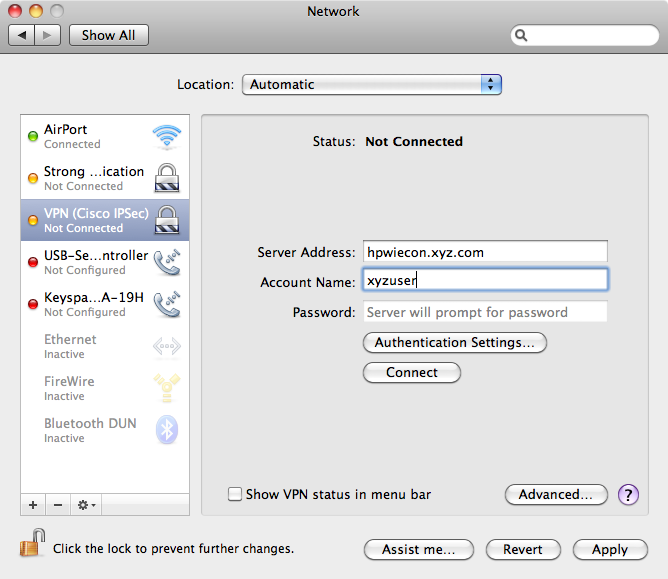
Click "Authentication Settings". Enter your shared secret and group name information. If your employer uses certificates then set that up. My employer uses shared secrets instead of certificates so I won't provide any more guidance on that.

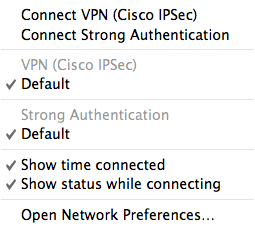
If you employer uses a web gateway (web proxy) clicked Advanced to enter that information. It might be convenient to have the VPN connection controls easily available so go ahead and click "Show VPN status in menu bar". When you enable that check-box a small icon will appear in your menu bar. Clicking that icon pops up a small menu from which you can control the VPN connection. It is also convenient when you need to rapidly switch from one VPN connection to another.